
What is the standard WooCommerce Return URL for PayPal?

WooCommerce return URL will bring customers back to your site right after completing the payment. And it also applies to your PayPal payment method. If you are fond of using PayPal to pay for your products or items in WooCommerce, it will be a great choice if you can approach one full-stack solution with flexible and powerful payment process capability.
This is to say, in case you want your shop to run smoothly in terms of the payment process, you need to understand “What is the standard WooCommerce return URL for PayPal?” As we deeply know your needs and concerns, we have here a piece of article to provide you with essential knowledge related to standard WooCommerce return URL for PayPal as well as how to create it. Now, let’s thrive!
What is the standard WooCommerce Return URL for PayPal?
As regards PayPal Payments, you could also apply the auto-return feature in WooCommerce to it. This will include such options as Shopping Cart, Subscriptions, Donations, and Buy Now. Here, you are required to add a URL in which you wish your consumers to return to your site after completing a transaction successfully.
To be more specific, for WooCommerce, this standard return URL will be yoursite.com/checkout/order-received/. But have you known how to create it for PayPal? Keep scrolling to see how to create the standard WooCommerce return URL for PayPal.
How to create the standard WooCommerce return URL for PayPal?
Let’s get started with PayPal Standard that will take your consumers from your website to the secure site of PayPal to complete the payment for their orders. However, the requirement for this is to have an account with PayPal Business.
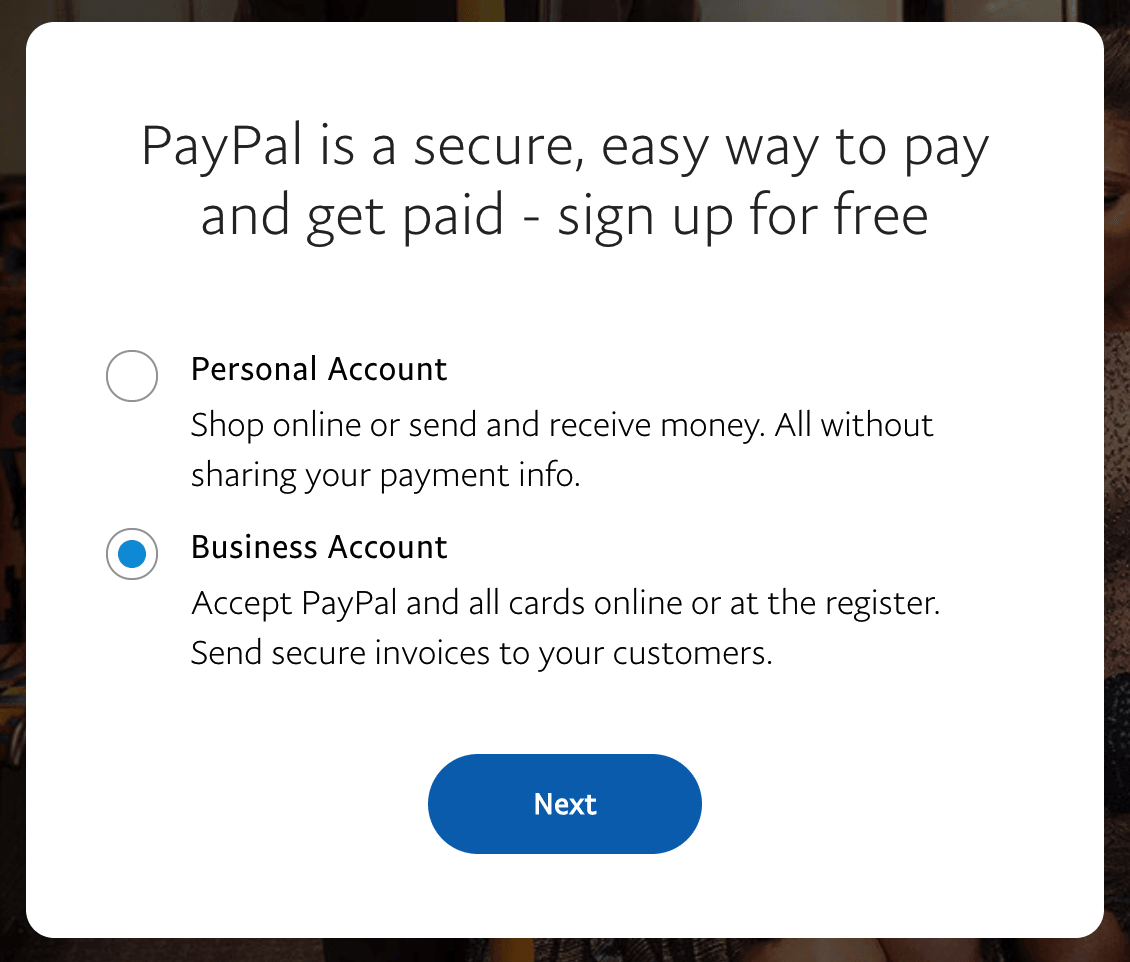
You need to go to the address paypal.com to sign up for an account of PayPal Business or convert your existing personal account to this business level. It is free to do so.
Step 1: Set up and configure the PayPal Standard
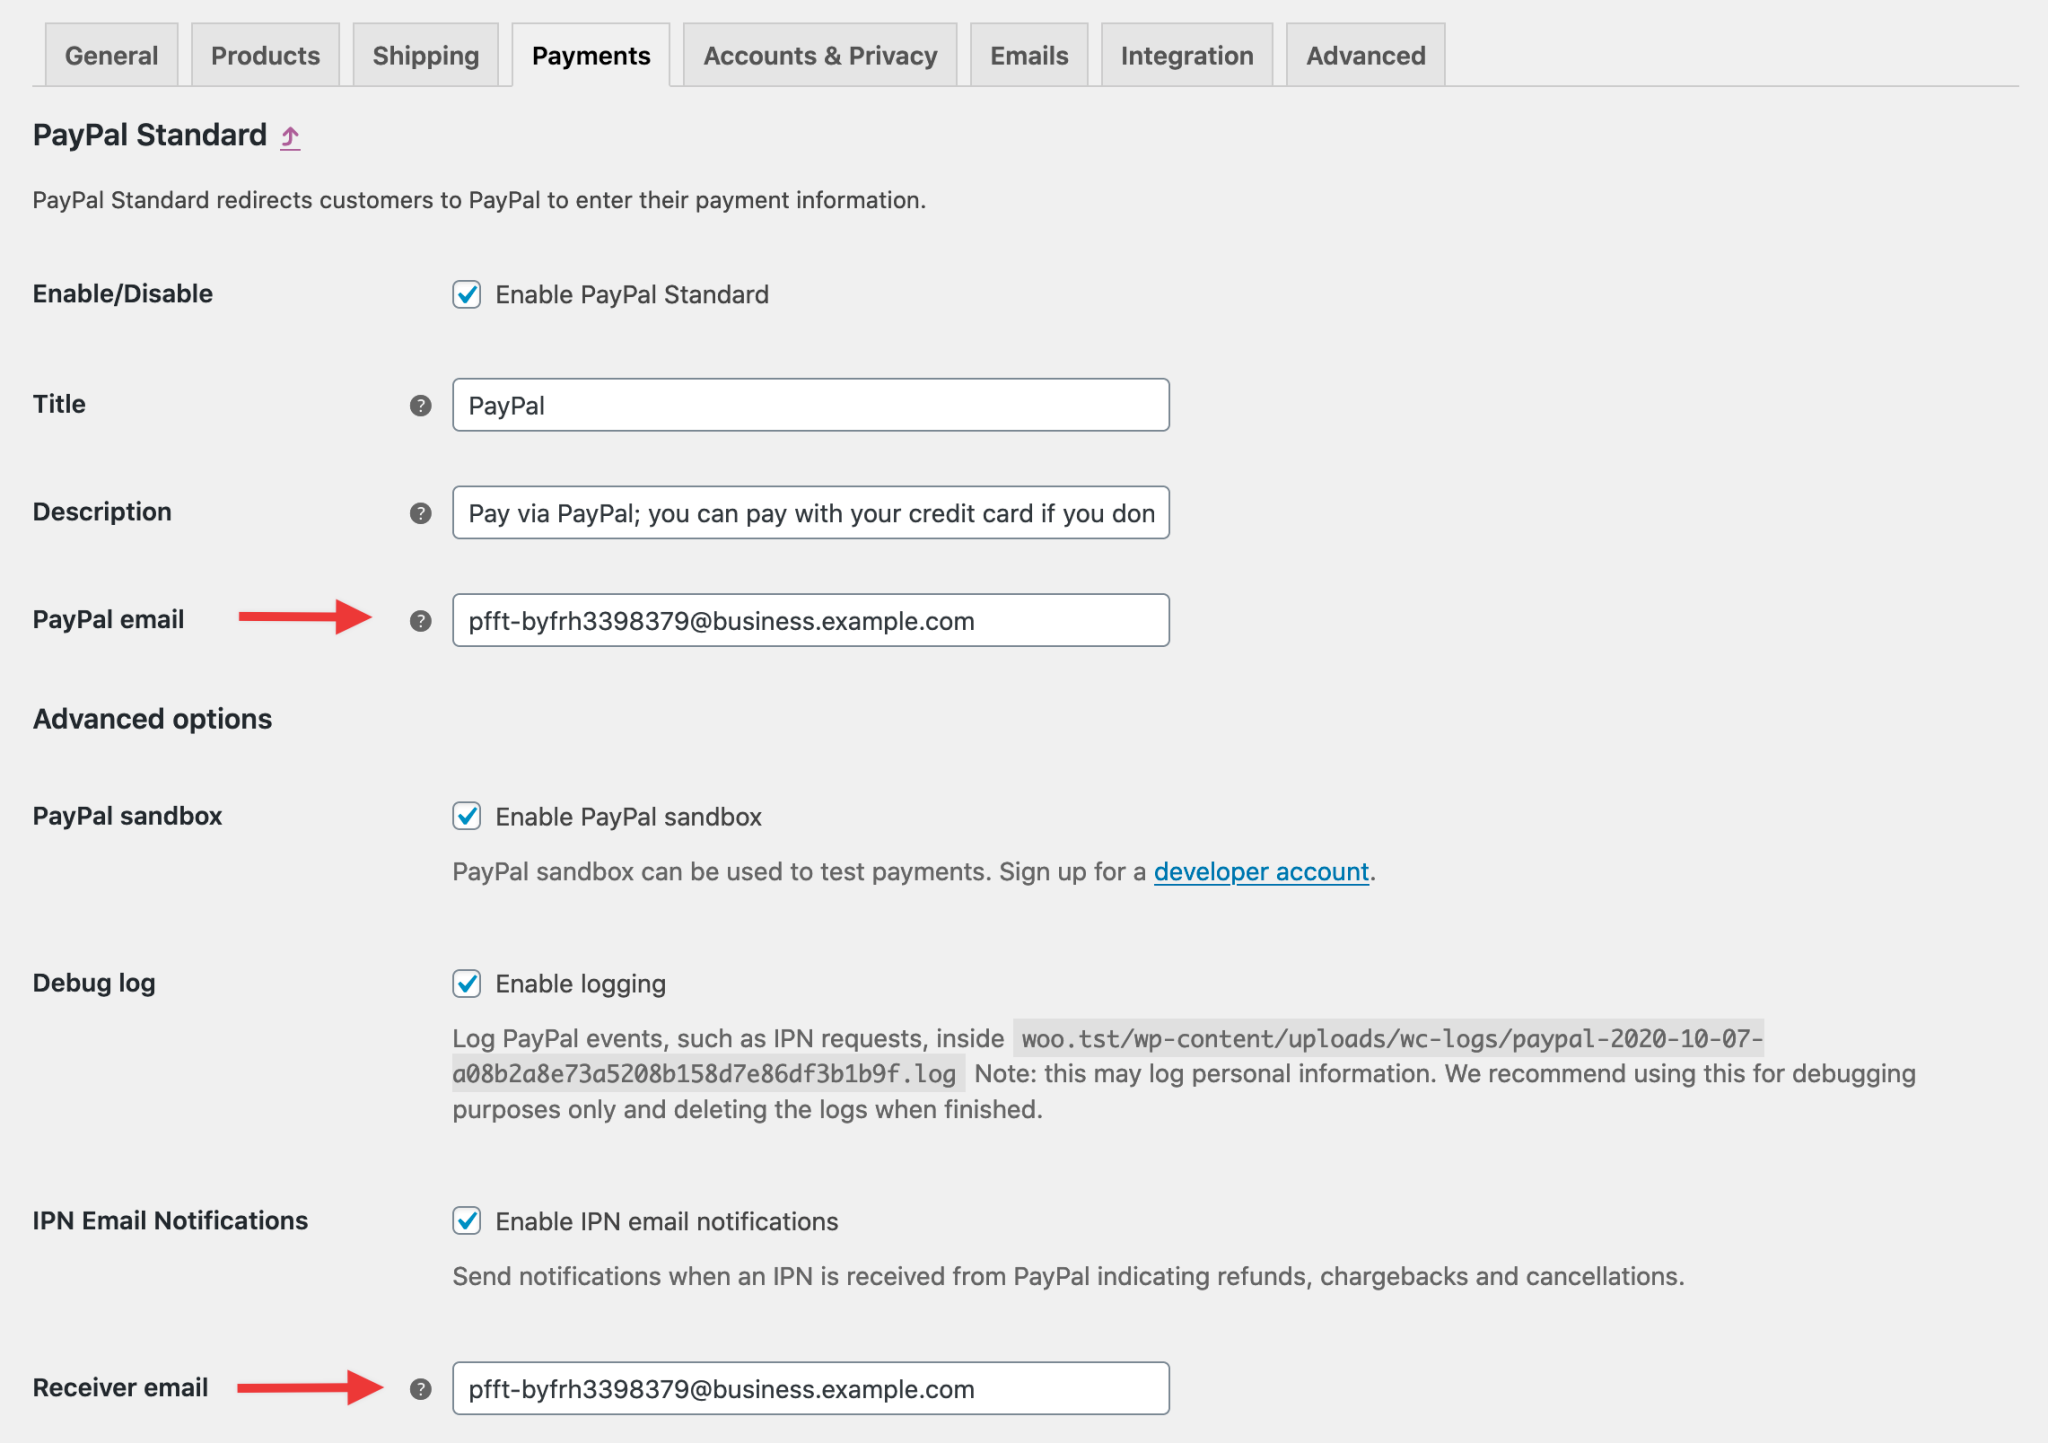
It is time to set it up as well as implement some configurations. In setting up this PayPal Standard, you need to navigate to your “WooCommerce” and choose the section “Settings” and you could find “Payments” to click on it. Then, your next task is to apply the toggle that is ender the button “Enabled” for selecting PayPal. Next, choose “Set up” and you will head to the settings of PayPal Standard.
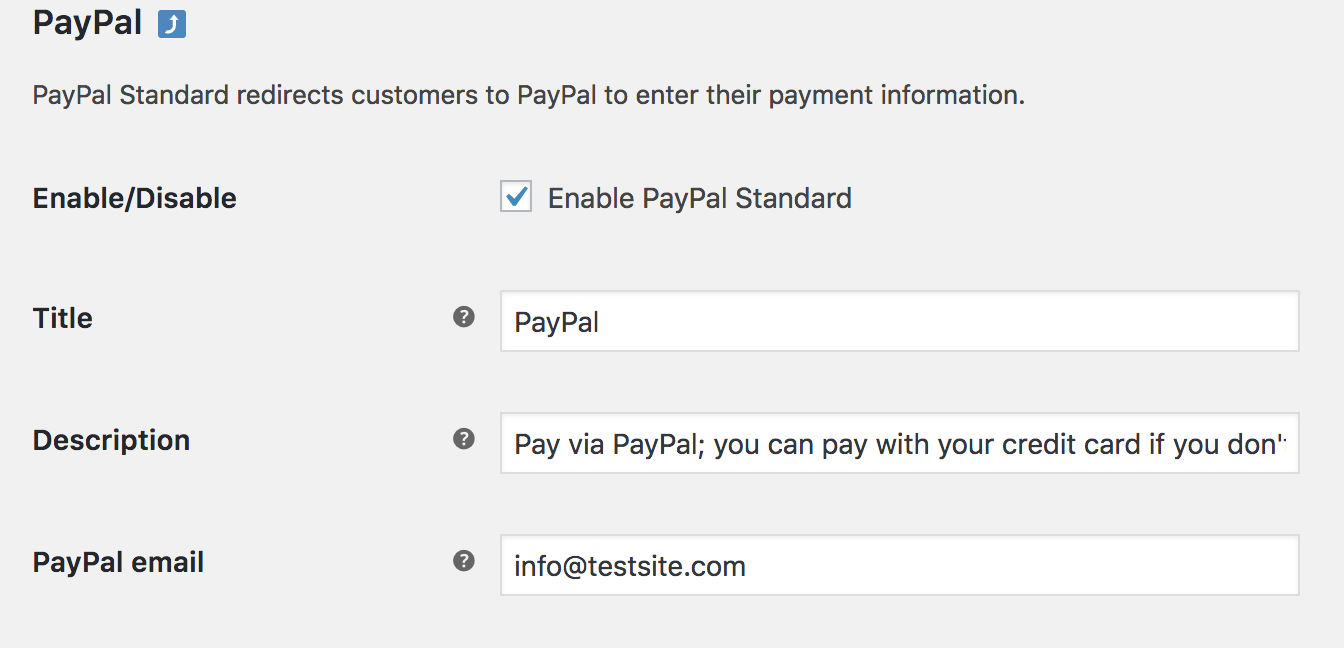
In this section, you need to fill in the required information of the email address. As indicated in the above screen, you can notice the field “PayPal Email”. You need to enter the address of your email there. It is very vital for the configuration prior to taking payments. This is useful in matching the similar email address that is on your account of PayPal Business.
- Advanced options
To create the WooCommerce standard return URL for PayPal, it is highly recommended to learn these advanced options. Navigate to this part, several fields require you to enter.
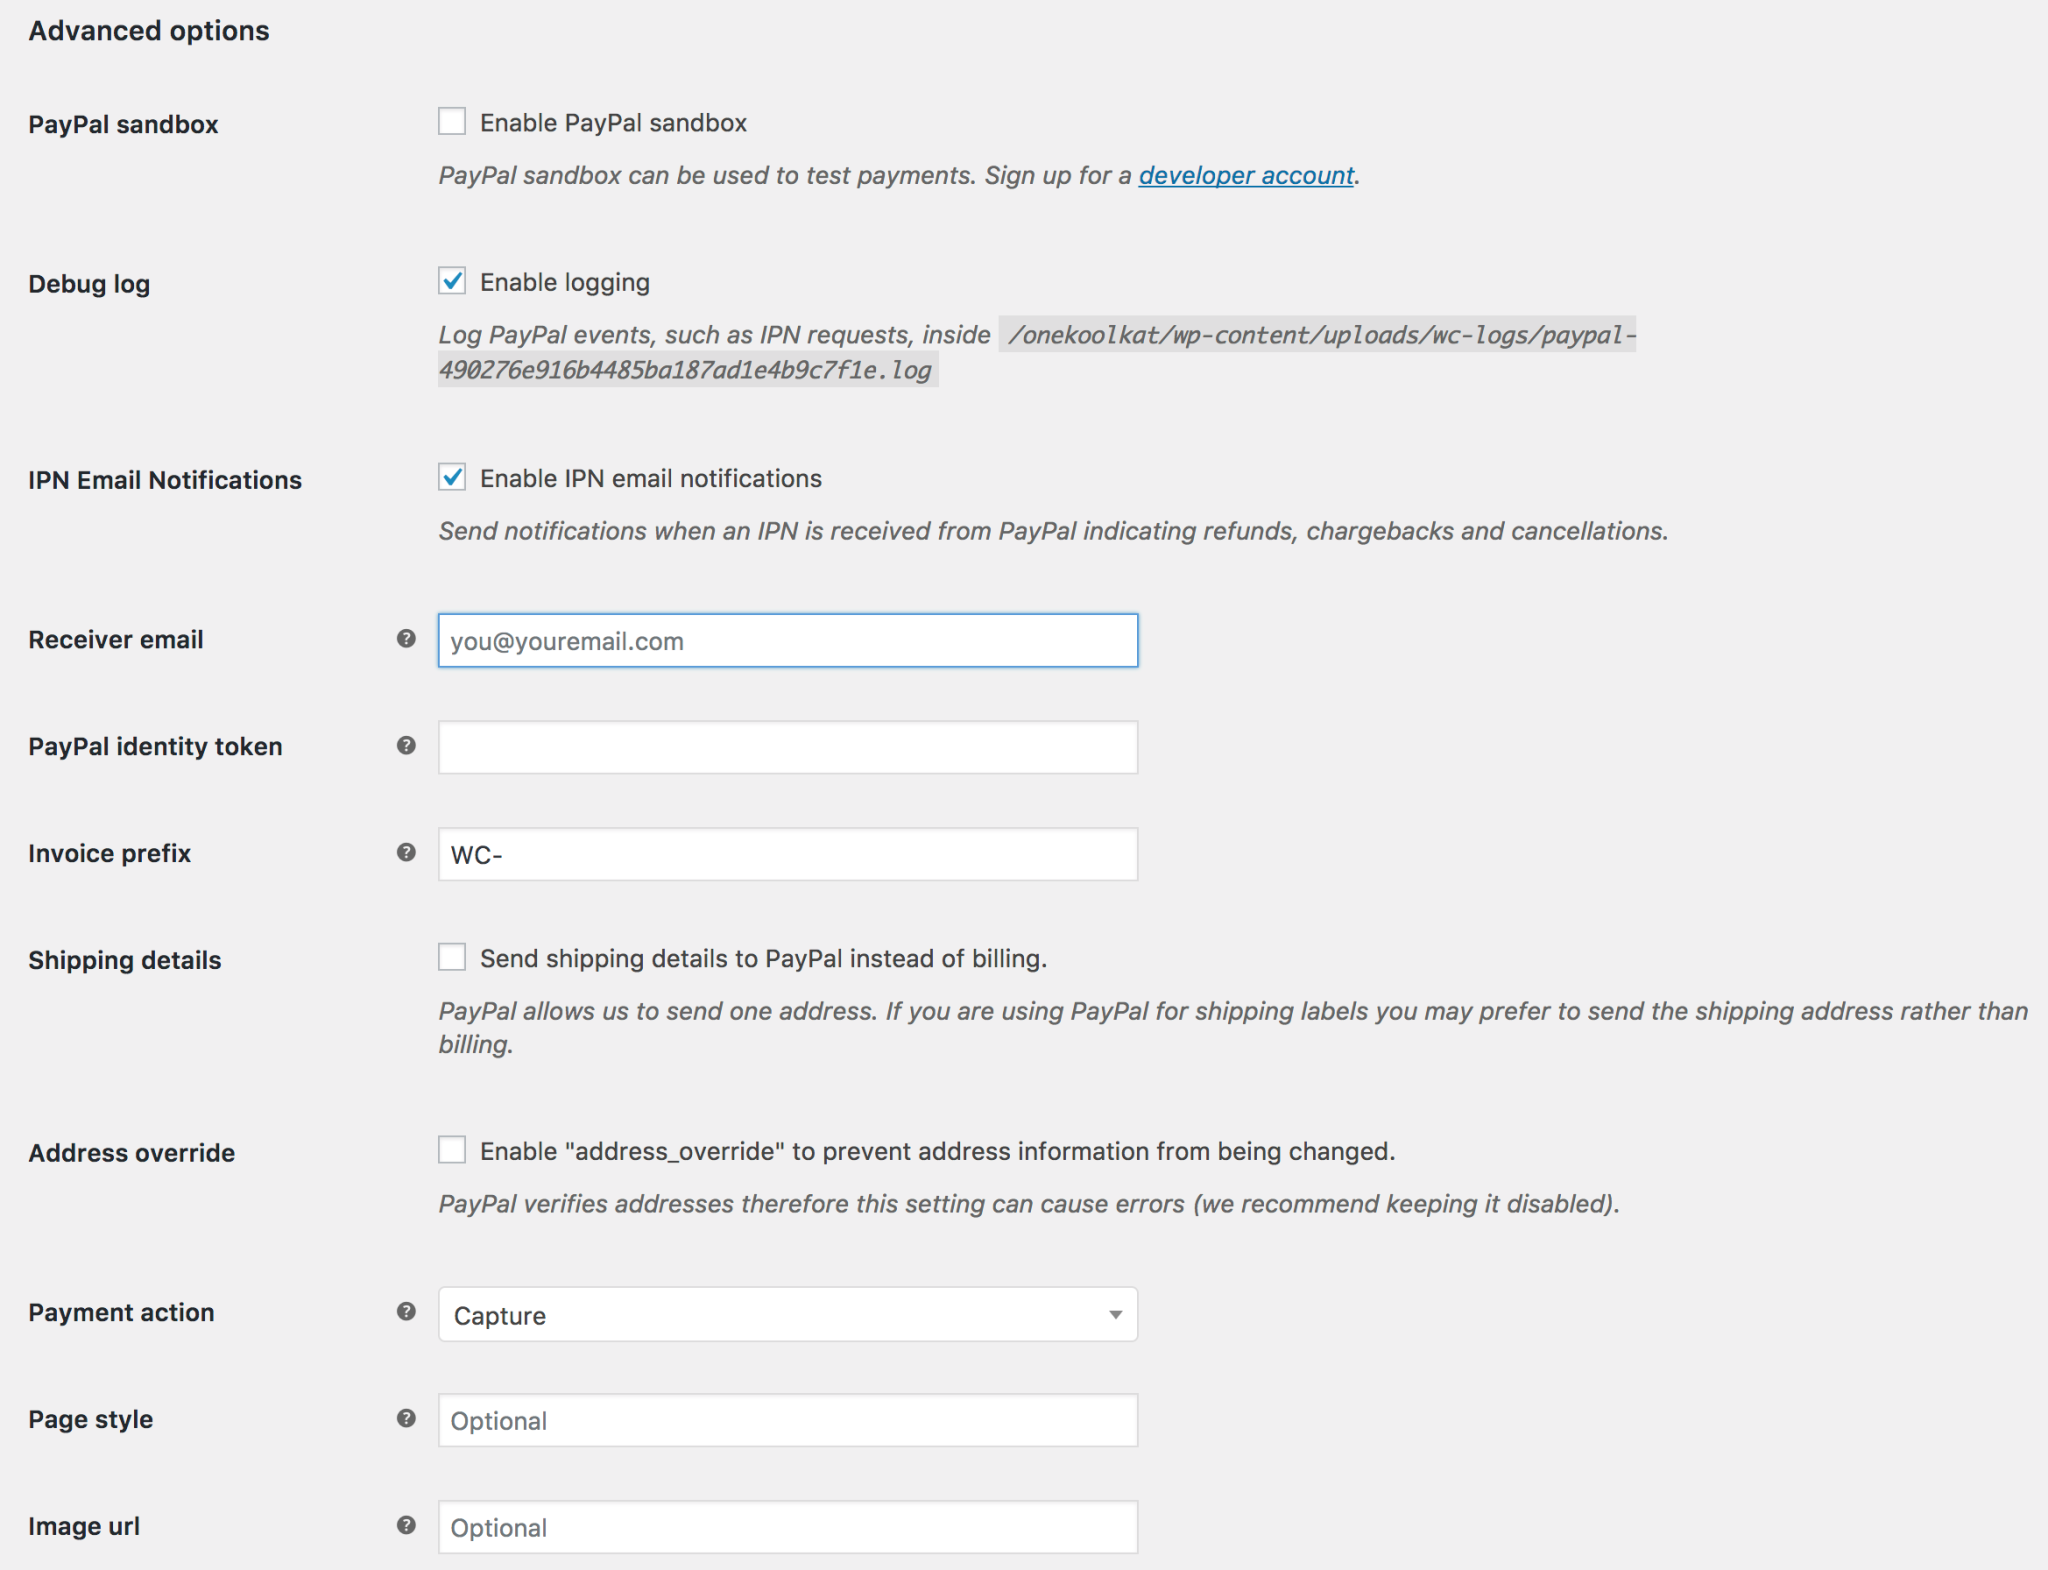
In the box named “Enable PayPal Sandbox”, you will give it a tick if you are keen on testing the checkout process throughout the development of your store. As soon as this sandbox is enabled, there is no requirement for payment or money. If you want to apply this Sandbox mode, what you need to do is to separate your sandbox account through PayPal Sandbox.

The next field to be entered is “Debug log”. You might turn on this mode that could be useful for your store’s development. However, in doing so, you need to create a folder “wc-logs” first, then set the permission for it to be capable of being put in writing. In particular, you can find those logs by penetrating “WooCommerce”, choose “System Status” before hitting on the button “Logs”. When you are here, you will choose the log of PayPal from your drop-down.

A further step for this configuration is to tick another box named “IPN Email Notification”. Nevertheless, depending on your need, it is optional to choose this field or not. The instant payment notification, or IPN for short, will be sent from your PayPal once you have received any payment, or issued a refund, a cancellation, or a chargeback. Keep scrolling down a bit, you will encounter the section “Receiver email”. You need to fill in this field will be your “Primary email address” listed on your setting page of Paypal.com.

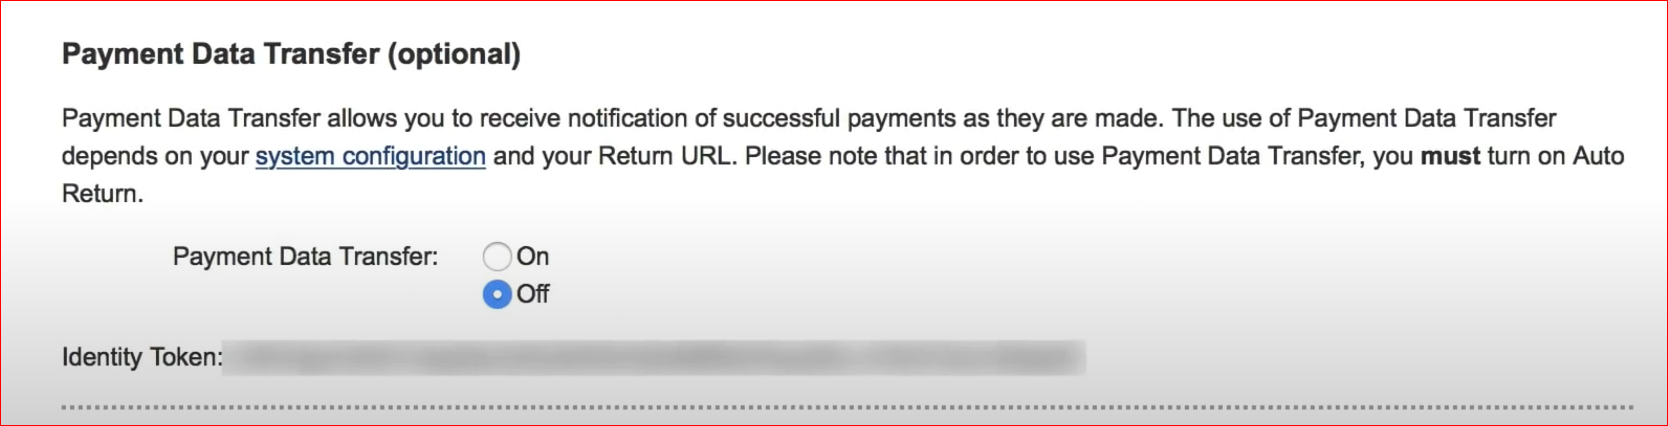
What is more, you will have one more field to enter “PayPal Identity Token” and it is non-compulsory.

Only when you need to sign up for an option named “Data Transfer” on the PayPal account. This is useful in verifying payments in case you have difficulty with IPN issues.
“Invoice Prefix” is also another useful field if you own multiple stores. Furthermore, as regards shipping methods, there are two options that you can take into consideration. The first one is to send the details of the shipment to PayPal. In particular, you could be able to choose to have your WooCommerce send the details of shipping to PayPal for building shipping labels as a substitute for billing.

The second method involves the option “Address override”. In this method, PayPal will verify the addresses. Hence, this kind of setting could result in errors. That is why we suggest you maintain it disabled. However, it could help you to save information related to address from being modified.
At this step, there is an important note to keep in mind. PayPal will verify qualified addresses as well as reject customers who do not recognize the address fully if you choose the method to send the details of shipping. Additionally, suppose the checkbox “Shipping Details” has not been checked yet. In that case, the protection of PayPal Seller may be invalid because PayPal will require the shipping address of buyers for this Seller Protection.

Navigate under the shipping option, you can see the field “Payment Action” where you are able to select funds “Capture” or just choose “Authorize”. So, what is the main difference between these two things? If an order “Authorize Only” is transformed into “Completed” or “Processing”, funds will be captured automatically with the condition that you make sure to enter the API Credentials.

The last two fields “Image URL” and “Page Style” are non-compulsory, so think twice if you tick it or not (depending on your requirements). While “Page Style” lets you choose your custom page name from the account of PayPal, “Image URL” will give you an opportunity to specify the image with a dimension of 150x50 for showing on the checkout page of PayPal.

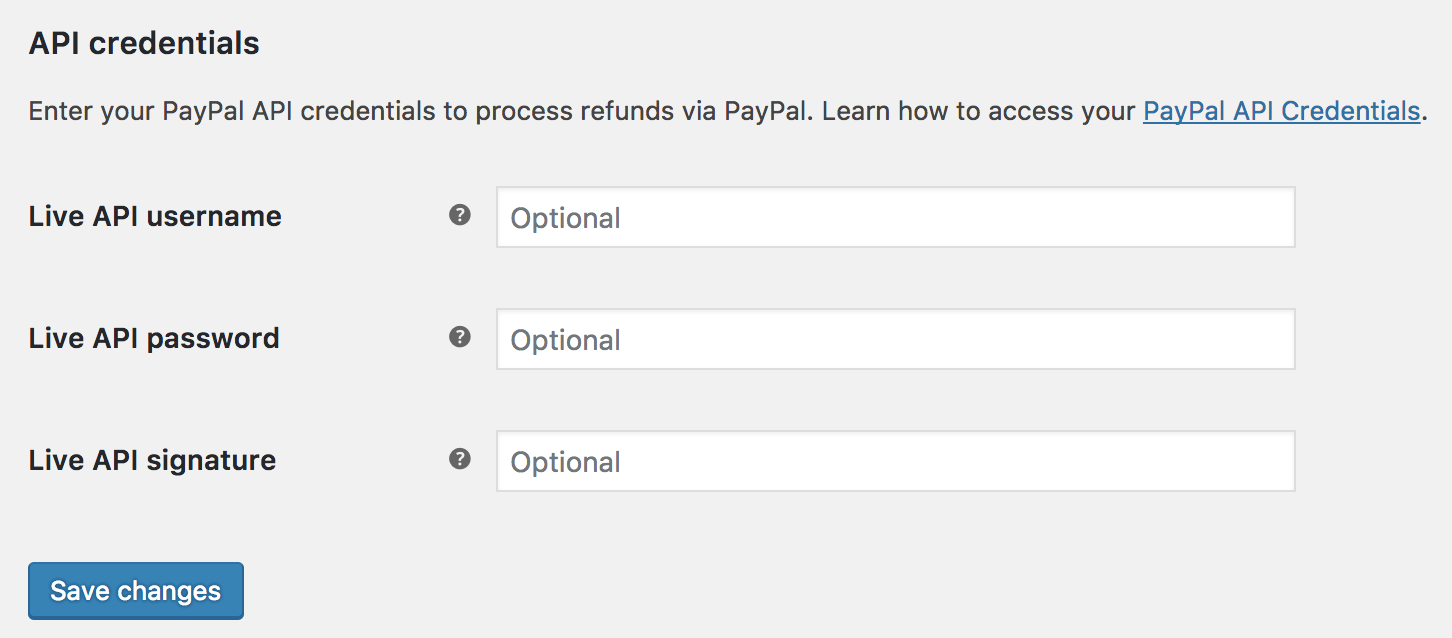
- API Credentials
Besides advanced options, it is a must to work with the API Credentials. To be more particular, there exist three fields that you need to paste the information of API into. They are API signatures, API password, or API username. So, what do you need to do to get API information?
You need to log into your PayPal account at the address: PayPal.com. Your next task is to navigate to the section “Settings” and choose “Account Settings” to click on “API Access”.
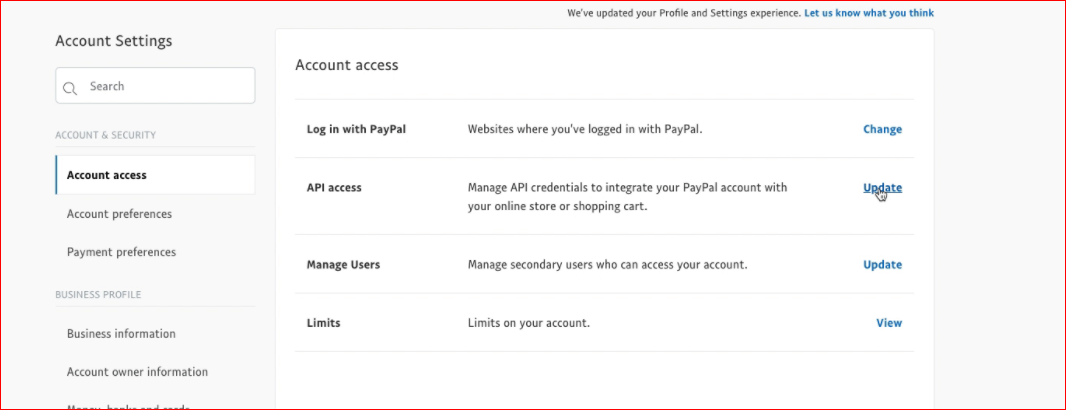
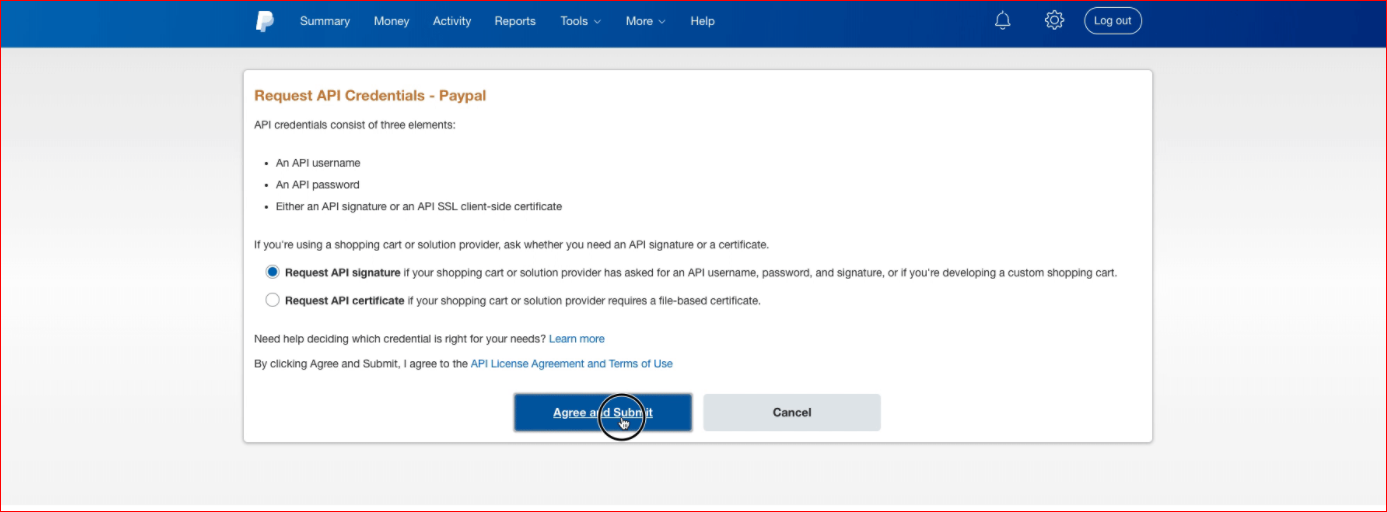
After that you will go under a bit to choose the section “SOAP/NVP API integration”, then keep going by choosing “Manage API Credential” to choose “Request API Signature”. Next, you will need to view as well as copy the API Signature, API Password, and API Username.
Step 2: Configure the dashboard of PayPal
There are some simple tasks to follow to set up your WooCommerce standard return URL for PayPal when you are here.
- PayPal IPN URL
Here, you need to configure several steps within PayPal. To have a standard URL, it is necessary to install the IPN URL PayPal for your WooCommerce. Specifically, the PayPal IPN will notify your store if the payment is successful or not.
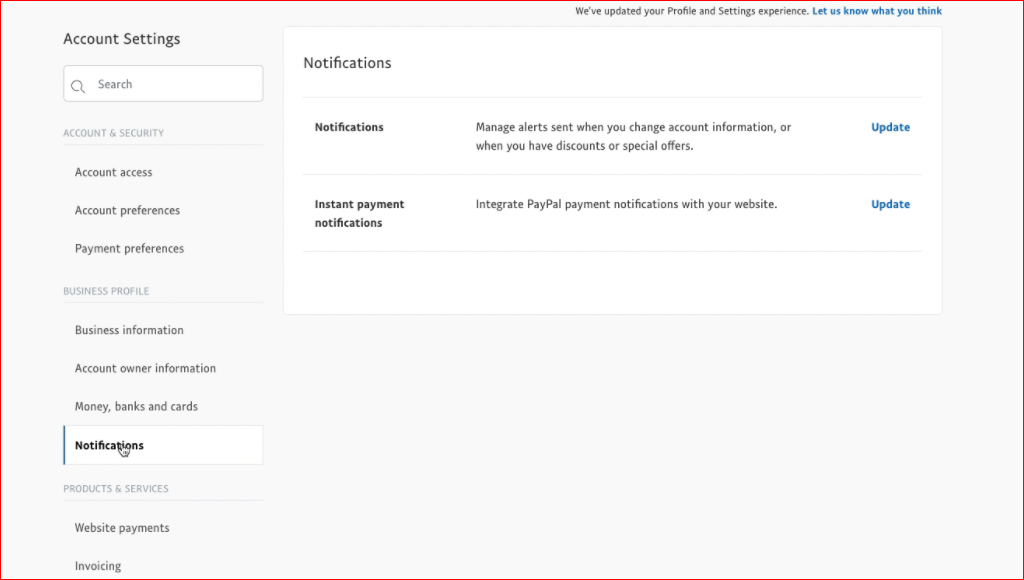
To set up your PayPal IPN, you need to log into the account of PayPal at the familiar address PayPal.com. Continue to the gear icon to choose “Settings” and select “Account Settings”. Go ahead to select “Notifications” before choosing your “Instant Payment Notification”.
After that, your job is to hit on the button “Choose IPN Settings”, then you need to use the following URL. But you are required to replace example.com with a chosen URL on your own.
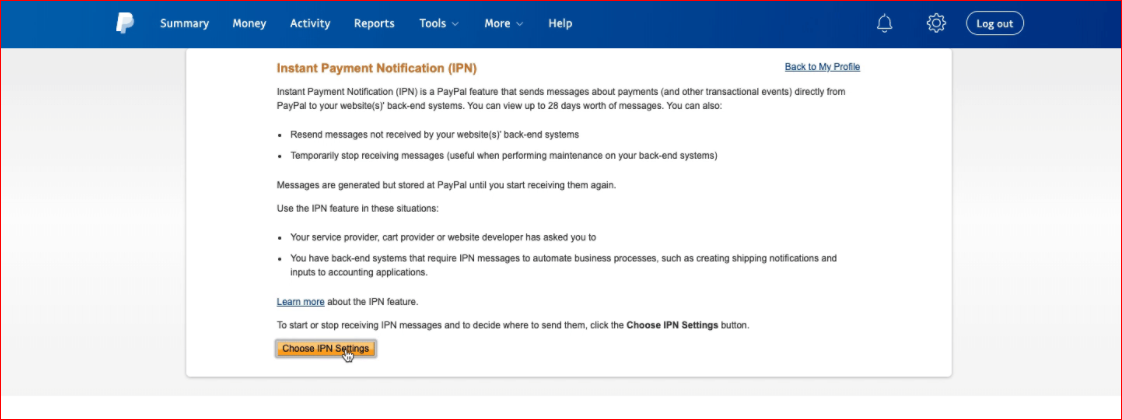
Moreover, another step is to ensure that the option “Receive IPN message” will be chosen before clicking “Save”. You have understood how to create a single IPN URL. In case you are owning multiple stores, it is also possible for you to apply the same IPN as well as a PayPal.com account. There exists one “Notification URL” by default. But, when you send one IPN URL with a transaction, it will override the default.

- Auto-Return
In this section, you will learn how to install the standard auto-return in your PayPal account. By doing so, your customers will be taken to the receipt page. So, how to set it up?
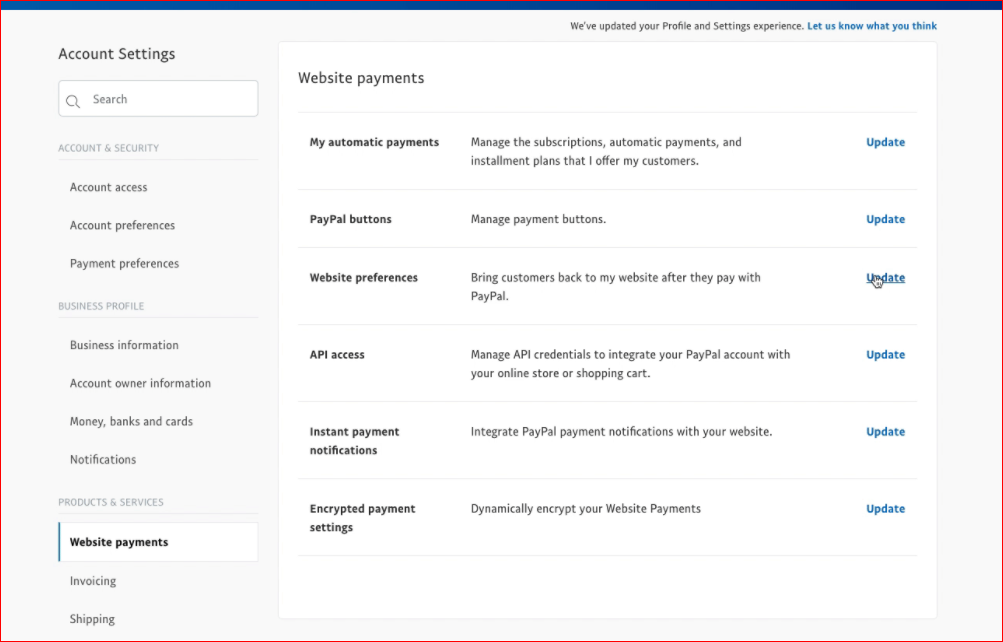
You now need to log into your account at PayPal.com again to approach the section “Settings” with the gear icon. When you are here, your task is to click on the section “Account Settings” where the menu “Website payments” is located. Click on it before choosing “Website preferences”.
Proceed to the next step by heading to the section “Auto return”. Here, you will hit on the button “On”, then you can use the following URL and you only need to replace “example.com” with the chosen URL on your own: https://example.com/checkout/order-received/
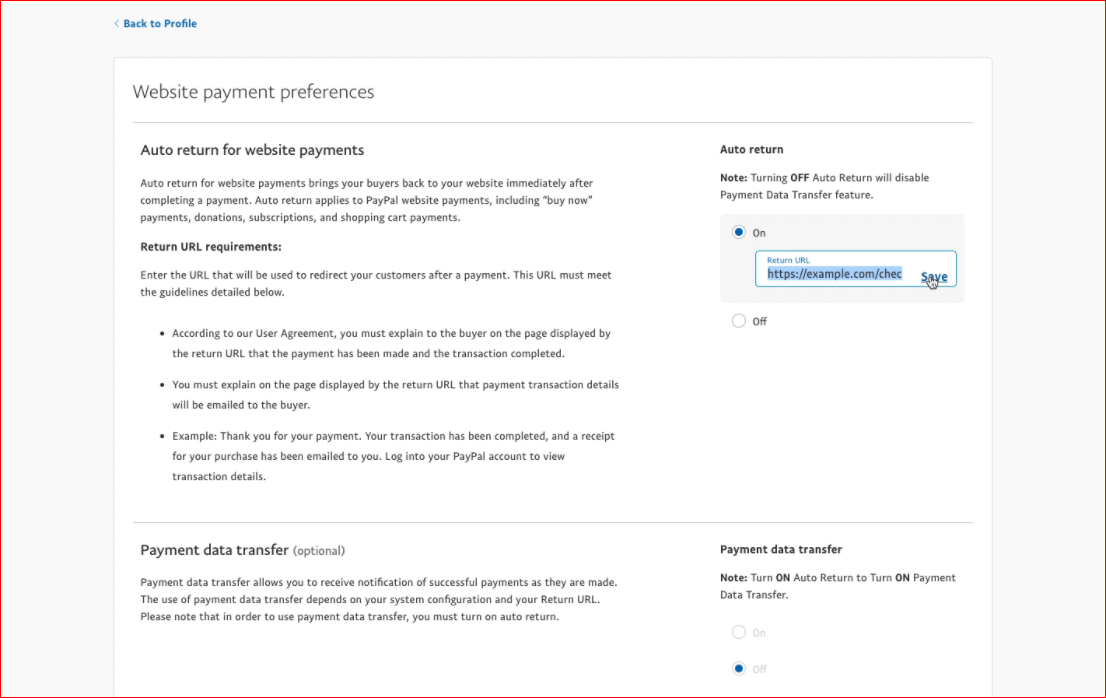
This URL will dynamically redirect to the proper receipt page. Moreover, you could even add to your URL end with the “?utm_nooverride=1” to make sure that conversions or transactions will be credited to your original source of traffic instead of PayPal.
Step 3: Test with your PayPal Sandbox
Testing with your PayPal Sandbox is a not-to-be-missed step to make sure that everything will be okay and works great for your store. As you configure the payment, coupled with the checkout workflow of your website, you could be able to select if you will use the details of PayPal sandbox or not. Hence, you are capable of transacting to the content that you feel satisfied with.
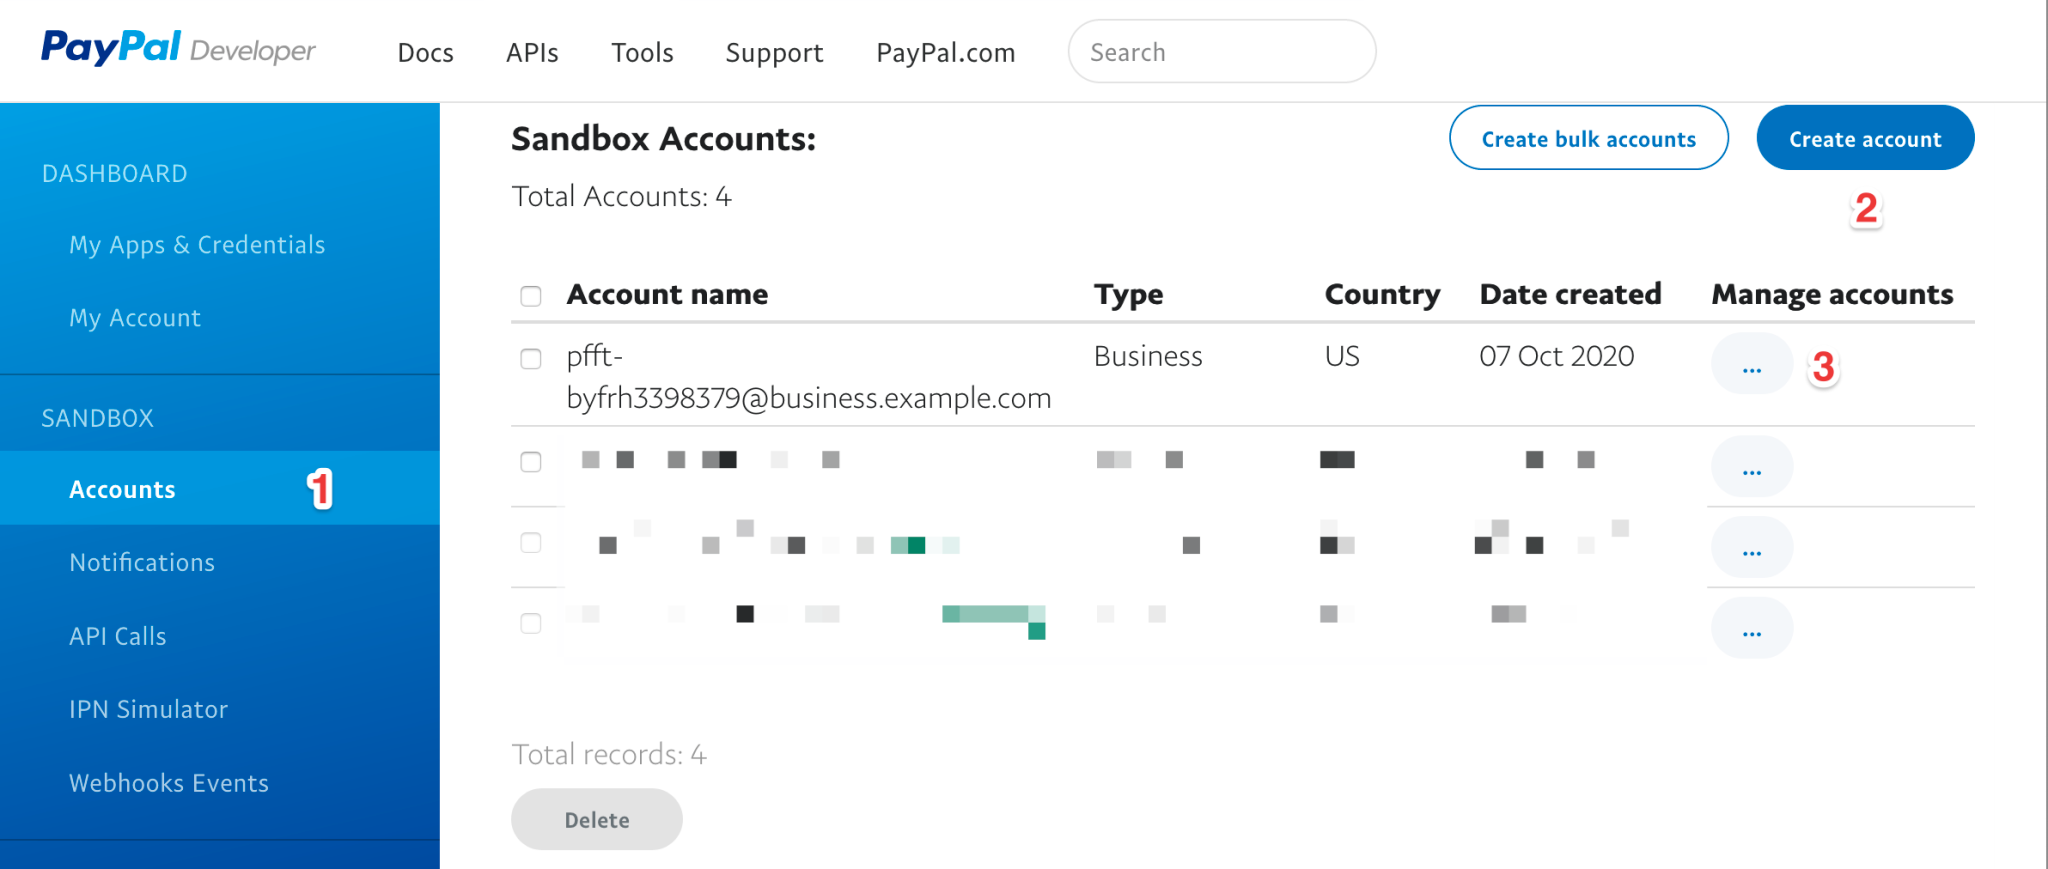
To meet this need, you are supposed to create an account of “PayPal Developer”. After finishing this sign-up, you will keep going by selecting the section “Sandbox” and click on the button “Account (1)” and then hit on the button “Create Account (2)”. Next, continue by specifying the “Country/Region” as well as “Account Type” to fit your requirements.
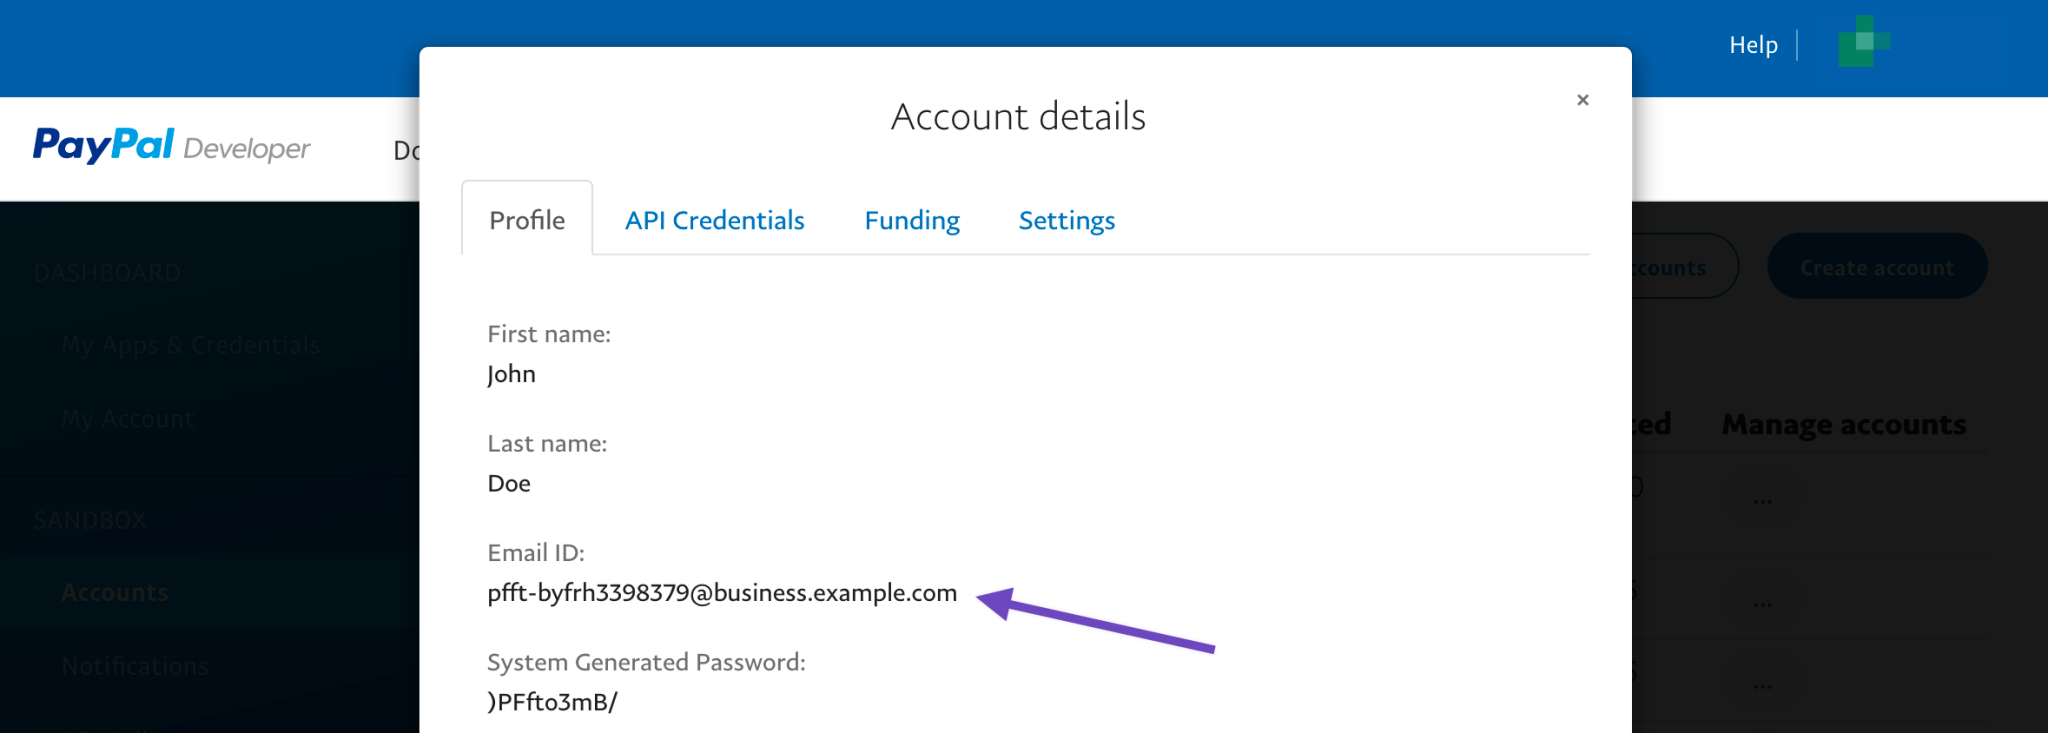
Next, your job is to choose the section “View/Edit Account (3)”“ for revealing the details of your sandbox account. Another step is to choose the menu that is near the account that has been just added in the column “Manage accounts”. Check out the below screen to understand what you are going to do.
Additionally, you also have to navigate under the tab “Profile”, you then encounter the sandbox account that comes with an “Email ID”. You will use this address of email while your website is in sandbox mode. And, be noted that this email ID sandbox should be applied for not only the field “PayPal email” but the field “Receiver email” as well. To do that, go to your “WooCommerce”, choose “Settings” and click on the menu “Payments” to select “PayPal”.
In case the live email address on PayPal is applied instead, “On Hold” will be shown as the order status. What is more, the notes of order read with the information “Payment pending. Order statuses changed from the Pending payments to on hold”. And the final task is to enter the ID of the sandbox email in those fields.
Conclusion
WooCommerce standard return URL has now been an integral part of your buying process. Now, you could set up the auto-return in your account on PayPal so that customers can be taken to the receipt page. If your customers are not returned to the site automatically when ordering on your WooCommerce store, this article is for you. Hope you could find it helpful and share it with anyone who is interested.


