
How to Integrate Shippo with WooCommerce

WooCommerce has been famous for being a free platform of eCommerce that store owners are allowed to sell everything, while Shippo has a reputation for decoupling the business’s logic from the process of order fulfillment logistics. Therefore, if you want to ship your WooCommerce products effortlessly, shipping with Shippo is considered one of the most effective methods. This is to say, you are able to take a bundle of advantages from the integration between these two eCommerce platforms.
It is time to equip yourself with the most efficient shipping method of all time for your WooCommerce products. Hence, do not hesitate anymore to implement this integration to improve your online business’s overall performance. Do not worry if you have not known how to integrate Shippo with WooCommerce. Go with us and this piece of article is born for you.
Why should we integrate Shippo with WooCommerce?
There are some reasons why you should integrate these two platforms. By knowing that, you could be able to highly aware of its importance and feel more eager to learn how to execute this task successfully. Below are some things you should know about the benefits you could get from this integration.
-
Help to enable the automatic shipping rate: By integrating Shippo with WooCommerce, the automatic shipping rate will be enabled for every order that is placed on the site. Therefore, it can help you save much time and effort in setting up shipping rates.
-
Get the real-time update on every order: There is nothing quite like getting the real-time update on every order. This integration assists you in integrating the whole shopping experience in WooCommerce into the system of Shippo.
How to integrate Shippo with WooCommerce
Integrating Shippo with WooCommerce now becomes easier than ever, only following simple steps. Here, we will walk you through three main steps for this task to be completed. Read and follow to make your own integration.
Step 1: Set up Shippo account
First of all, you are required to set up your Shippo account. Shippo is now a platform that is born to help you with the logistics process, setting up an account is another not-to-be-missed step. Below are the most basic things you need to keep in mind in order for your account to be created.
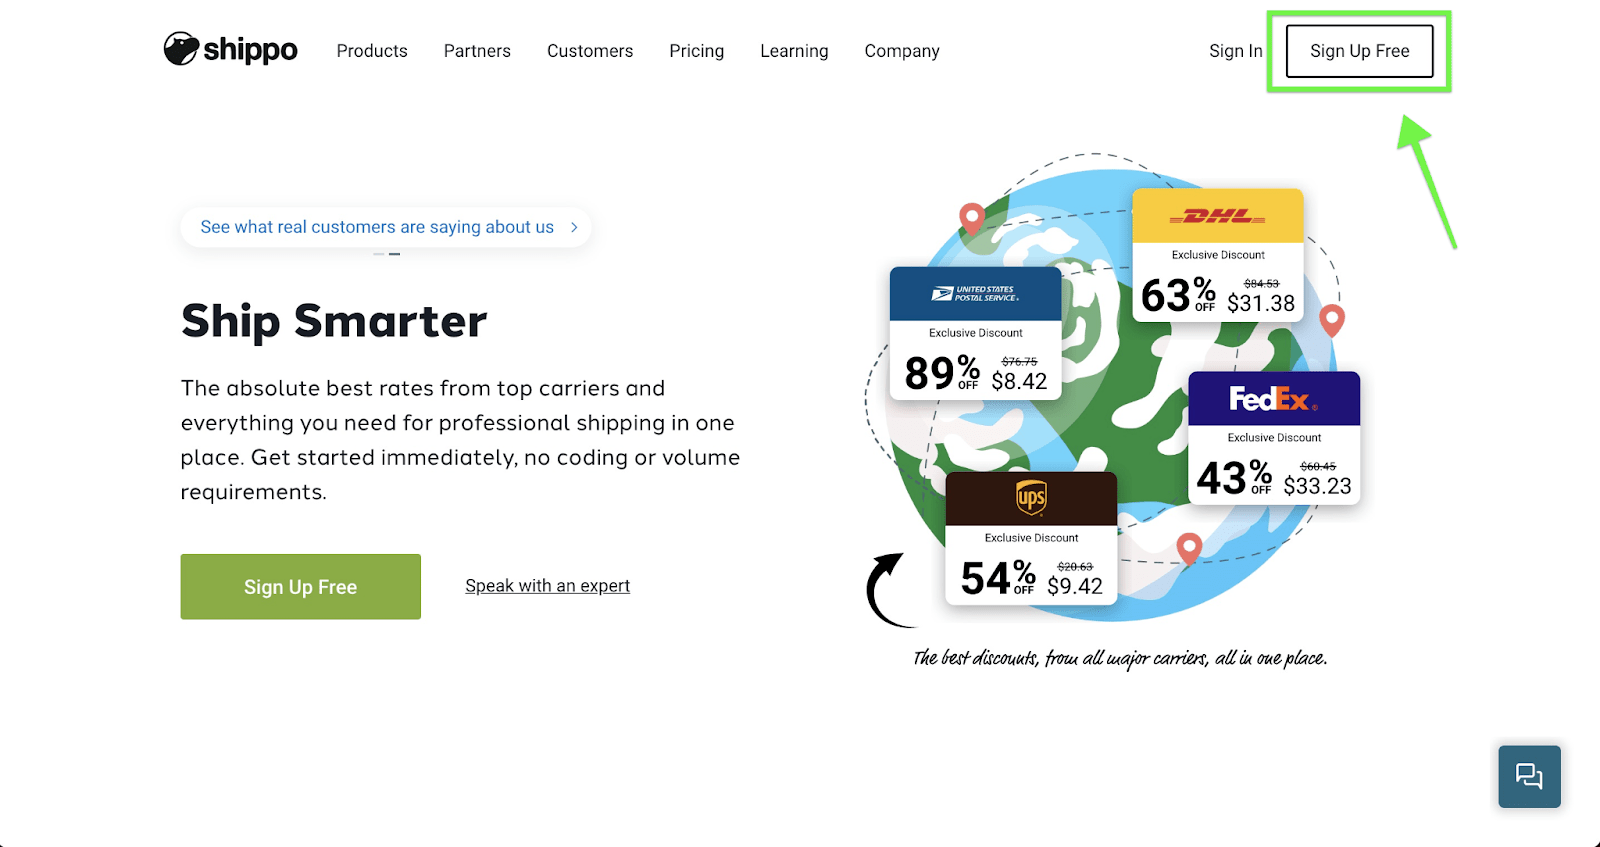
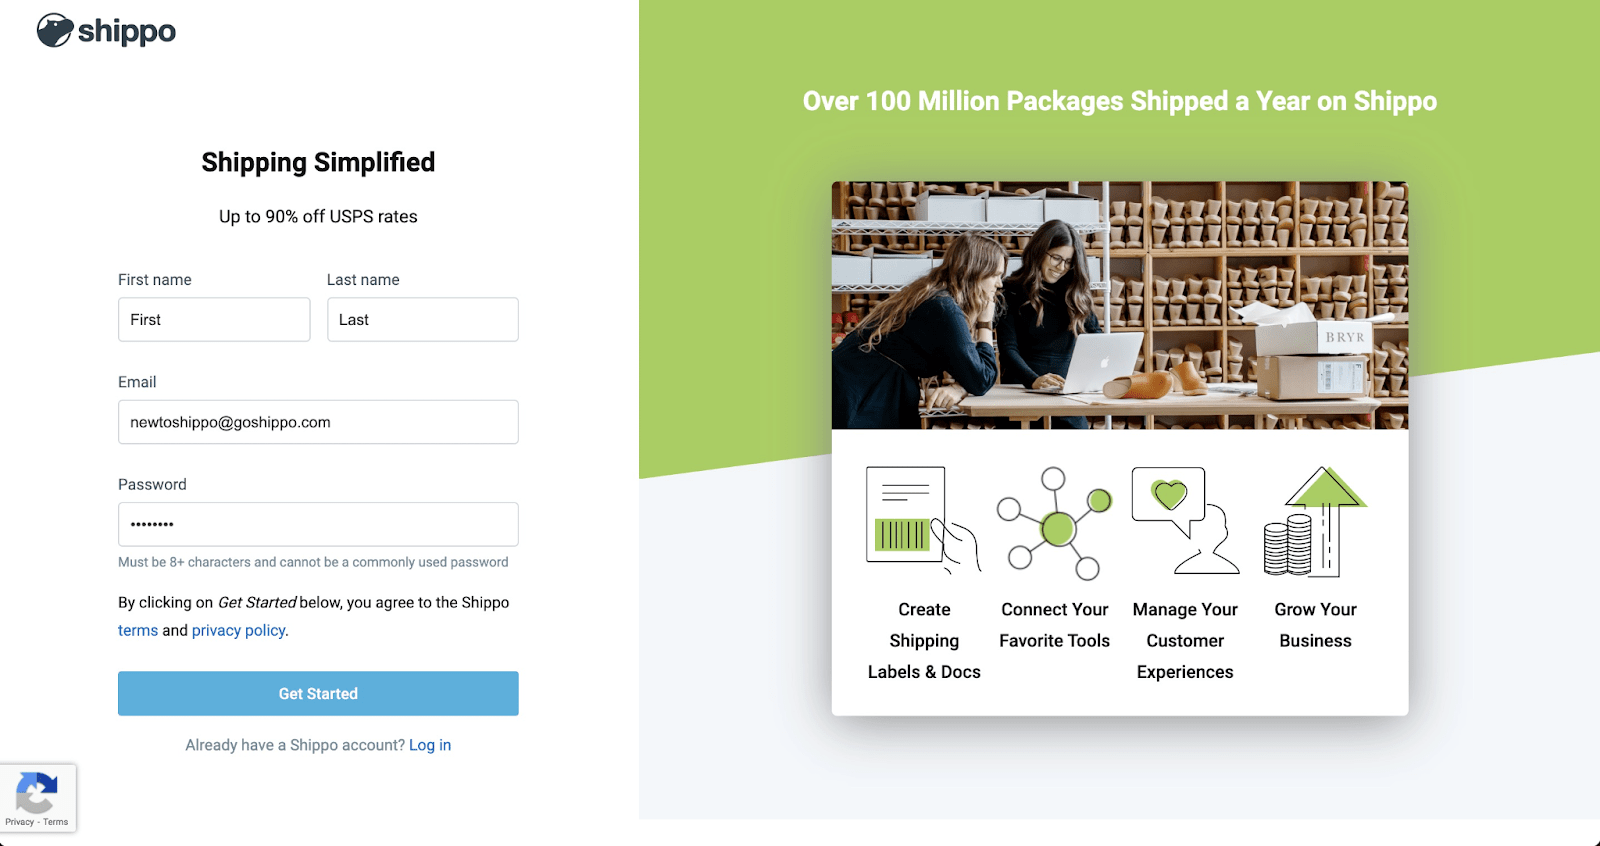
By navigating to the Shippo homepage, you are capable of finding the initial option for signing up at the pages right corner of the Shippo website page. From here, it is possible for you to fill in the necessary information for getting started.
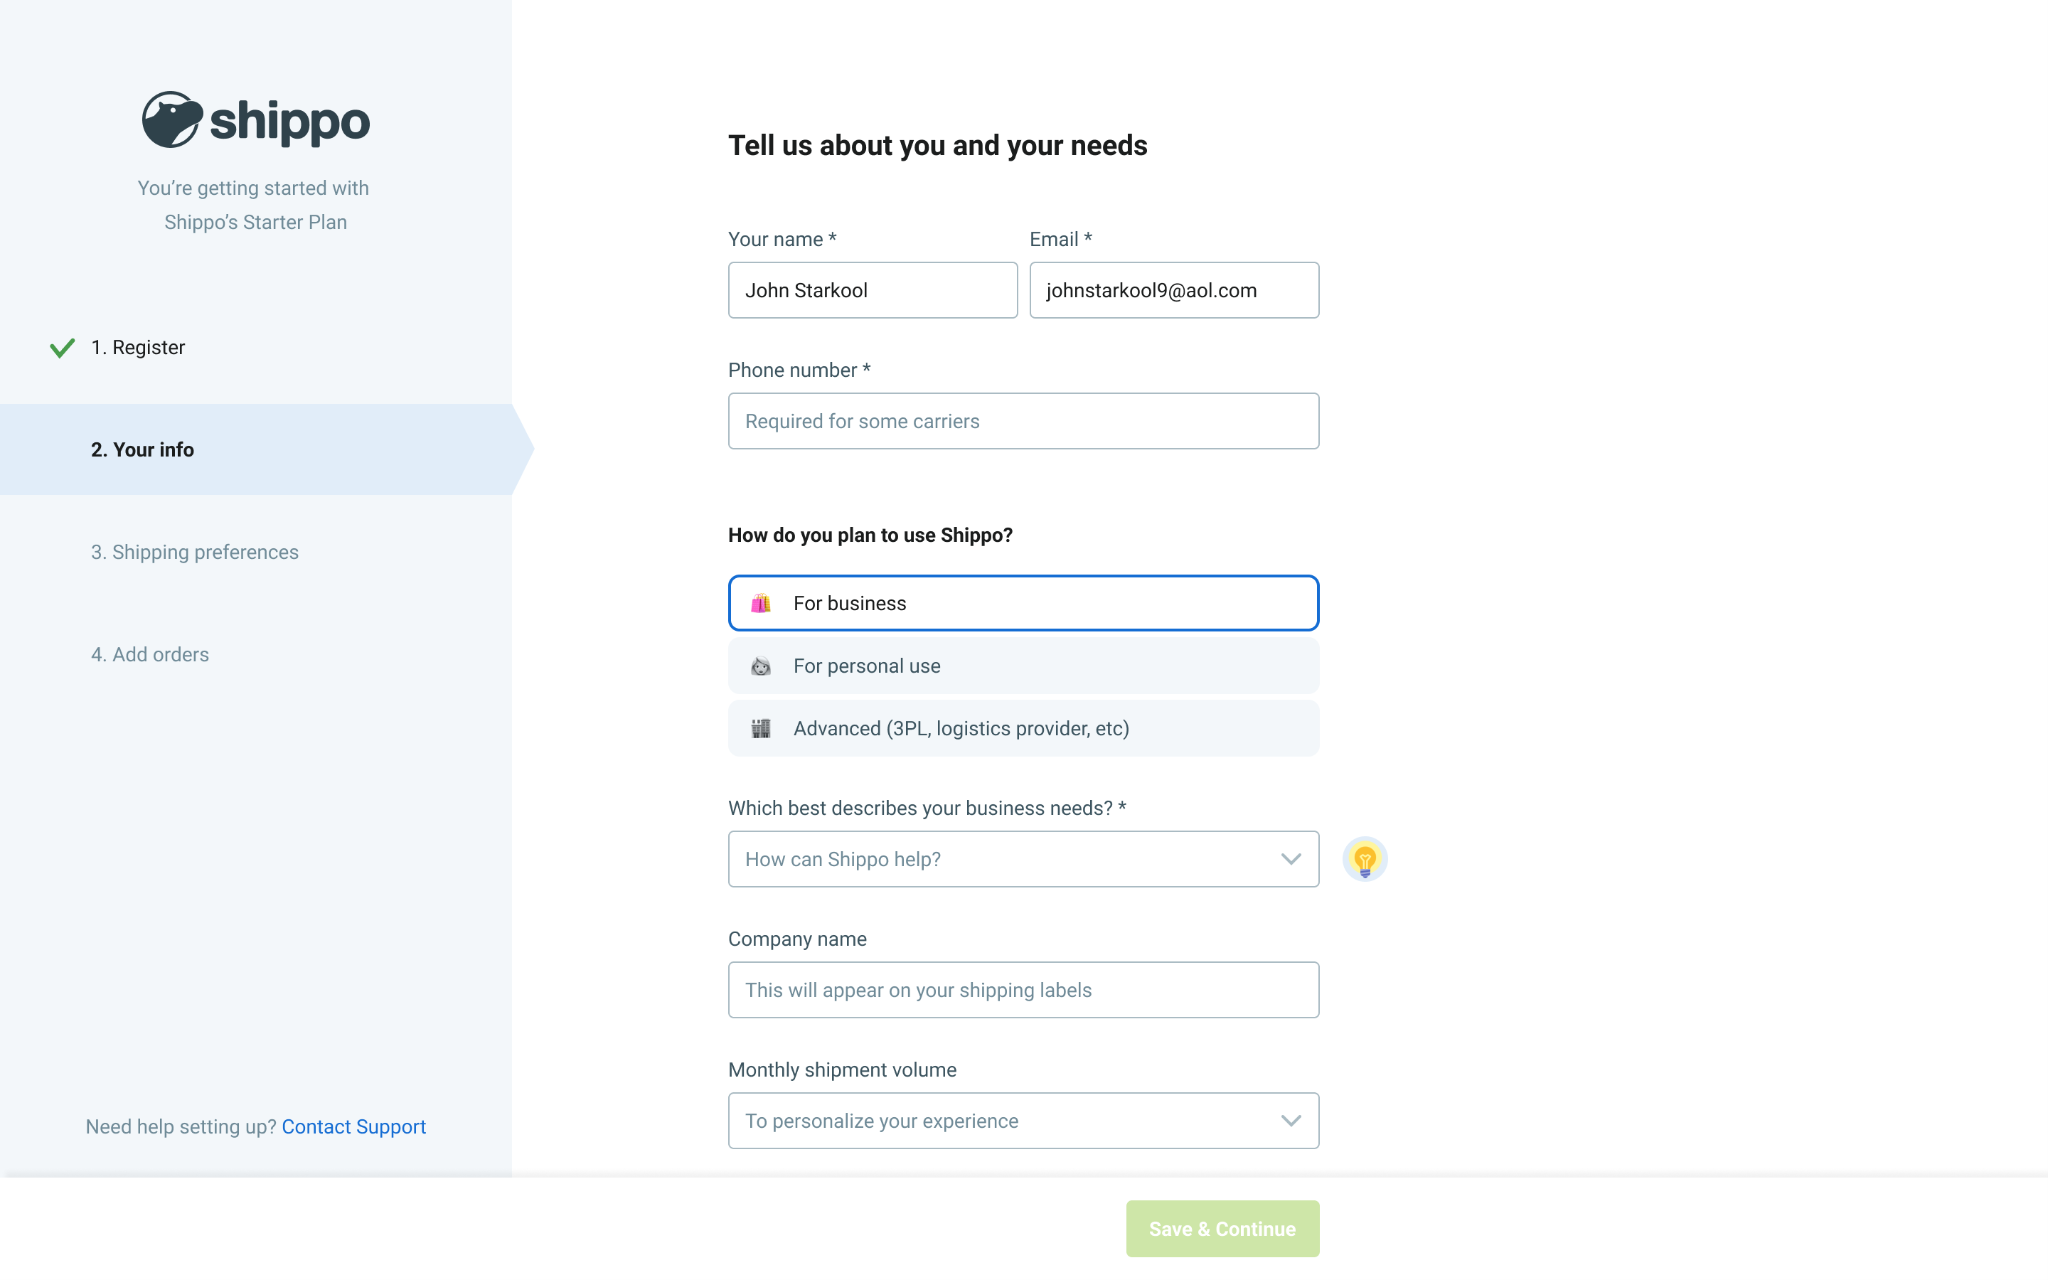
With the first sign-in, you will need to fill in the company information such as your contemporary store platform, the principal preferred carrier, and the average monthly shipment volume. To be more specific, when you need to calculate your shipment volume monthly, you are highly recommended that you provide the average between the lowest and highest volume months. With this number, you can rest assured that, the best rate can be achieved.
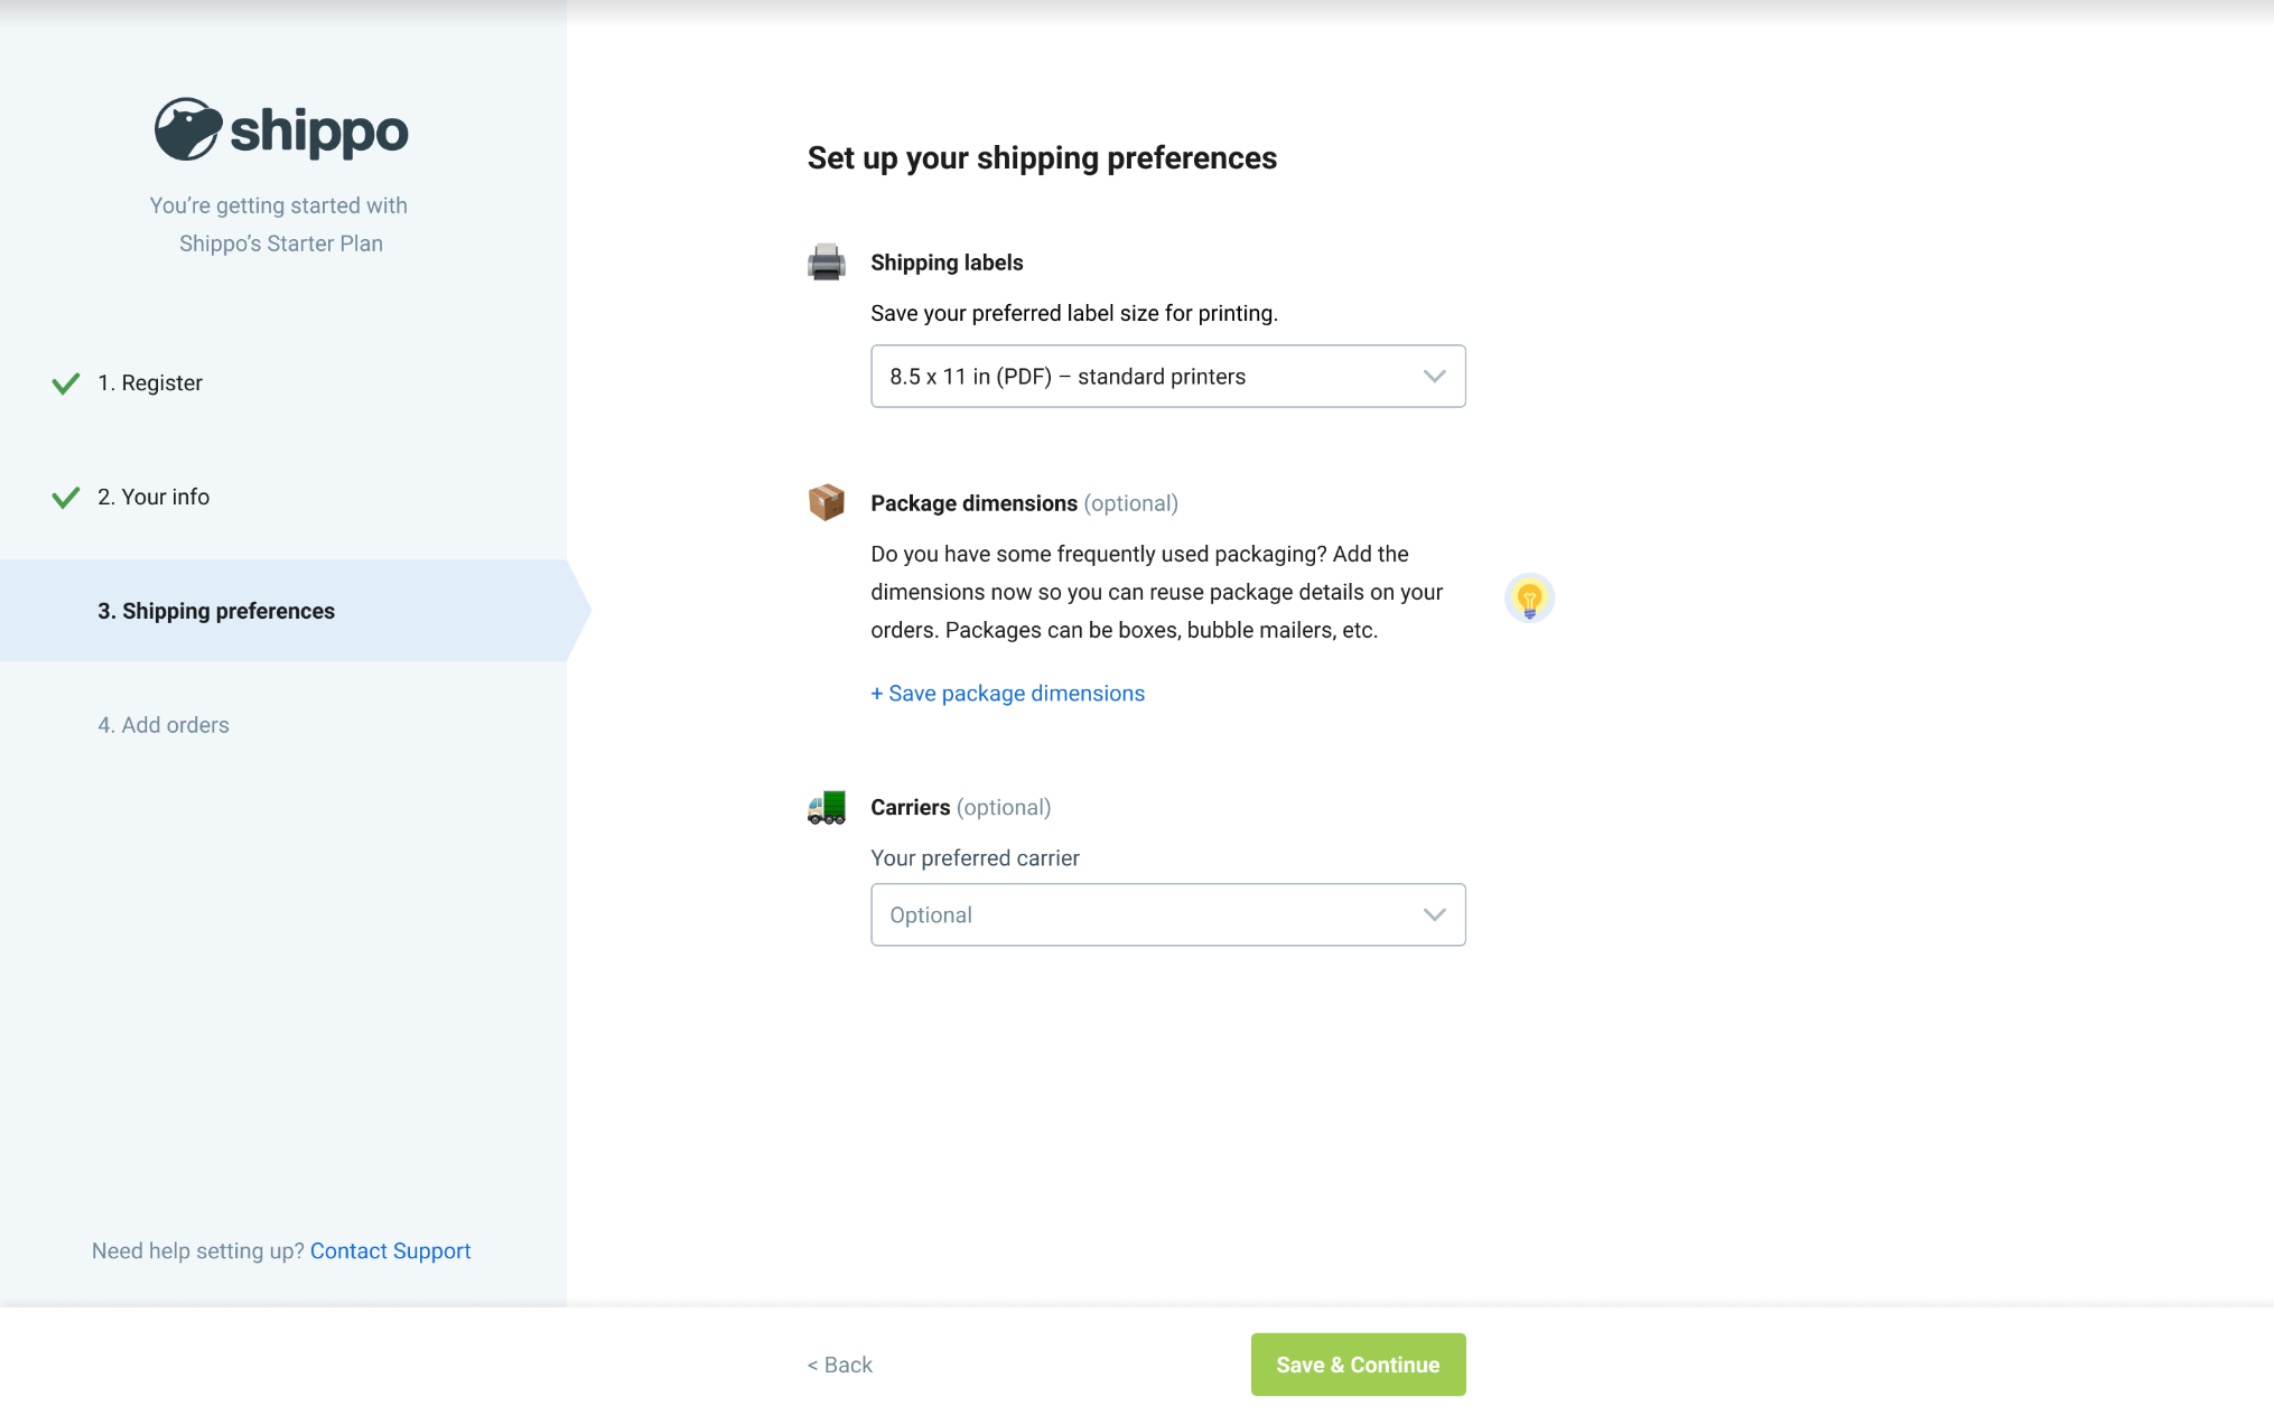
After you are done filling in the details of the company, you will be taken to another section where you have to fill in the shipping preferences. These things are your default package, carrier settings, and label that Shippo is about to use when products or labels are purchased.
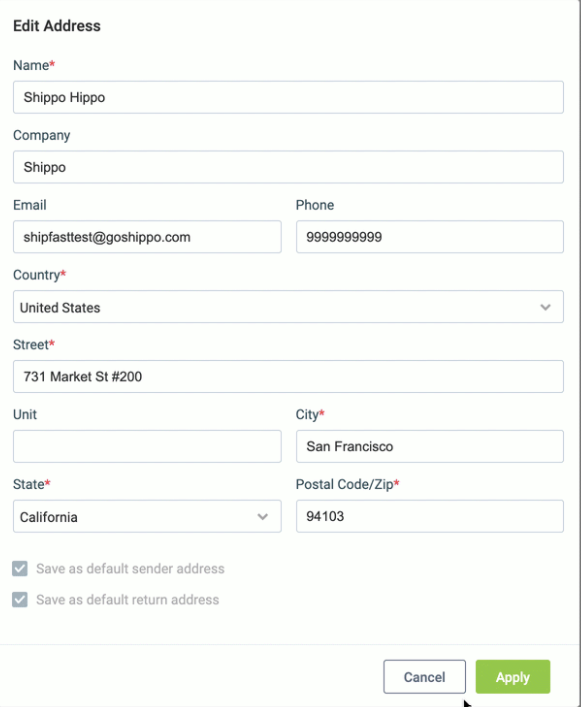
Another important thing to do is to update the address. In doing so, you will need to hit on the tab “Settings”. If you have various locations that you are keen on shipping from, you can add them right on that page. Remember that the first address you fill in will become the default return and sender address. So, you must update this as you update your address.
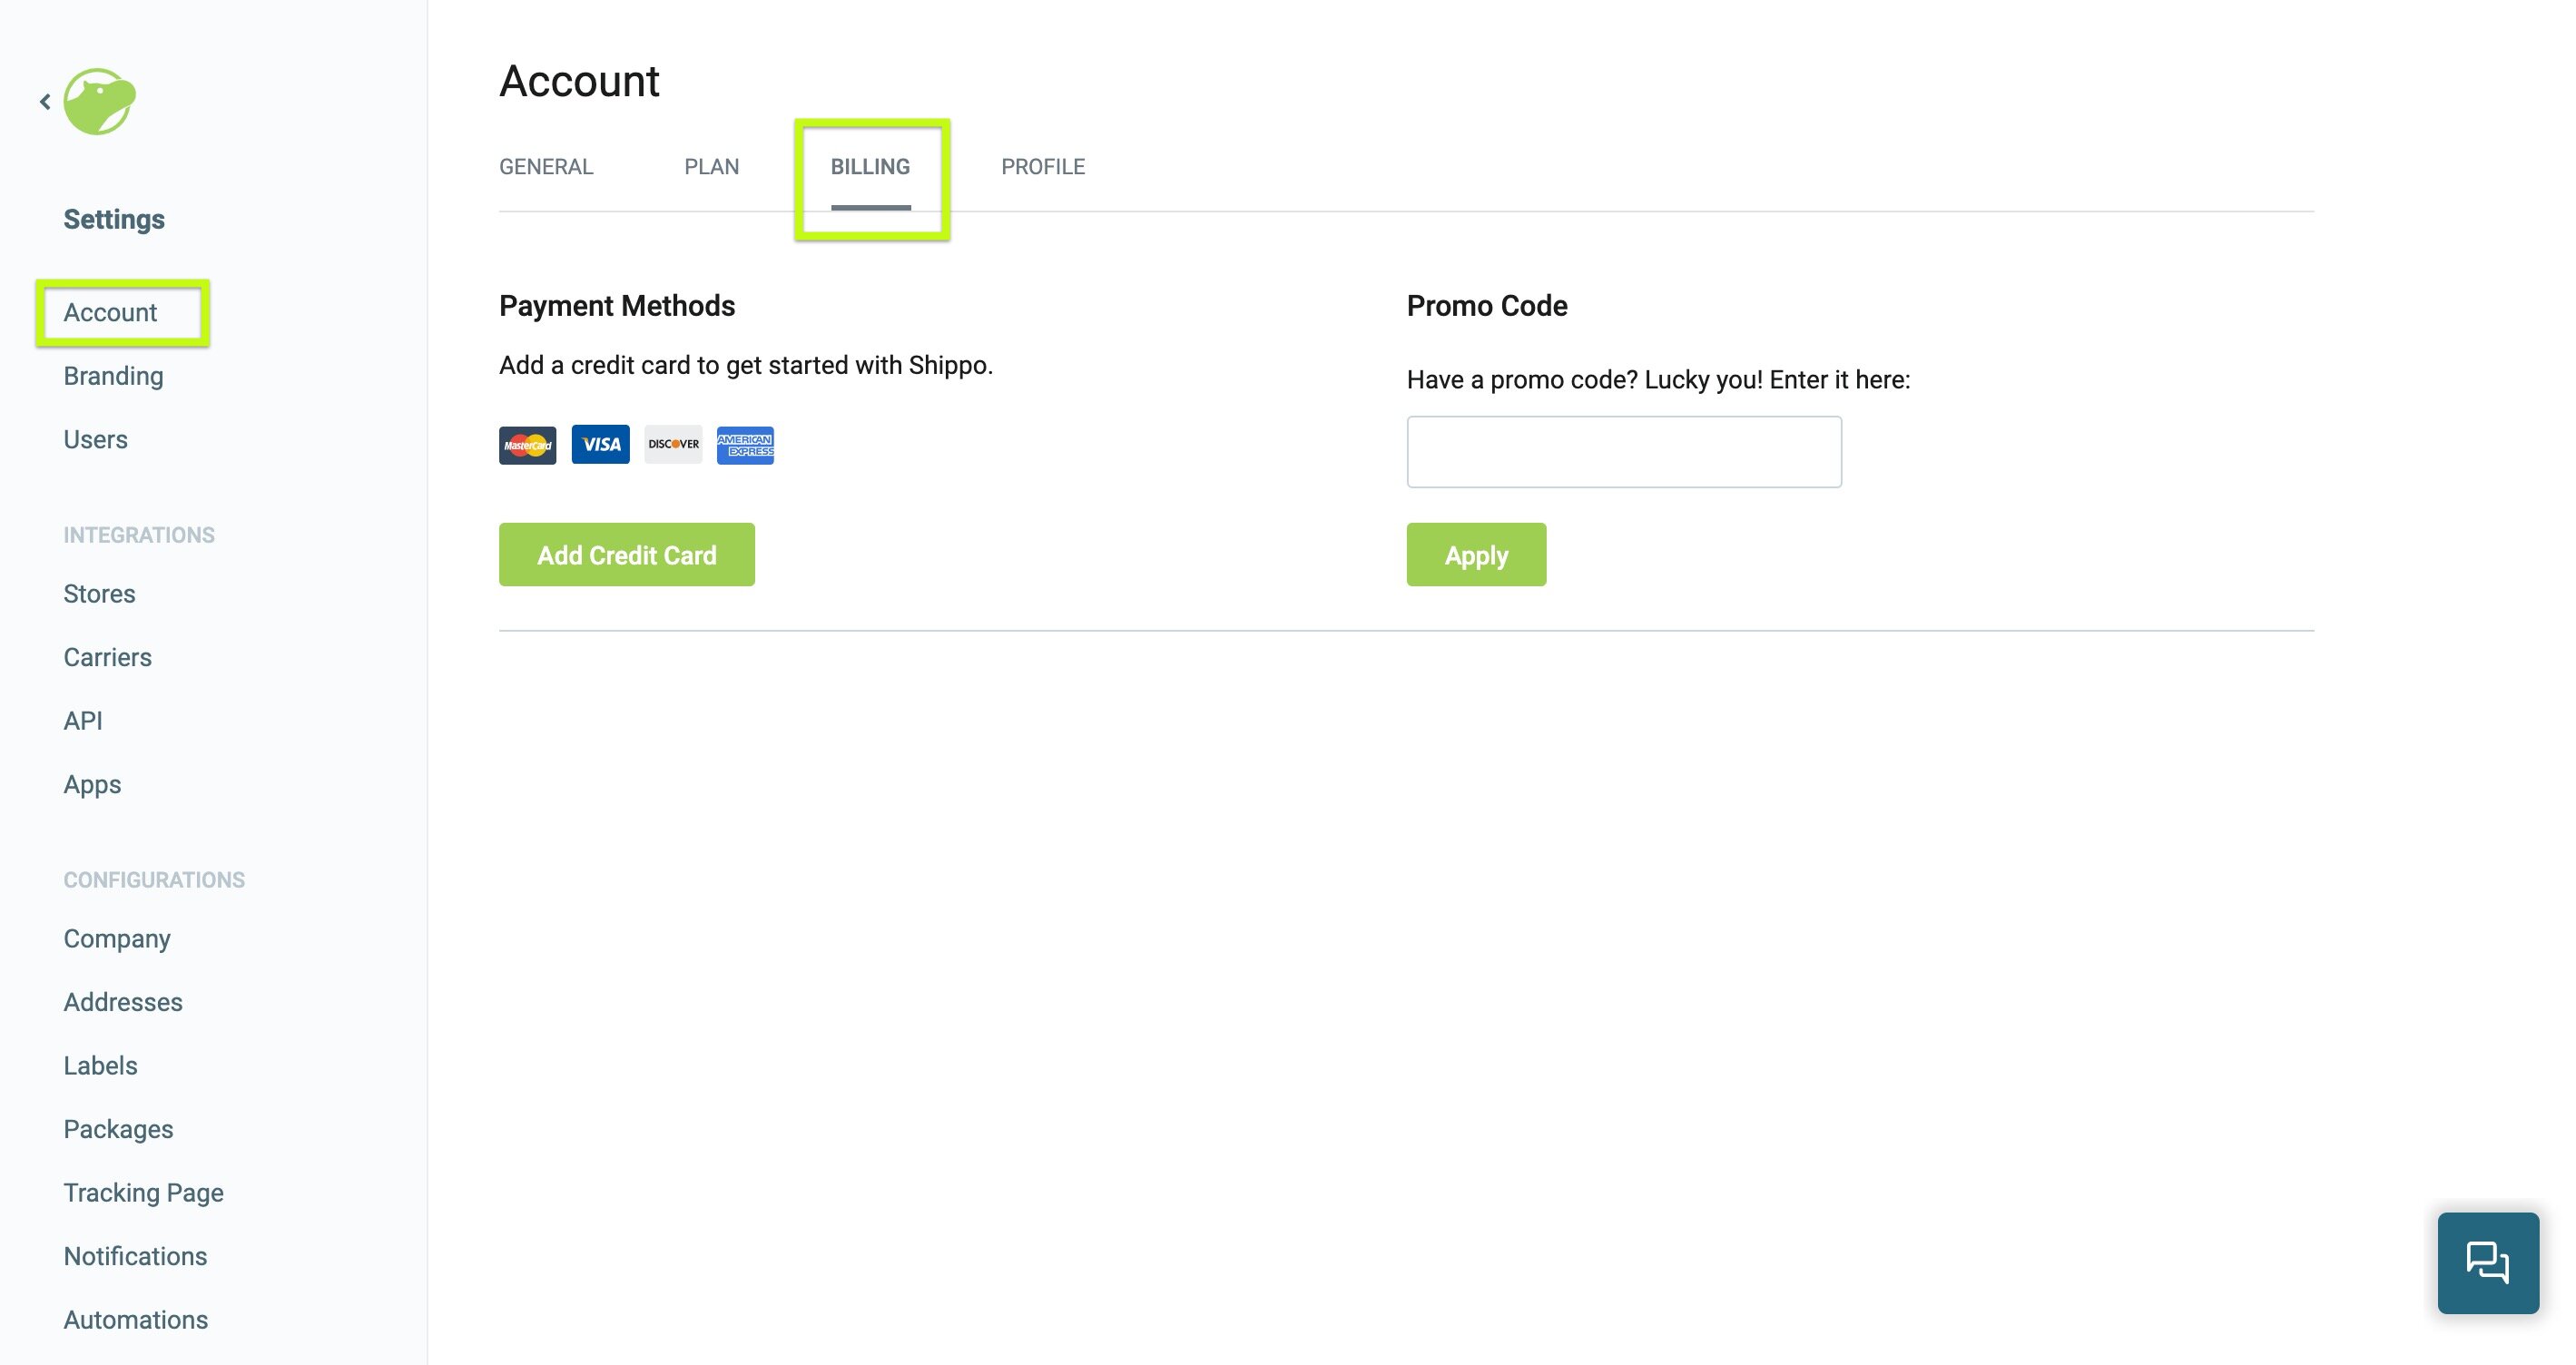
It is also vital to update information for billing. This type of information needs to be updated before you ship your 1st package. You need to click to add one credit card. This can be applied as your principal payment method.
Step 2: Configure the Shippo’s “Connect” page
The connection between Shippo and WooCommerce works like any other connection with some other different stores. It is necessary to import the order details as well as update the WooCommerce’s fulfillment status after a label to be created in Shippo. Then your tracking number will be sent. Unlike some other online stores, WooCommerce doesn’t contain any certain fields for these tracking numbers/ As a result, it is a must to fill it in the section “Order Notes” of every order. When you are keen on changing the WooCommerce order status, this will be updated on your Shippo account as well. In case you need to modify an address within WooCommerce, this kind of change or modification is also synced to your Shippo system.
When the WooCommerce store gets connected to your Shippo, every detail of the orders will also be imported automatically to the “Orders Page” in Shippo and the Woo icon obviously marks them. Now, it is time for you to navigate to your Shippo’s Stores page by hitting on the section “Settings” before clicking on “eCommerce Channels” that lies on your left panel of navigation.
Proceed to the next thing by clicking on the green button “+Connect Store” on your top screen to the right. Then, you have to choose WooCommerce for this connection.

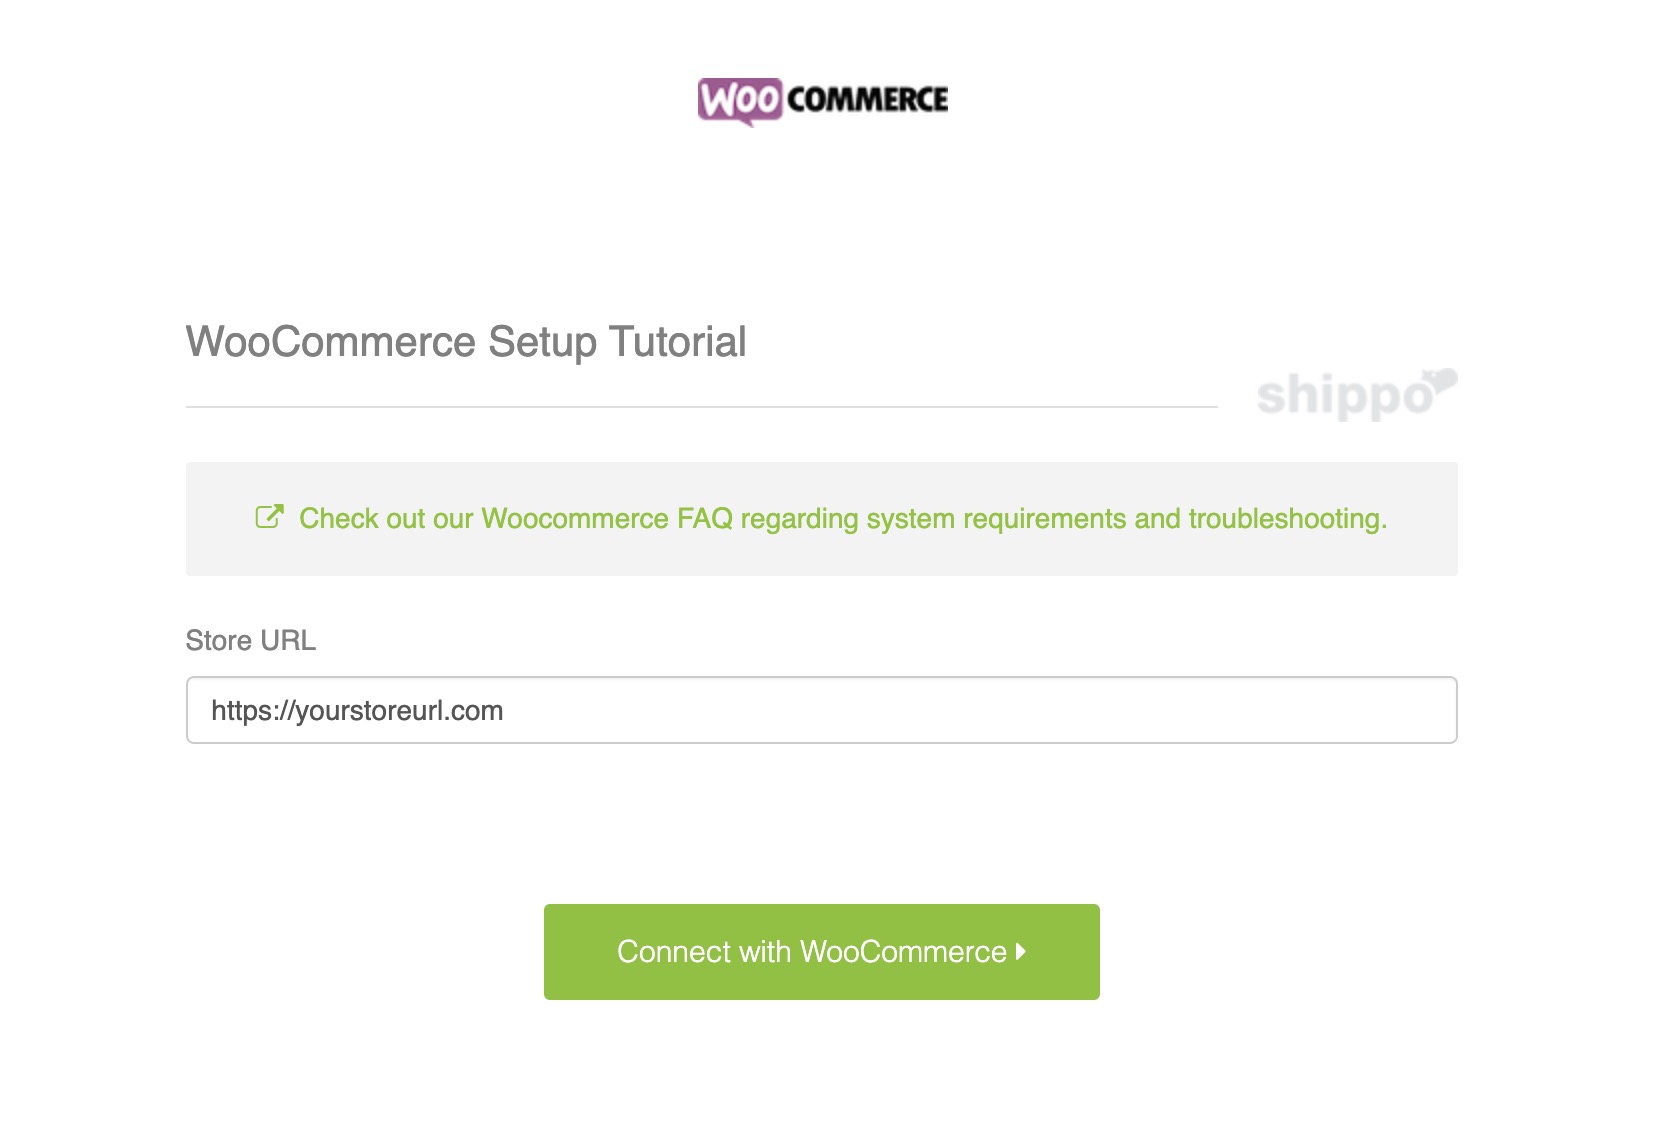
When you are here, do not forget to fill in the name of your store, coupled with the base URL, before clicking on the button “Connect with WooCommerce”.
Step 3: Approve the permission
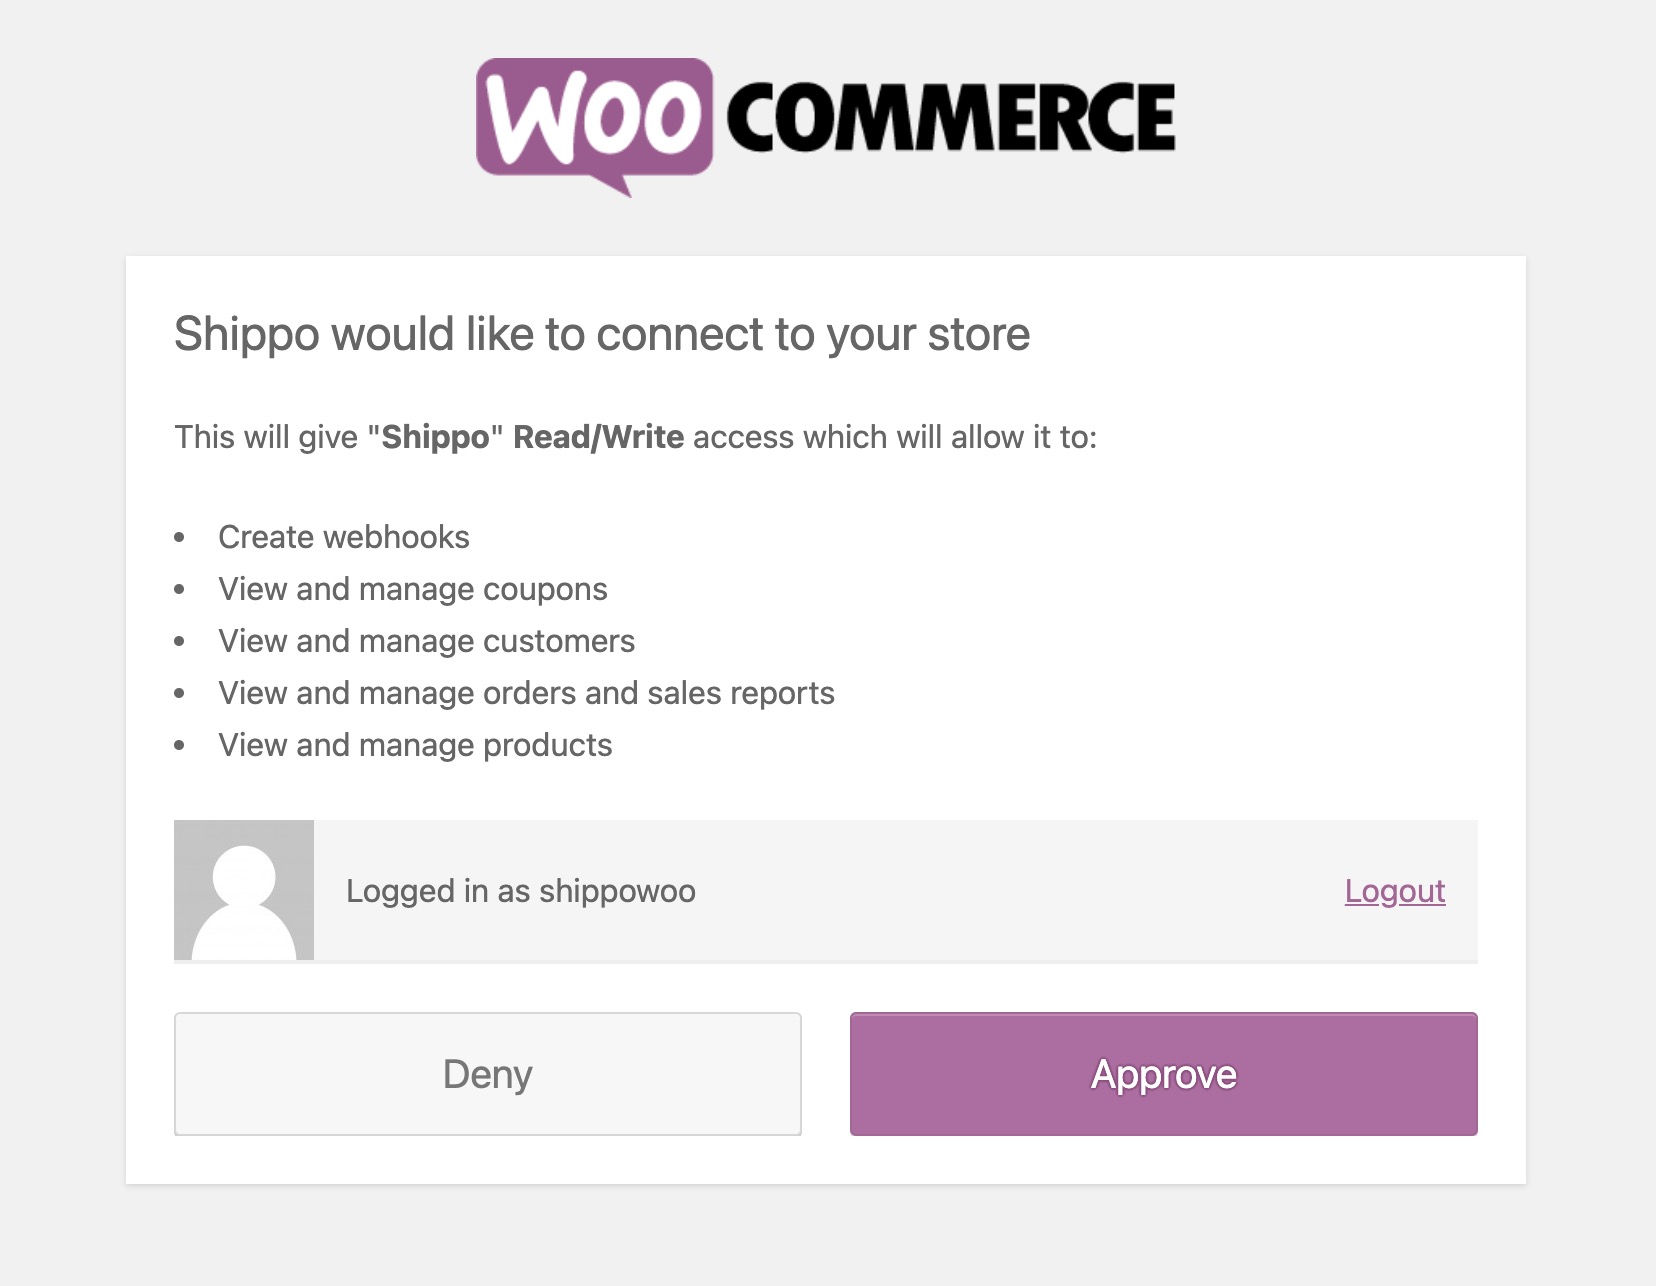
That’s what you need to do in order to connect your Shippo with WooCommerce. But the process does not end here. There are some more things you need to proceed with. Now you will be taken to your WooCommerce to approve the permissions in which Shippo has to operate, such as importing orders or sending back tracking numbers. And this step requires you to hit on the button “Approve”.
After approving this connection, you will be redirected back to the Shippo’s Orders page in which you are able to see orders of your WooCommerce store. If you run into any of the errors, you can’t connect Shippo to WooCommerce. So, it is important for you to figure out some of the reasons leading to these errors.
Remember to check whether the URL that you enter is correct or not. Check if it is misspelled if it is not the real store on WooCommerce, or check if it is not your base URL. What is more, one more reason that can make you not be able to connect Shippo with WooCommerce is that your WooCommerce plugins do not get updated to the latest versions. WooCommerce should be the 2.4 version or higher in order to work great with your Shippo.
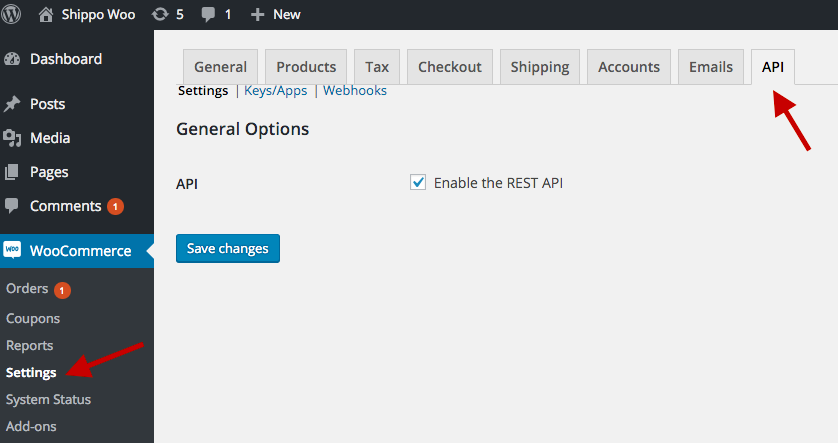
Furthermore, it might be due to the fact that you do not have any REST API to be enabled for the WooCommerce plugin. In checking this, you can go to your WordPress admin and choose the section WooCommerce. Here, it is time to hit on “Settings” before heading to the tab API. Be sure that the section “Enable REST API” has been already checked. If you do not find this tab API, you must upgrade the WooCommerce plugin as Shippo only works with the 2.4.10 version or the one higher. The last reason is that your WordPress permalinks are not set up correctly. To solve this, you need to navigate to your WordPress settings to find the section Permalinks. Here, you should rest assured that it had been set to the one called “Post Name”. It is possible for you to use Shippo only when these permalinks will be set to the thing called “Post Name”.
Afterward, do not forget to add the orders. You can select to add your orders through CSV files or create your orders manually. In this case, we will guide you on how to upload orders through CSV. The first thing to do is to create the CSV file. You could be able to perform this task in Excel or Google Sheets.
Go to your Orders page in Shippo where you can see the “Upload CSV” section, click on that button.

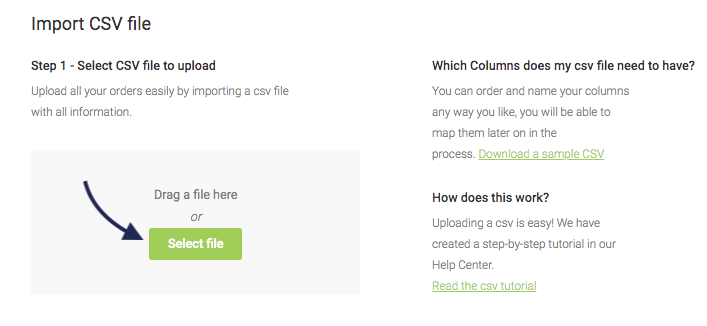
Next, do not forget to drag the CSV file in order to upload time. In other words, you could press “Select File” for choosing the CSV file to be uploaded.
Then, it is necessary to assign the proper categories of Shippo to these CSV columns before hitting on “Upload”.

That’s! Congratulation! You have successfully integrated Shippo with WooCommerce. Now, just go ahead with selling your WooCommerce products and let Shippo deal with the order fulfillment process. Everything will now be much easier and more effective with Shippo and WooCommerce.
2 best plugins to integrate Shippo with WooCommerce
While you can choose to execute this integration manually, one more way to help you achieve the goal is to use a plugin. Many online store owners prefer using plugins because of its flexibility, effectiveness, and effortlessness. It makes no exception to integrating with Shippo with WooCommerce. There exist multiple plugins out there to assist you in accomplishing the task without taking your time and effort. This is to say, store owners can pick up a useful plugin for this integration to be completed. Here, we will introduce you two most popular plugins to connect Shippo to WooCommerce. Let’s check out what they are.
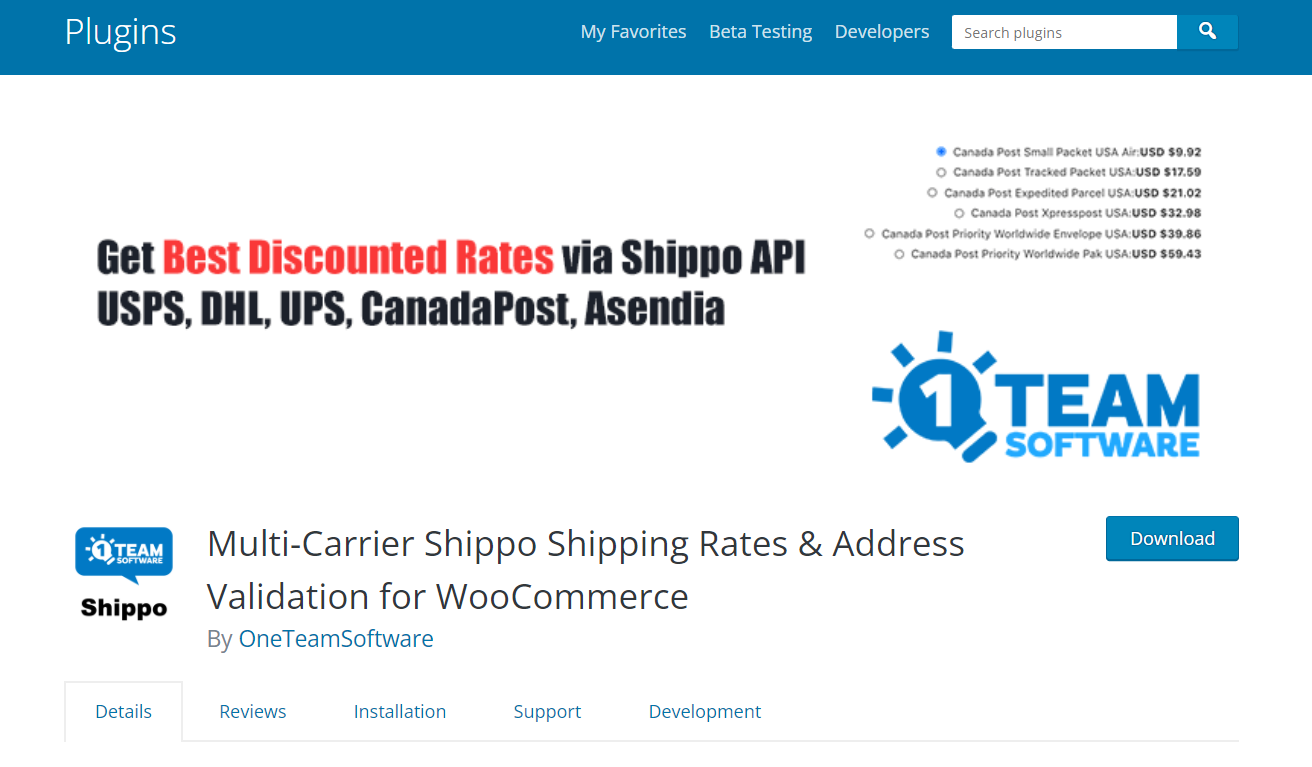
1. Multi-Carrier Shippo Shipping Rates & Address Validation for WooCommerce
Multi-Carrier Shippo Shipping Rates & Address Validation for WooCommerce is so great that you will be allowed to approach the lowest rates from DHL, FedEx, UPS, USPS, and so on. What is more, the real-time rates of shipping will be accurately displayed at the checkout or cart pages as well as the authenticated delivery address before any payment. Do you know that this plugin supports up to 50 carriers worldwide with the ability to enable shipping globally or shipping in accordance with shipping zones? Moreover, the requirement of minimum and maximum rate costs for the shipping rates are displayed throughout the checkout process.
Main features
-
Control the live shipping rate that can be exhibited in the checkout and cart pages
-
Be able to validate the delivery address before the permission of placing an order
-
Accommodate customers’ marketing and packaging material with the weight adjustment
-
Detect issues easily by enabling the mode of debugging
-
Speed up the site by reusing or caching the previously explored rate
Pricing: Free
2. Shippo by WooCommerce
Another not-to-be-missed plugin to help you integrate these two platforms is Shippo by WooCommerce. After assisting you with the simple connect, it also grows your online business by accessing the best rate easily at myriad carriers, coupled with experienced support in all steps. It will considerably turn powerful delivery technology into built-in features to directly sync with your WooStore. To be more specific, Shippo by WooCommerce also works great with several awesome tools for maximizing efficiency as well as margins throughout the while fulfillment journey.

Main features
-
Save your shipments with the best rates with the support from more than 85 carriers worldwide
-
Build into the workflow directly with intelligent configuration automation and defaults
-
Manage returns and labels at well
-
Power via shipping challenges such as quick customer support and good implementation
-
Secure the better rate for online businesses
Pricing: Free
Conclusion
Overall, if you know how to use this integration, you could get a pack of benefits to grow your online business. There is no denying that by connecting these two platforms, you can come up with a quick, affordable, and simple solution for automating the workflow. The process of integrating Shippo with WooCommerce might be intimidating and complicated for you if you do not know how to get started. This is why this article is born to help you accomplish the task. So, read our above tutorials and follow each detailed step to be successful. Hopefully, it will be helpful for you. Stay tuned for more upcoming great tips and tricks.


