
How to Create Popup in WooCommerce

Lightbox popups make it simple to capture a customer’s attention and persuade them to make a purchase. WooCommerce popups may be used to offer coupons, promote specials, sign up visitors for your email list, and more.
In this article, we will show you How to create popup in WooCommerce to upgrade your online store ultimately.
Reasons to create popup in WooCommerce
You can use popups to help you if you run a WooCommerce store:
- Deliver timely messaging to your customers to increase sales. You may, for example, show the popup when customers are about to leave your store.
- Offer a coupon or free shipping to reclaim abandoned cart sales.
- Cross-sells (promotion of similar products) and upsells help you sell more things (promoting a better-featured product).
- Build your email list, increase your social media following, or remind customers about current specials and promotions.
How to create popup in WooCommerce
1. Coupon popup
Coupons are an excellent strategy to boost sales. Customers will be aware of your coupon and encouraged to use it if you use a popup.
Simply choose the Popup campaign type to generate a coupon popup. Then, you can select it by dragging your mouse over the template and selecting the Use Template button. The Coupon template will be used.
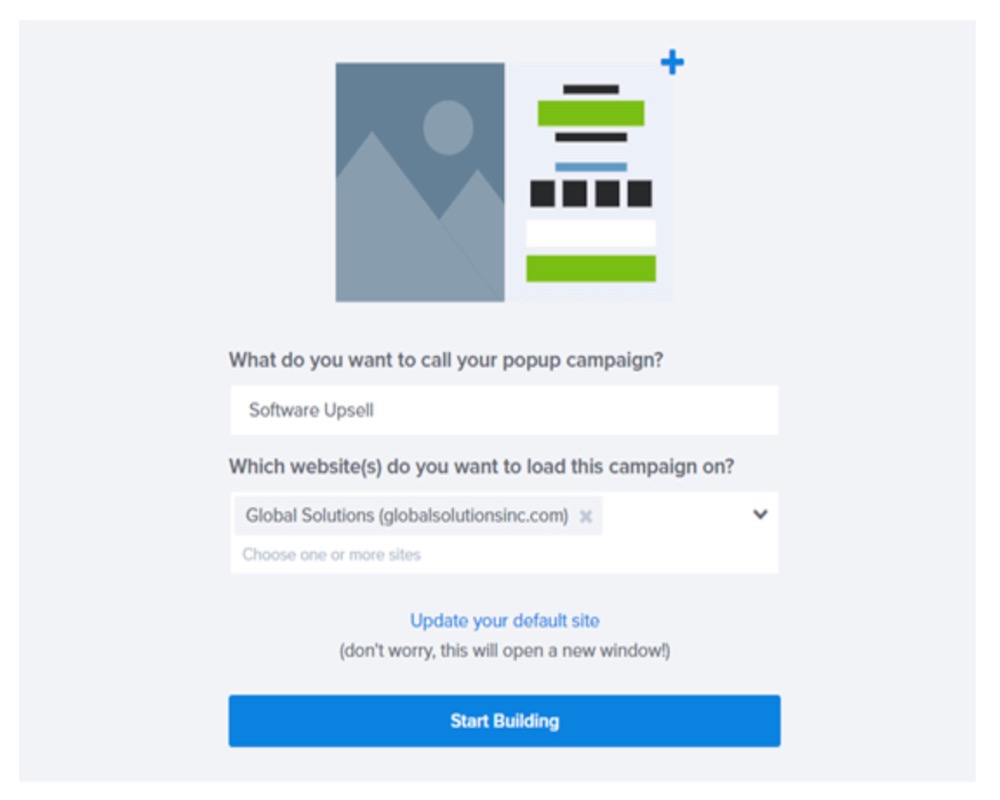
You will be asked to name your campaign and select which site you want it to appear on when you use OptinMonster.
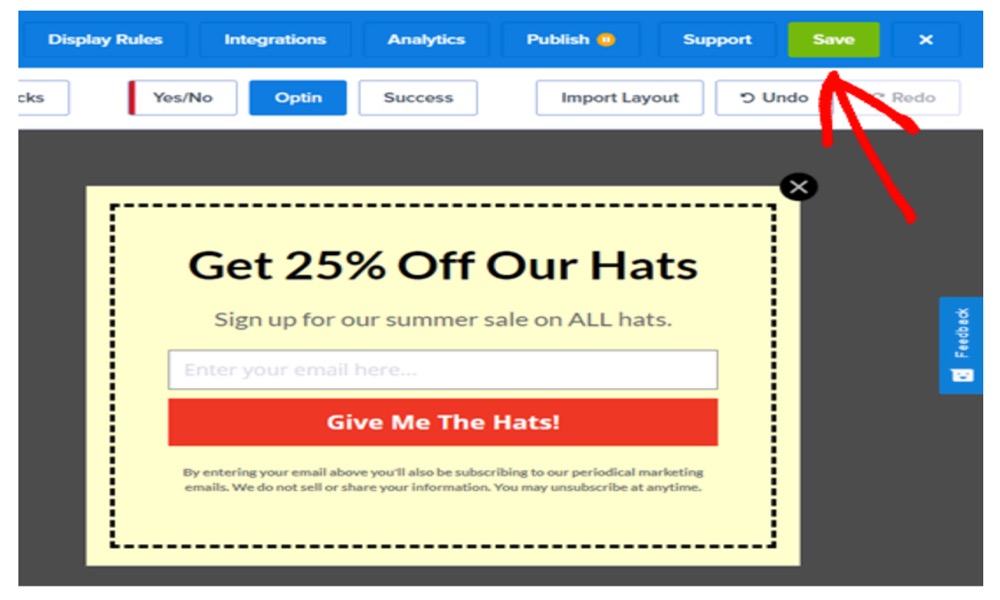
It is now time to create your coupon. To alter the coupon, simply click on any area of it. You can alter the text, font, and color scheme, among other things. There is an update the coupon’s heading wording here:
Parts of the coupon can also be removed. For example, you may determine that an email sign-up box is unnecessary. You might just include a promo code in the popup to entice users to use it immediately.
Once you have completed making changes to the coupon design, don’t forget to hit the Save button:
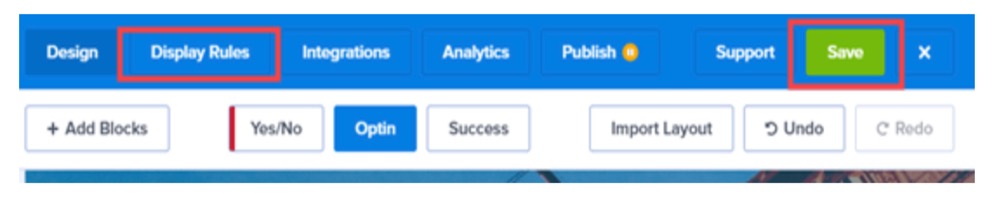
You will need to configure the display rules once you have finished creating your coupon popup. In the top bar, select the Display Rules tab. By default, the coupon will appear on all pages of your site after 5 seconds have passed.
2. Cart abandonment popup
A popup is a terrific approach to remind visitors to complete their checkout. When a user is on the shopping cart page and is about to leave your site, you may design a custom WooCommerce popup to appear.
To begin, open OptinMonster and start a new campaign. For the campaign type, you must choose Popup. After that, select a template for your popup. The Abandoning Checkout template will be used:
You might wish to adjust this to a longer or shorter period, or base it on the visitor’s overall time on your site. You can also wish to limit the coupon’s visibility to specific pages on your website.
The final step is to publish and activate your discount popup on your website. For assistance, see the instructions at the end of the article.
Give your popup campaign a name and then click the Build button:
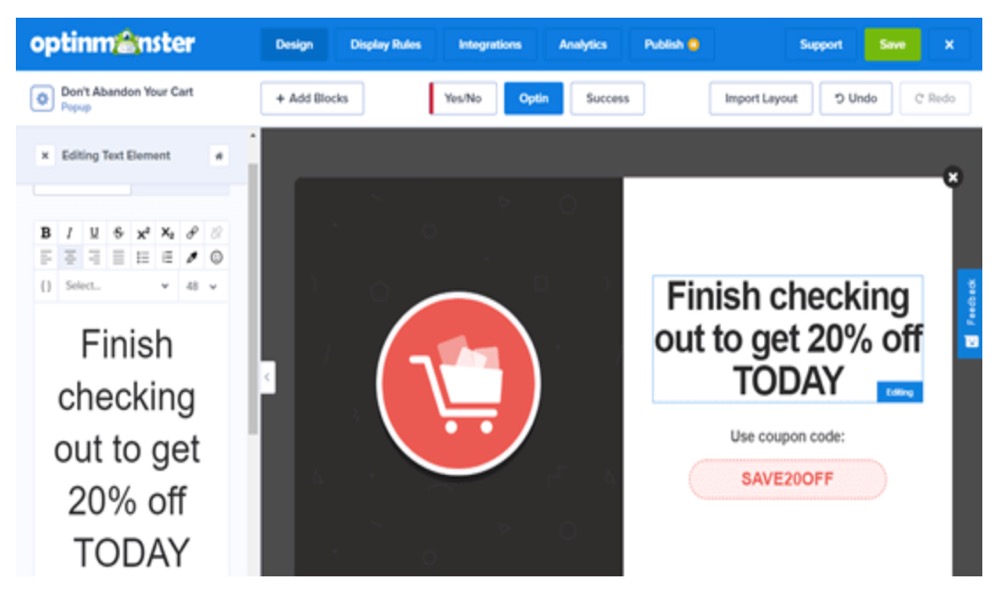
The campaign builder will open with your chosen template. You can alter the text, colors, and fonts, among other things. Simply select the element you wish to edit by clicking on it:
Don’t forget to click the Save button on the top right when you have completed making changes.
Your OptinMonster campaign will be saved.
Now you must configure your popup to appear on your WooCommerce shopping cart page. To begin, select the Display option.
If it is not already selected, pick the time on page dropdown, then select Exit Intent. Exit-intent technology from OptinMonster allows you to show your message just as a user is about to leave your website.
After that, continue scrolling down the page. Set the first dropdown to the current URL path, and the second dropdown to exactly match. Enter the URL of your shopping cart page in the box that opens.
Remember to save your modifications. Then, on the Publish page, you may publish your coupon to your online store. Instructions on how to do this can be found later in our tutorial.
3. Cross-sell popup
Cross-selling is another excellent technique to increase sales. When you cross-sell, you are promoting a product that complements what the customer already owns.
You must first establish a new campaign in OptinMonster before you can construct a cross-sell popup. Make sure the campaign type is set to Popup, and then pick any template you like.
For the popup below, you will utilize the Shopping template.
After that, OptinMonster will ask you to name your campaign and select which website you want to use it on. Simply click the Start Building button once you have completed this.
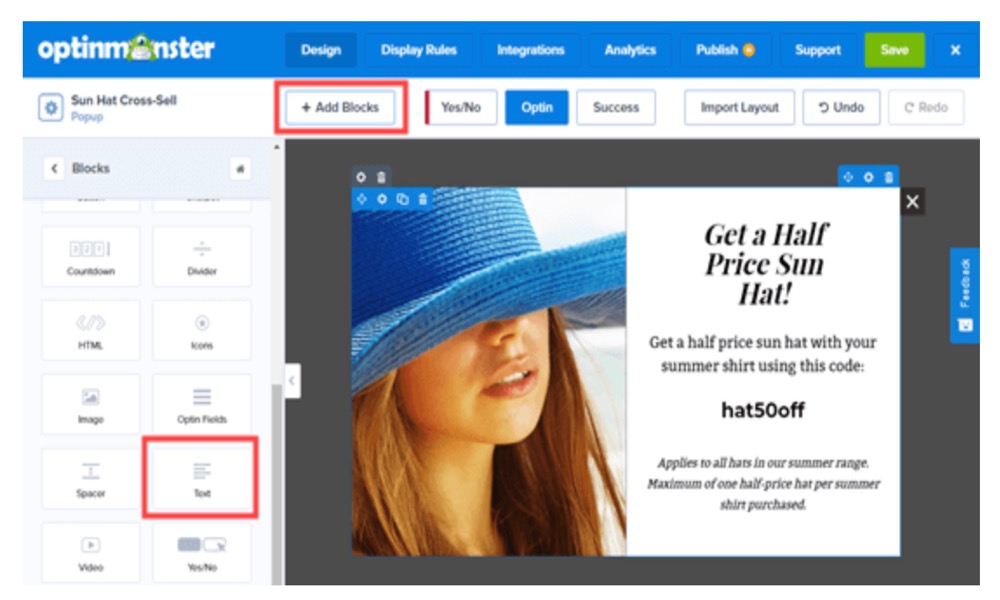
You will be directed to the campaign editor. By clicking on it, you can edit any feature of your template. For the campaign, below publish a new image:
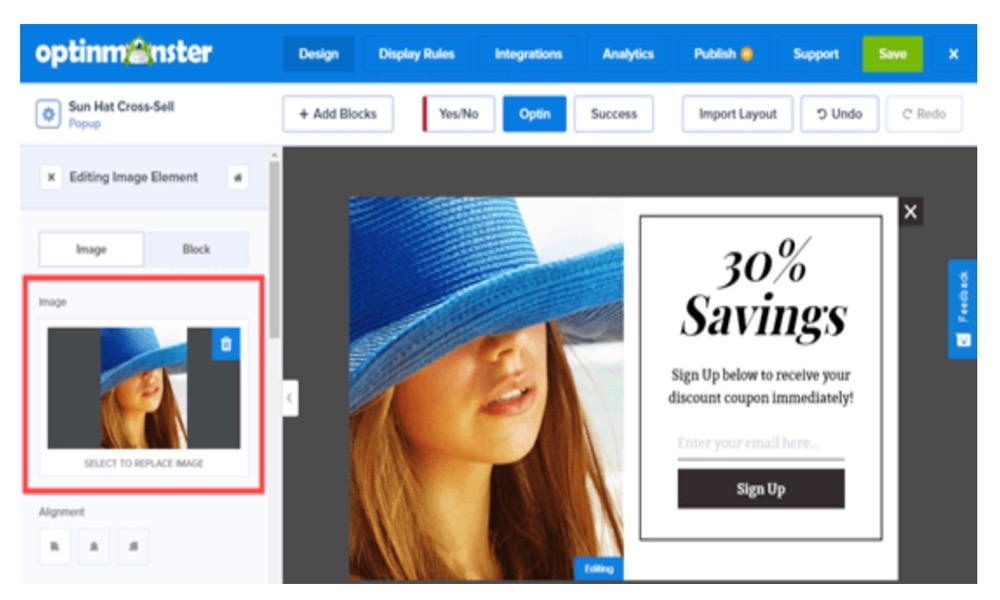
It is simple to change the text, buttons, and other elements. You may include the coupon right immediately by eliminating the email newsletter registration form, just like we did. To deliver the coupon code, we added extra text blocks to our popup:
If you keep the email signup, make sure to change the popup’s Success view to show your chosen coupon code.
Don’t forget to hit the Save button on the top right when you have completed building your campaign.
You must integrate OptinMonster with WooCommerce to present your campaign to customers who have specific products in their carts.
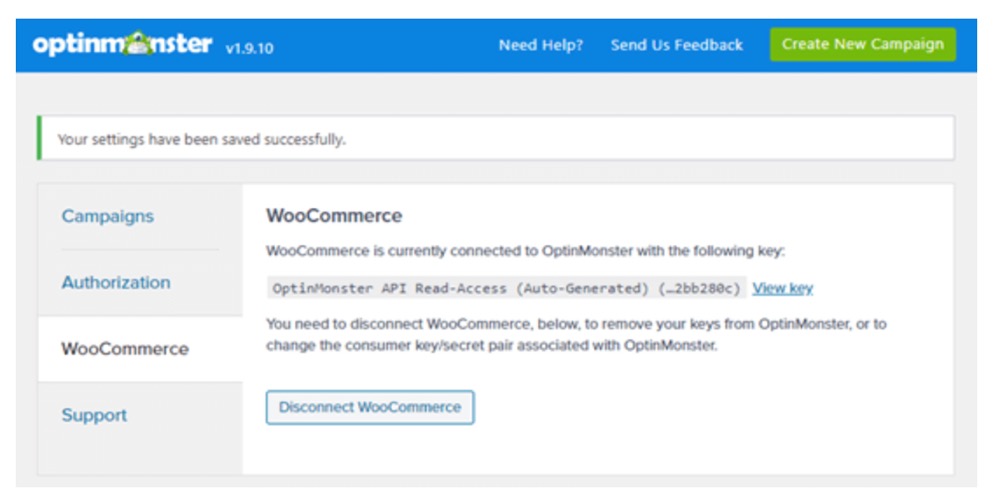
To do so, go to your WordPress dashboard and click on the OptinMonster tab, then the WooCommerce tab.
You should see a notice indicating that WooCommerce and OptinMonster are linked:
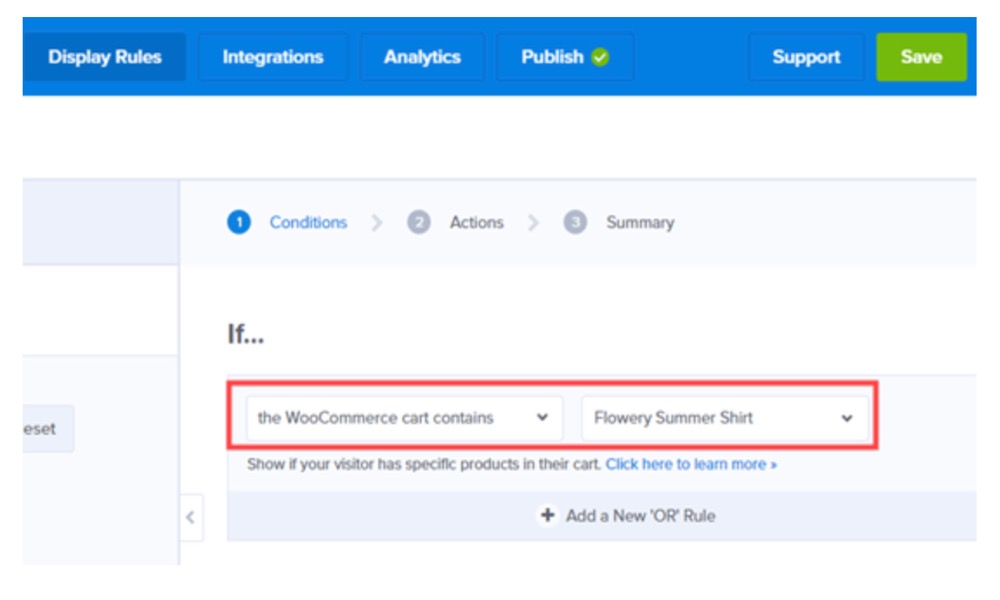
Return to the OptinMonster app and make any necessary changes to your chosen campaign. Select the WooCommerce basket contains and your desired product for your rule under the Display Rules tab:
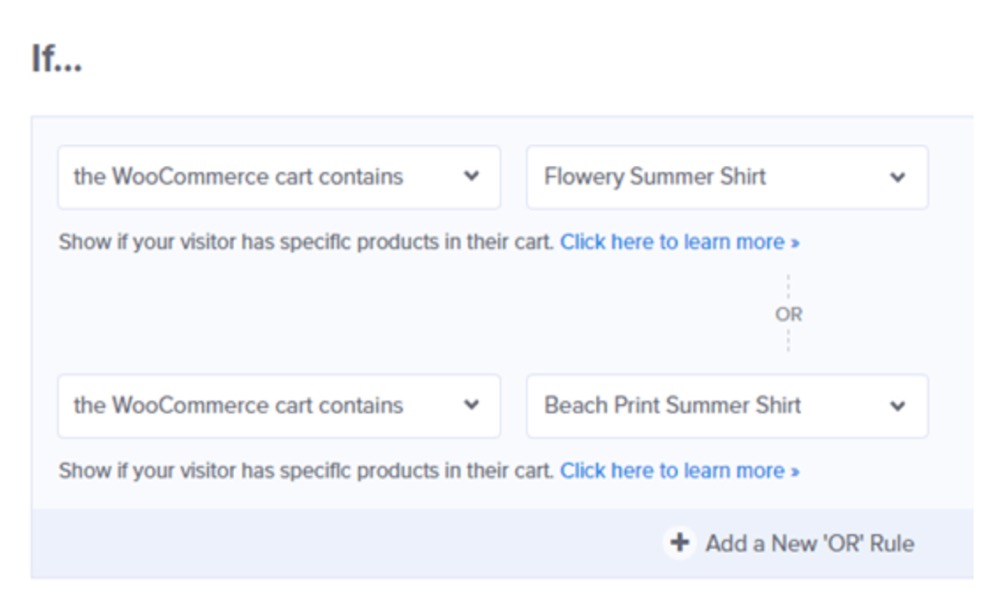
You will need to create a separate rule for each product that you want the cross-sell to apply to. To create a new OR rule, simply click:

Then, as previously, add your rule:
Don’t forget to save your work by clicking the Save icon in the upper right corner of the screen. To make your popup live on your site, simply follow the instructions at the conclusion of this guide.
4. Upsell popup
You can use an upsell popup to persuade clients to buy a more expensive product than the one they were contemplating.
You must first build a new OptinMonster campaign before you can develop your upsell popup. For the campaign type, choose Popup and any template you want to use. The Flash template will be used.
After choosing your template, OptinMonster will ask you to name your campaign and choose the site where you want it to run. Simply click the Start Building button once you have completed this:
By clicking on the item, you may now edit anything about the campaign that you want. There is a change the timer to a dynamic (evergreen) one. This means that it will be customized for each customer:
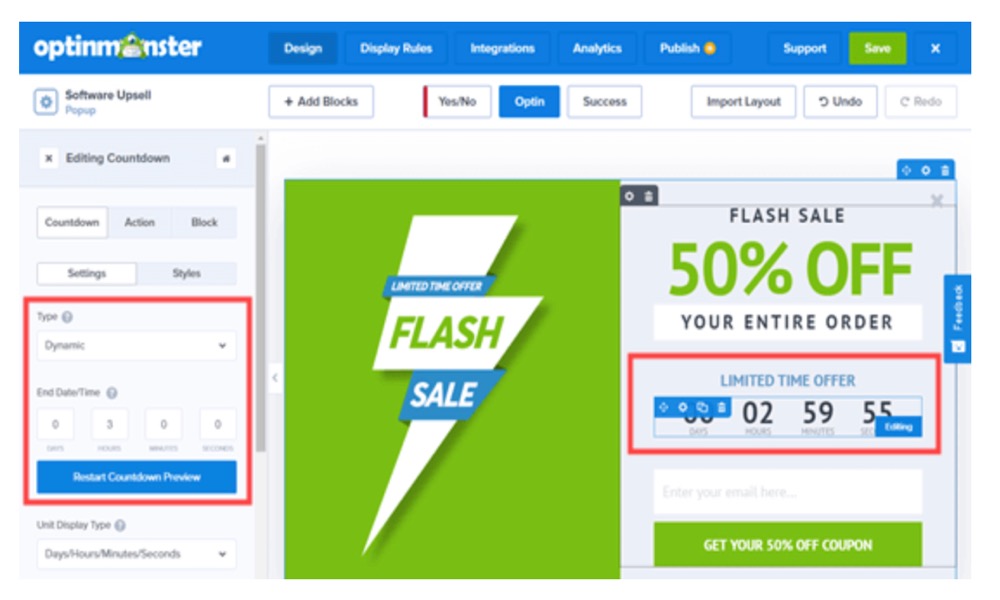
Simply remove the email option if you want to send customers the voucher right away. Instead, you can utilize the Add Blocks option to include a text field with a coupon code.
When you are satisfied with your coupon, click the top right-hand Save button. After that, go to the Display Rules tab.
To connect OptinMonster and WooCommerce, simply follow the instructions above for cross-selling coupons. Then, when the user is looking at a specific product, add a display rule to show the popup.
Save your popup after you have defined your display rules. Then, simply follow the instructions at the end of this guide to make it live on your site.
5. Fullscreen popup
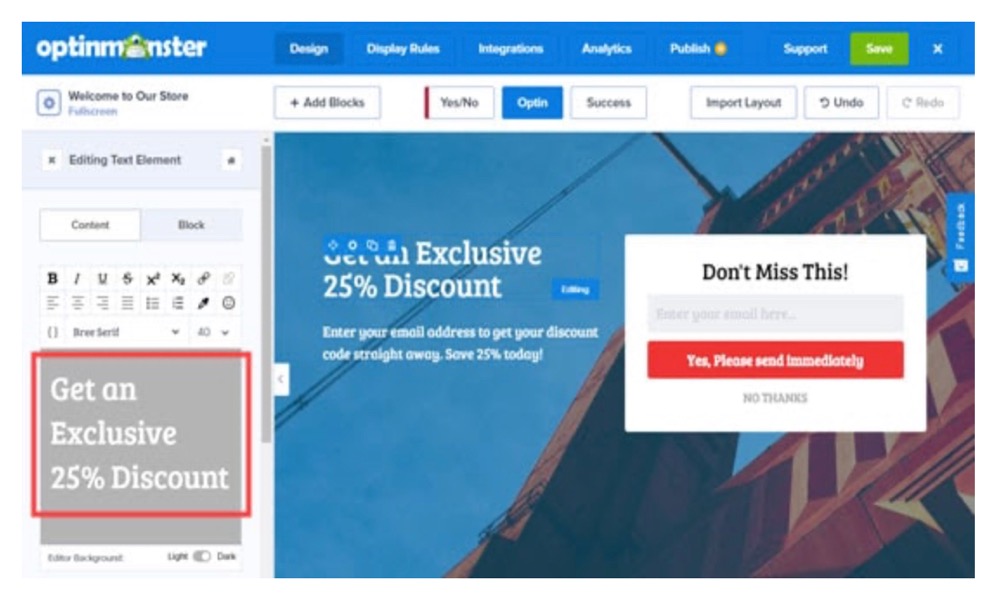
A fullscreen WooCommerce popup is another highly effective popup you can make for your online store. This allows you to greet new visitors and invite them to sign up for your email newsletter. In exchange, you may offer them a unique discount.
Create a new campaign in OptinMonster and select the Fullscreen campaign type to create a fullscreen popup. After that, pick a template. For the popup, utilize the Estate template.
The next step is to give your campaign a name and decide which website it will appear on. When you are ready, click the Build Now button.
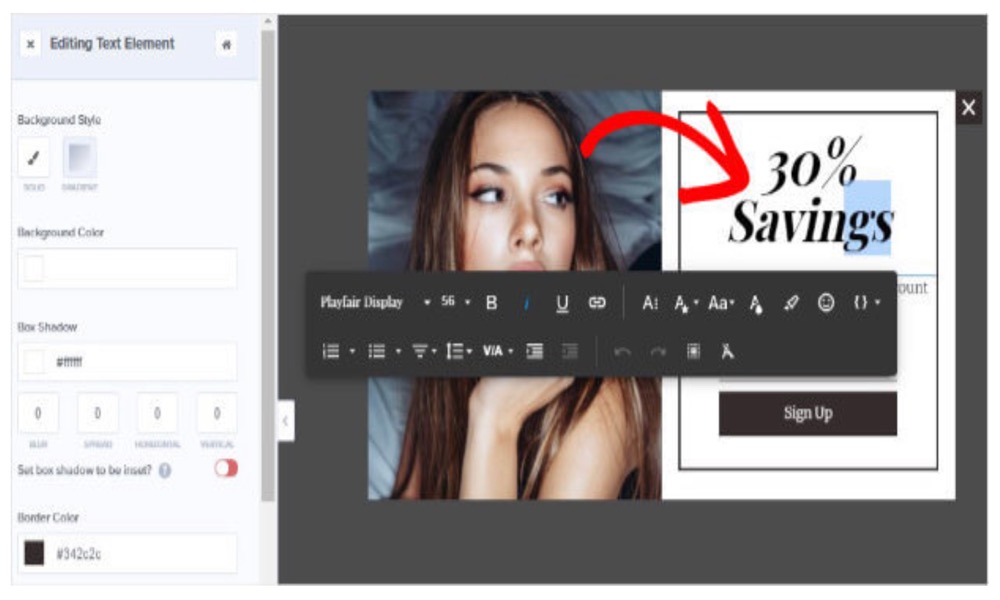
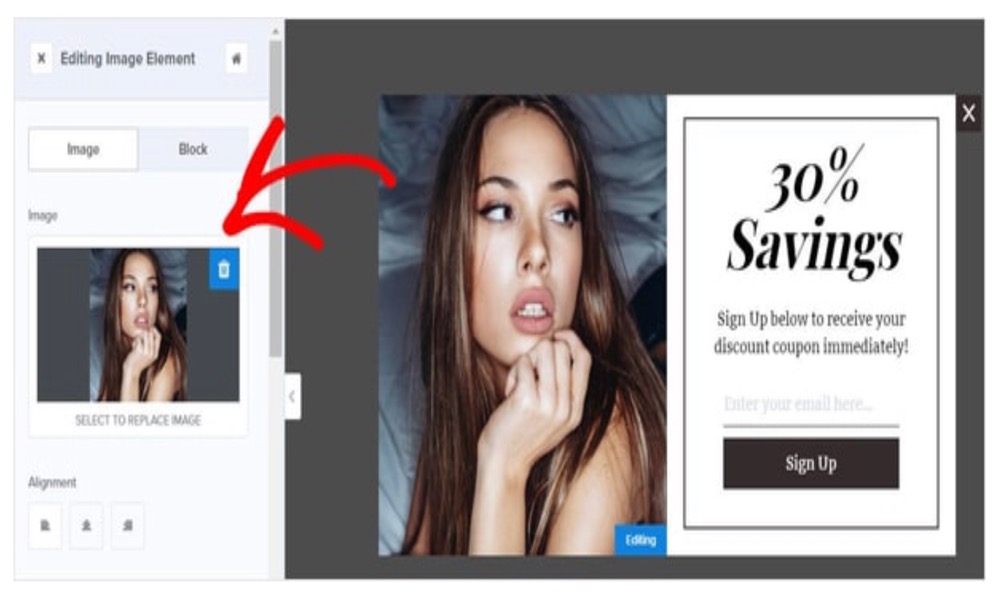
In the OptinMonster builder, you should now see your fullscreen welcome mat. You can change the content and image to fit your store’s needs. Simply alter whatever you want by clicking on it.
You will edit the text on the left hand window by clicking on it and editing it:
Make any other modifications you would like.
By selecting the Integrations tab, you may connect OptinMonster to your email list. Take a look at our tutorial for spinning the wheel popups for more information.
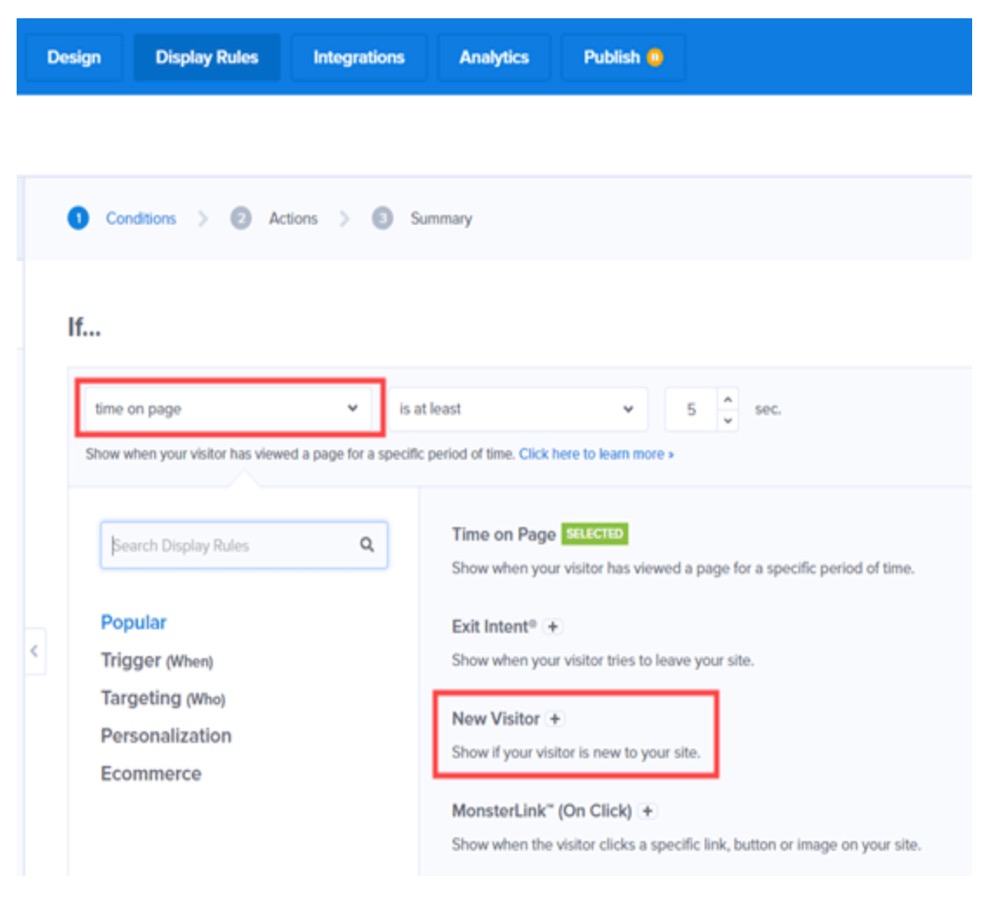
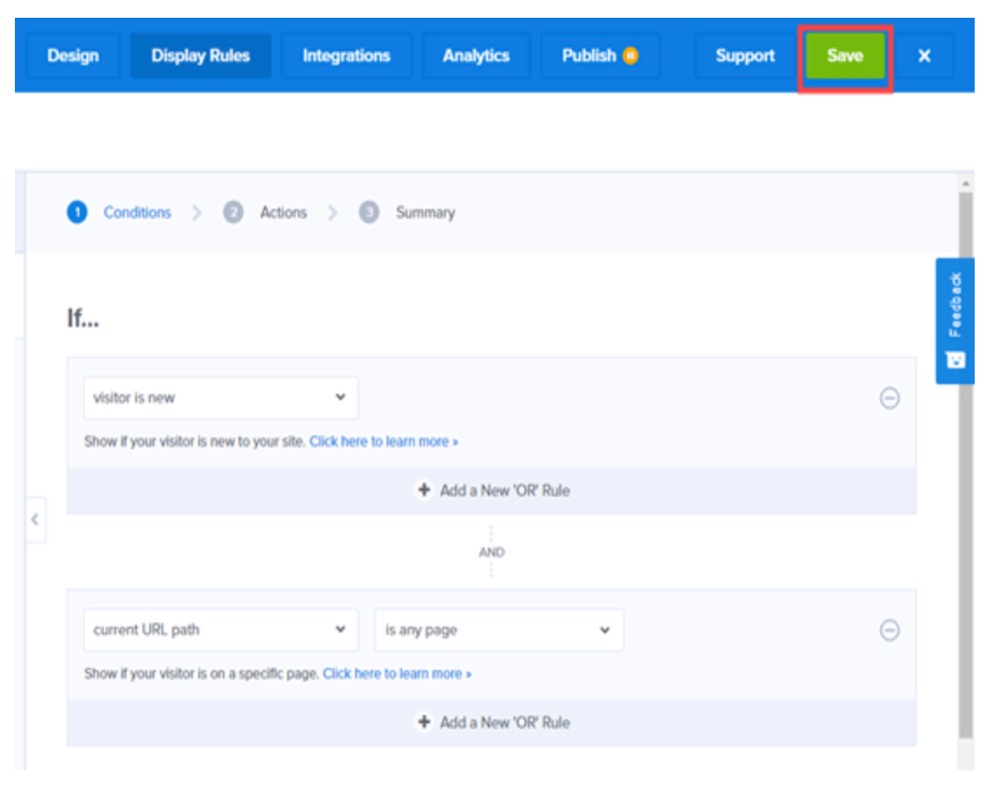
Don’t forget to click the Save button when you are through customizing your welcome mat. Then you can go to the Display Rules tab:
Set your welcome mat to only display to first-time guests per the display guidelines. To do so, select the New Visitor option from the time on page dropdown:
Simply set the current URL path dropdown to any page if you want the welcome mat to appear on all pages of your site. Remember to save your work by clicking the Save icon at the top of the screen:
Following the instructions below, you can now go ahead and activate your popup on your website.
6. Checkout popup
You must first log into your OptinMonster account.
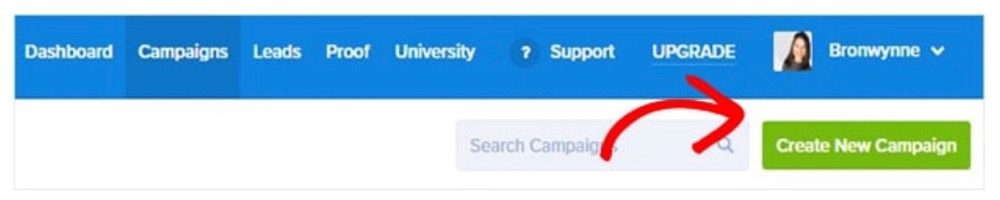
From your dashboard, select Create New Campaign.
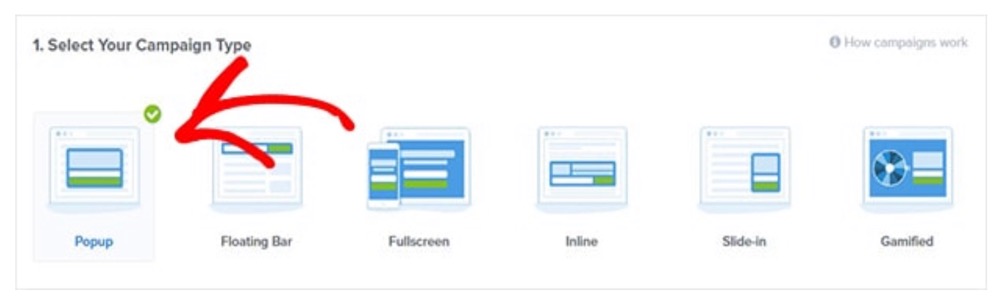
The next step is to select the type of campaign you want to run. Multiple campaign choices are available with OptinMonster, including:
- Full-Screen ads: covering the entire screen with a single call to action, such as a discount, are known as fullscreen campaigns.
- Floating Bar: floating header or footer bars follow you across the screen and are useful for advertising sales and special deals.
- Slide-in Scroll: using a Slide-in Scroll Box, you can offer timely deals and related products in a subtle way.
Popup will be used in this lesson. The following step is to select a template. OptinMonster provides more than 50 beautiful prebuilt themes that operate on any device.
If you are still unsure, you can filter solely by eCommerce templates. Simply select the Store Owner filter.
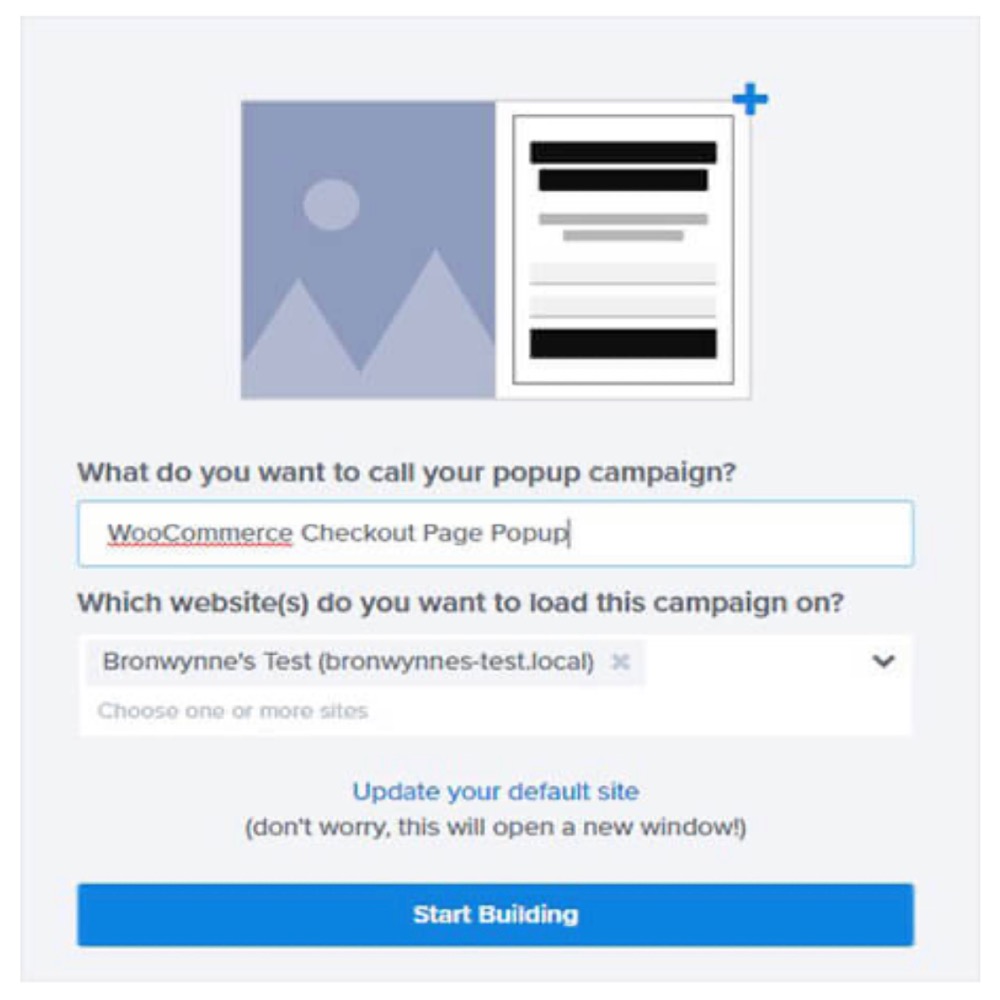
To access the OptinMonster editor, click Start Building. OptinMonster will now prompt you to name your campaign. You can now personalize your popup.
It is now time to create your checkout popup. The drag-and-drop builder in OptinMonster makes editing your WooCommerce popup a breeze.
To edit any section of your popup, simply click on it.
Simply click the text to edit it. You can alter the colors, fonts, and other elements.
Countdown timers and video clips can also be added to your WooCommerce popup.
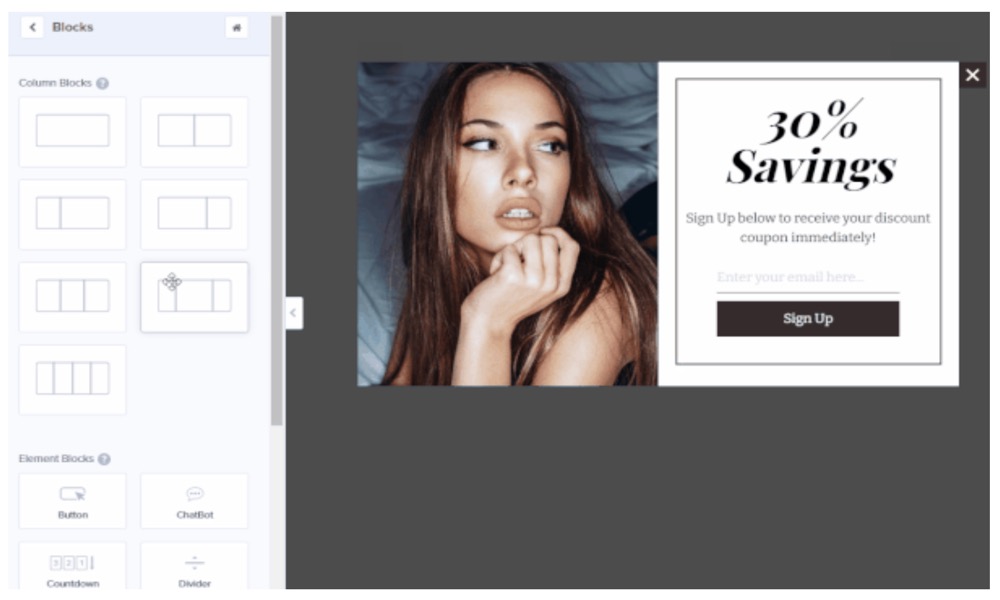
Simply go to the top of your editor and select Add Blocks.

Button, ChatBot, Countdown, Timer, Divider, and Text are some of the elements you can use.
Simply drag and drop the block onto your popup.
3 Best WooCommerce Popup Plugins
1. Optinly
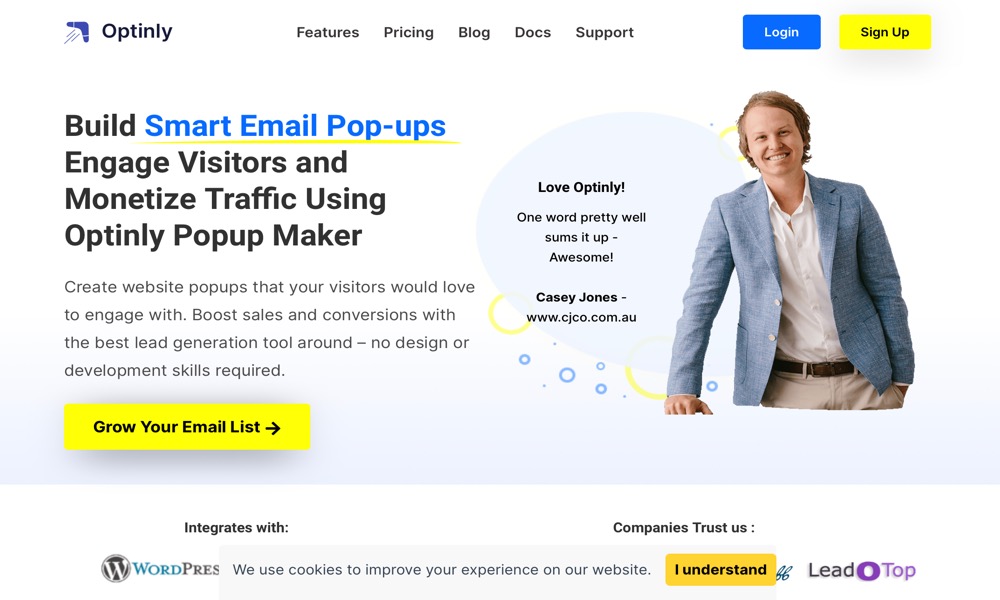
Optinly is a goal-based WooCommerce popup plugin that has already piqued the interest of a number of WooCommerce stores due to its unique approach to allowing store owners to create popups. Optinly provides store owners with a list of some of the most frequent eCommerce marketing goals from which to choose. Furthermore, the fact that each marketing goal comes with matching popup templates simplifies the whole popup creation process. All you have to do now is decide on the goal of your popup campaign, select a relevant popup template, customize it, and publish it. From the moment you sign up to the moment you create your first popup campaign, it just takes a few minutes.
Features:
- 30+ highly adjustable WordPress popup layouts that support 10+ growth marketing goals
- There are six distinct sorts of popup forms to pick from, including gamification popups.
- Exit intent triggers, timed delayed triggers, page based triggers, and more advanced popup triggering options are available.
- No design or development abilities are required with the built-in WYSIWYG popup builder.
- Target visitors depending on their interests, devices (mobiles, PCs & tablets), time spent on websites and more.
Price: $25
2. WooCommerce Splash Popup
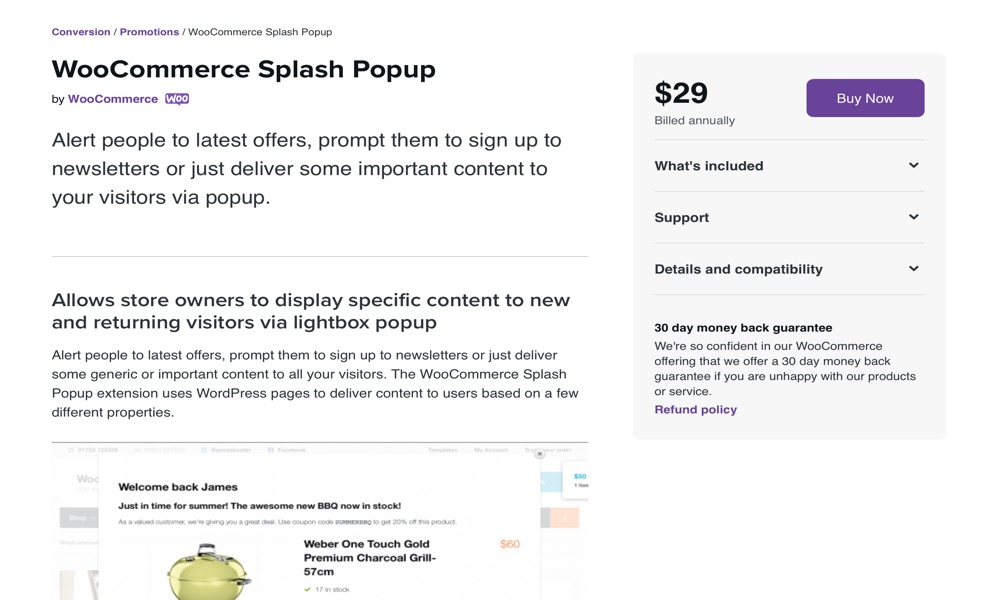
WooCommerce Splash Popup allows business owners to display helpful product content while also encouraging website users to sign up for your newsletters. You may use lightbox popups to notify clients about ongoing promotions and offers as soon as they visit your store.
Features:
- New visitors, logged-in users, and existing customers will all see different popups.
- Once a popup has been closed, the plugin creates a cookie to prevent it from being shown to the same customer again.
Price: $29
3. Sumo - Boost Conversions and Sales
This is the plugin you must have if you want to expand your email list. Sumo - Boost Conversions and Sales allows you to increase lead conversion in your online store by using timed popups. The premium feature of the plugin allows you to add “Share buttons” to the popup so that your audience can share your material.
Features:
- Installation is simple.
- Popups can be embedded in articles and product sites.
- Every email subscriber’s return on investment is tracked.
- Assist customers in boosting their average order value.
Price: $49
Conclusion
The popup captures the attention of your visitors and invites them to interact with your brand. It’s critical to encourage website visitors to interact with your online store from the very beginning. Seventy percent of internet visitors who leave a website/online store for the first time are unlikely to return. A popup notification is a wonderful alternative when you want to capture useful client data such as customer emails. Also, keep in mind that popups can help you enhance your sales conversions.
We hope that you will find this article about How to create popup in WooCommerce fundamental!


