
How to Create & Manage WooCommerce Product Tabs

One of the most effective ways to assist your customers in understanding your products deeper is by providing them with the information they want. As they receive more information, they tend to know more about products in your store, thereby resulting in a greater conversion rate. In this case, product tabs play a crucial role in your WooCommerce store. In some cases, you want to create more content, including the detailed bulk purchase, instructions, or maps, creating product tabs is a perfect way to make your online business more professional.
This is to say, by knowing how to create and manage WooCommerce product tabs, you can have better control of your store, thereby offering customers a unique shopping experience. In this article, we are going to introduce you to all the things you need to know about these product tabs. Then, you will become an expert in managing your online business. Now, let’s thrive in!
Why should we need to create and manage WooCommerce product tabs?
It is easy to understand the purpose of creating product tabs in WooCommerce. There is no denying that this activity is efficient in making shoppers understand more what your store is selling. Nevertheless, it evens brings about more advantages than you could imagine. So, let’s go with us on this part and we will explore together the obvious benefits of creating and managing WooCommerce product tabs.
-
Enhance your product page’s usability: Creating and managing product tabs in a good way will help to arrange the product information logically, thus being easy for customers to get what they need.
-
Offer customers a greater comprehensive perspective: Product tabs assist store owners in organizing tabs. Then, customers can seek relevant information quickly to determine which product they desire.
-
Help store owners include a wider range of store content types: Product tabs are where FAQs, tutorial videos, and technical data sheets are clearly displayed for customers to encounter easily.
How to create WooCommerce product tabs?
It is not complicated to create WooCommerce product tabs. Here, we are about to mention 2 popular methods to help you create your desired product tabs. One is to use code snippets, and the other is to use a plugin. Each method comes with its strong points, so you are advised to read through both of them and figure out what method will fit your skill, knowledge, and your store as well.
1. Use code
In the first method, a code snippet will be used to help you create WooCommerce product tabs. Do not worry if you do not excel at coding. The reason is that your task is just to copy the provided code and paste it to the right location. Everything will be much easier with this guide. Hence, if you find this way quick and simple, do not hesitate to implement it immediately.
To create WooCommerce product tabs, you will apply the below code and paste it to your file Theme functions.php:
add_filter( 'woocommerce_product_tabs', 'woostify_custom_tab' );
function woostify_custom_tab( $tabs ) {
    $tabs['woostify_custom_tab'] = array(
        'title'    => 'Quantity Pricing',
        'callback' => 'woostify_custom_tab_content',
        'priority' => 50,
    );
    return $tabs;
}
function woostify_custom_tab_content( $slug, $tab ) {
    echo '<h2>' . $tab['title'] . '</h2><p>Buy 10, reduce $10 each one. For more purchases, contact us.</p>';
}
However, there might exist several configuration issues related to the custom code. Therefore, it is necessary to create one child theme before you add the code as well as get it activated on your store.
If you want to head to your file functions.php of the child theme, you are recommended to go to the section “Appearance” from the dashboard and choose “Theme Editor”. Check out the below screen to see where it is located.
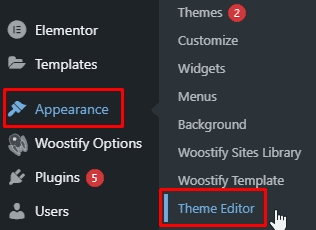
Then, you will need to look at your right side to see the page theme editor in order to hit on “Theme Functions”. This will be where you copy the above code and add it to that file.
2. Use a plugin
In case you prefer to use the plugin or extension thanks to its advanced and efficient features for customizing your store, you are advised to approach the plugin WooCommerce Tab Manager. This lets you better control our product tabs by letting you create new tabs and reorder tabs easily. With the drag and drop interface, create the new tab layout or share tabs between products, this plugin is a must to go.
Step 1: Install and activate the plugin
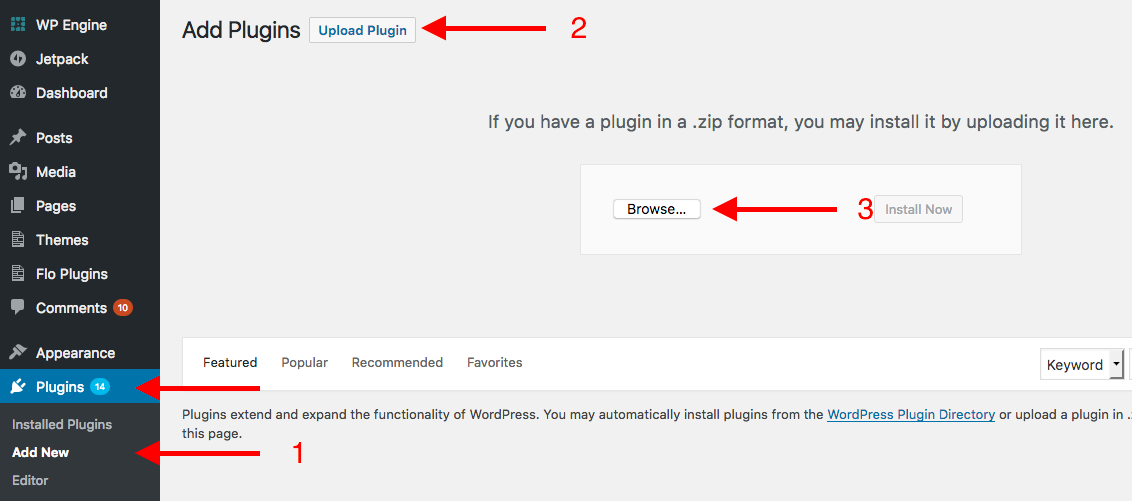
What you need to do now is to download this plugin from your dashboard in WooCommerce. After that, proceed to the section “Plugins” where “Add New” will be selected to head to the button “Upload”. Here, you will choose the downloaded Zip file for uploading it. The next step is to hit on “Install Now” then get it activated.
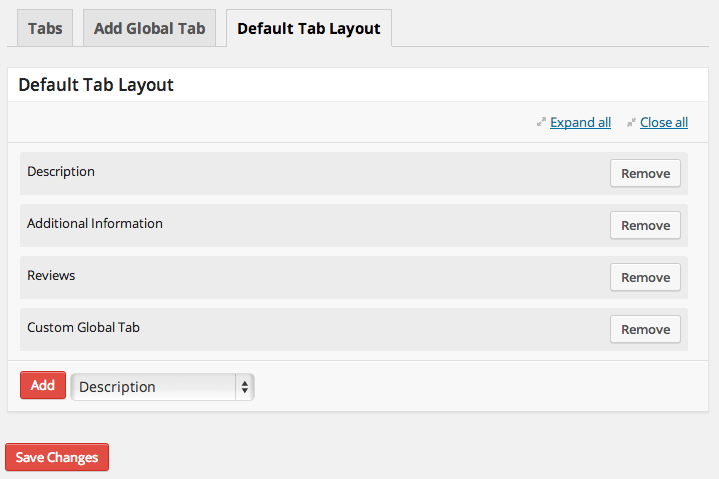
Step 2: Setup and configure the tab types
You need to configure your Tab Manager, and it is necessary to have an in-depth look into the tab types available for the management.
-
System/Core tabs: This includes the default, Reviews, Attributes, and Description tabs.
-
Product-level tabs: They will be tabs added to each product and customized for a particular product.
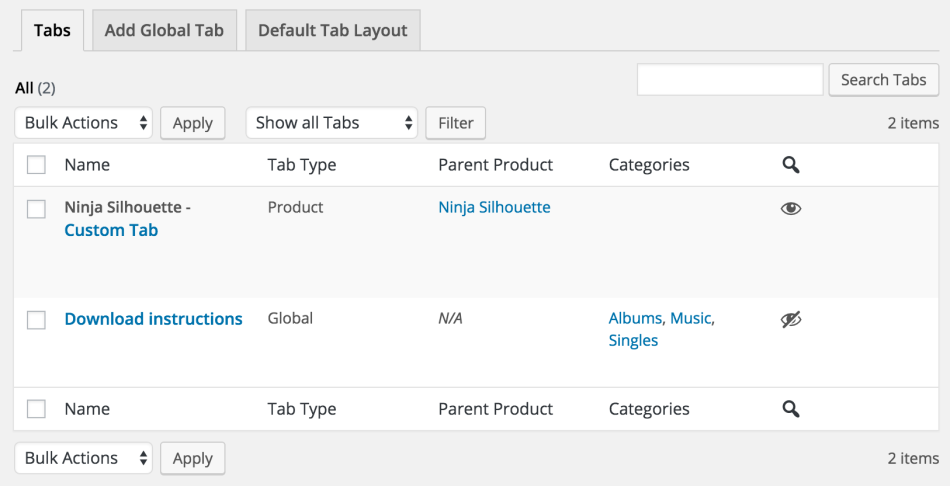
Now it is time to get to know how you can create product tabs. Tabs could be constructed at your product level. This is helpful for your product-specific content. If you are looking for a way to create one product tab, your job is to navigate to the Product Edit page for the new tab within the meta box “Product Data”. This box will come with the name “Tabs”. Within this meta box “Tabs”, you can encounter one checkbox in which you will be allowed to override your default layout of the tab. Then, this can be initially checked, which means that your “Default Tab Layout” can be in force.
To override this default tab layout as well as create a product tab, you should check this kind of box. In case, you make up your mind to hit on “Custom Tab” that lies at the form bottom and hit on “Add”, you could be able to construct, then order your brand-new product tab.
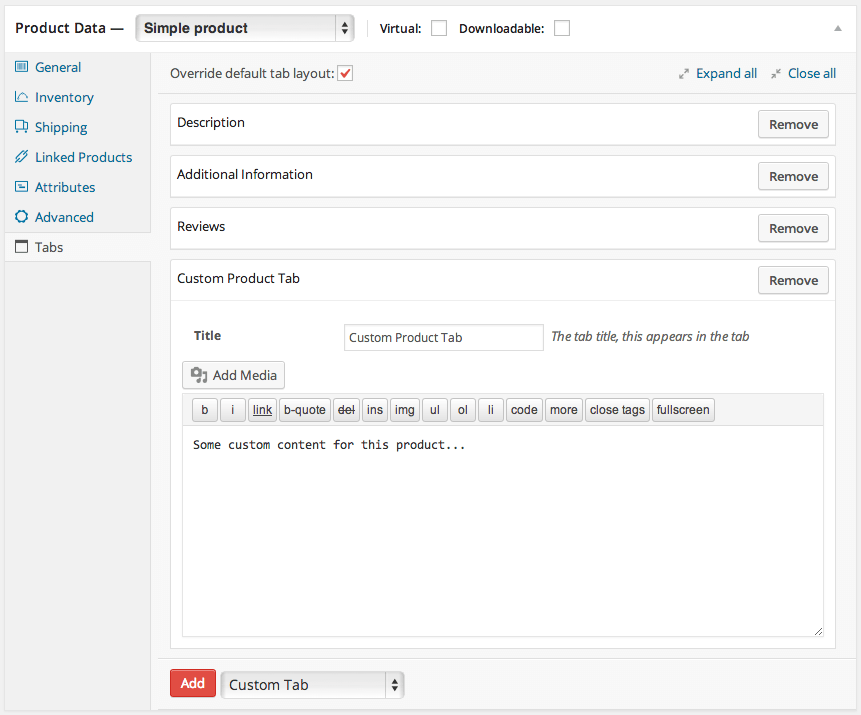
The content of this product tab could be directly edited within that interface. As soon as you create a tab as well as update your product, the newly constructed tab, however, can appear within the menu “WooCommerce” > “Tab Manager”. Here, you are capable of editing your content with the use of an HTML editor.
How to manage WooCommerce product tabs?
In the above-said part, you are guided to implement the procedure for creating WooCommerce product tabs. Nevertheless, this is not enough to enhance the performance of your online store. Instead, you should keep them in good management when needed to customize it to the requirement of a specific product. Some simple steps are taken to help you manage your WooCommerce product tabs as below:
Step 1: Reorder your product tabs
In case you are keen on reordering your product tabs in your store to make them compatible with existing products, it is easy as a piece of cake to do so. Your task is just to add the below function to the file functions.php in your WooCommerce theme. This would become very effective when it comes to overriding your default product tab on the product page within WooCommerce.
// Override product data tabs
add_filter( 'woocommerce_product_tabs', 'woocommerce_override_tabs', 98 );
function woocommerce_override_tabs( $tabs ) {
    // Your code goes here

    // Done - return the result of the modifications made above
    return $tabs;
}
There is a vital thing you should keep in mind is that this code snippet does not do anything actually. The reason is that we have not added any line of code to that function file yet. And we will implement this task in the upcoming section. And you need to know how this code snippet works.
You can see the code snippet starting with “//”in its first line. This means that the line works as one comment for you, not for your website. As the page gets loaded, it can be ignored. You will know some extra comments related to this code later.
In the 2nd line, the term “add_filter” aims at telling WordPress that you prefer to override several codes in your website. This can be applied to call this function, or the code snippet starting in the upcoming line. In this situation, the code you are fond of overriding is the function with the name woocommerce_product_tabs. This kind of function includes the code that is inside your WooCommerce plugin. It helps to define tabs for the product pages. Then, the new function should be specified named woocommerce_override_tabs. It includes the code you can apply for overriding the code that is inside the woocommerce_product_tabs.
What is more, it is also necessary to specify the function weight because you will be allowed to make clear when the function will be executed related to the function woocommerce_product_tabs. That is why it is set to the number “98” in order to rest assured that the code will run after the function woocommerce-product-tabs. One more important thing to be noted is that this line of code will be separated from the ones that follow. However, it is still essential in case you want to get this code to be workable. Without this line, the rest can be ignored.
In the next code line, it will declare the custom function woocommerce_override_tabs. As you can see, this function name is similar to the one applied in the line add_filter. In case they are not the same, the execution of your custom function will not happen. Moreover, you will need to offer one or even more inputs for your function to work. In this situation, you are supposed to need the input “$tabs”. This resulted from the generation by the function woocommerce_product_tabs. When you use $tabs as the input here, this means that your WordPress will be notified that you plan to it the information in the new function woocommerce_product_tabs.
After these two extra comment lines, one more line starts with “return $tabs”. This aims at taking the existing $tab value, then returning it to WordPress. Therefore, it could be applied to build the product page. Moreover, it also specifies the end of this function.
Now it is time to add that code snippet to your file functions.php, then proceed to one product page to rest assured that this page loads appropriately without issues. Nevertheless, if you type or add this code incorrectly, your site can still suffer from being broken. In case this situation happens, your task is to edit that code snippet for matching. If it still fails to work, you should remove all the code together to check if your website can load again or not.
In this section, you can also know how you can reorder your WooCommerce product tabs. WooCommerce comes with three default product tabs, including Description, Product Information, and Reviews. They are also ordered in that way. Hence, if you prefer to change their sequences like wanting Reviews to be exhibited before the tab Product Information, here is how you can do.
Your job now is to modify the above-provided code. It is the same as the earlier code. However, it is added with several additional lines that target changing the order among tabs. Look at the code below.
// Override product data tabs
add_filter( 'woocommerce_product_tabs', 'woocommerce_override_tabs', 98 );
function woocommerce_override_tabs( $tabs ) {
    // Change the default sequence of the product tabs
	$tabs['reviews']['priority'] = 15; // Reviews first
	$tabs['description']['priority'] = 10; // Description second
	$tabs['additional_information']['priority'] = 5; // Ingredients last


    // Done - return the result of the modifications made above
    return $tabs;
}
As you can see from the above code, each tab has a code line that you aim at overriding. The reason for these code lines to appear is that you must change the position of every tab individually. In such cases, you will be overriding one existing value as a priority for every tab within your variable $tabs. In each line, you indicate the tab name that you are about to override—for example, description as well as its priority.
To be more specific, the tab name will be defined within your WooCommerce. In case, the tab name comes with a space when you view your product page, you will have to add one underscore for getting the tab’s machine name. Let us get an example for you to understand deeper. The tab “Additional Information” has its machine name as additional_information. In case you explore this code working incorrectly, it might be due to the fact that you have had the improper machine name within one or even more tabs.
After modifying the name, you need to figure out the setting that you want to change. In this situation, you are going to change the tab’s priority. This focuses on controlling the order where the tabs will be displayed. The tab that has the priority of its highest is first displayed. On the other hand, the tab that has the priority of its lowest is last displayed.
You should also remember that it is not a problem about what order we seem to add those lines to your code. The vital matter lies in the priority value that you assign to the tabs. In case two tabs come with a similar priority, they can be exhibited in alphabetical order. Nevertheless, you are advised to set the distinctive priority value in each tab instead of leaving it to fate. Moreover, you need to return your modified value that belongs to your variable $tabs. This will be what your WordPress is going to apply when displaying tabs on the product pages.
Step 2: Rename your product tabs
Managing your product tabs is not all about reordering tabs. It is also about renaming your product tabs if necessary. If there are several situations that you are keen on renaming your product tabs, the following steps will be your helping hand. In this part, we will guide you on how you can rename your tabs in WooCommerce. For example, we are going to change “Additional Information” to a different name like “Ingredients”, “Reviews” to another name like “Ratings”, or “Description” to “Heating Instructions”. In this case, the code used will be the same as the one you already applied in the above section.
add_filter( 'woocommerce_product_tabs', 'woocommerce_edit_tabs', 98 );
function woo_edit_tabs( $tabs ) {
	// Rename tabs
	$tabs['additional_information']['title'] = __( 'Ingredients' );	// Rename the Additional Information tab
	$tabs['reviews']['title'] = __( 'Ratings' );				// Rename the Reviews tab
	$tabs['description']['title'] = __( 'Heating Instructions' );		// Rename the Description tab

	// Done - return the result
    return $tabs;
}
With this kind of coding, you should pay attention to the lines that bear no resemblance to the code compared to the one in the above section. It is possible for you to review to get the overall description of code lines applied in two snippets.
In renaming the WooCommerce product tabs, we are going to change the tab titles. And it is vital to take note that you modified your tab priority in your last section. What is more, you could have the new tab title for every tab in your specific formats. Then, you could be able to return your modified $tabs versions; hence, WordPress is capable of using it on the product page.
Step 3: Hide one product tab
In managing your WooCommerce product tabs, it is also necessary to know how to hide one or more product tabs. For instance, if you are fond of hiding the tab “Additional Information”, follow several simple steps below. Then, this code snippet will be helpful for you.
add_filter( 'woocommerce_product_tabs', 'woocommerce_edit_tabs', 98 );
function woocommerce_edit_tabs( $tabs ) {
	// Remove tabs you don't want
    unset( $tabs['additional_information'] );

	// Done - return the result
    return $tabs;
}
The above-mentioned code comes with one line to hide the tab “Additional Information”. This code assists you in hiding the tab. Furthermore, it also helps this tab to avoid being output within this code for your product page. It can be seen that using this code snippet seems to be a better way than applying CSS for hiding the tabs that display none. While this method aims at removing it from your page altogether, the option of using CSS only hides it.
Then you can name the kind of tab that had been unset by identifying the machine name “additional_information”. Finally, you need to return your modified variable $tabs to WordPress; thus, it could build your page.
In the three previous steps, you have learned how to manage your product tabs efficiently. But there is a bonus point for you. Instead of building three different functions to manage the tabs, it would be more convenient if you knew how to combine these three functions into only a single one. And the code below is what you are looking for.
// Rename/remove product data tabs
add_filter( 'woocommerce_product_tabs', 'woocommerce_reorder_tabs', 96 );
function woocommerce_reorder_tabs( $tabs ) {
	// Code to reorder tabs here

	// Done - return the result
    return $tabs;
}

// Rename/remove product data tabs
add_filter( 'woocommerce_product_tabs', 'woocommerce_rename_tabs', 97 );
function woocommerce_rename_tabs( $tabs ) {
	// Code to rename tabs here

	// Done - return the result
    return $tabs;
}

// Rename/remove product data tabs
add_filter( 'woocommerce_product_tabs', 'woocommerce_remove_tabs', 98 );
function woocommerce_remove_tabs( $tabs ) {
	// Code to remove tabs here

	// Done - return the result
    return $tabs;
}
In this function, you can remove or unset the tab “Additional Information”. In the meantime, you can also change the title of the tab “Description” and “Review”. Moreover, you will reorder your tabs in this function as well, so the tab “Reviews” will appear first.
Top 3 plugins to create and manage WooCommerce product tabs
When it comes to the customization of any function or activity in WooCommerce, using plugins is always a good idea to make the process more effective and effortless. That is why this section is born to help those who love using plugins to decide on the best plugins easily. As there are tons of plugins out there, you could be confused about which one is more suitable and works better than others. Keep reading to see out the top three plugins to assist store owners in creating and managing WooCommerce product tabs. Each comes with outstanding features to help you pick up the one that works for your store.
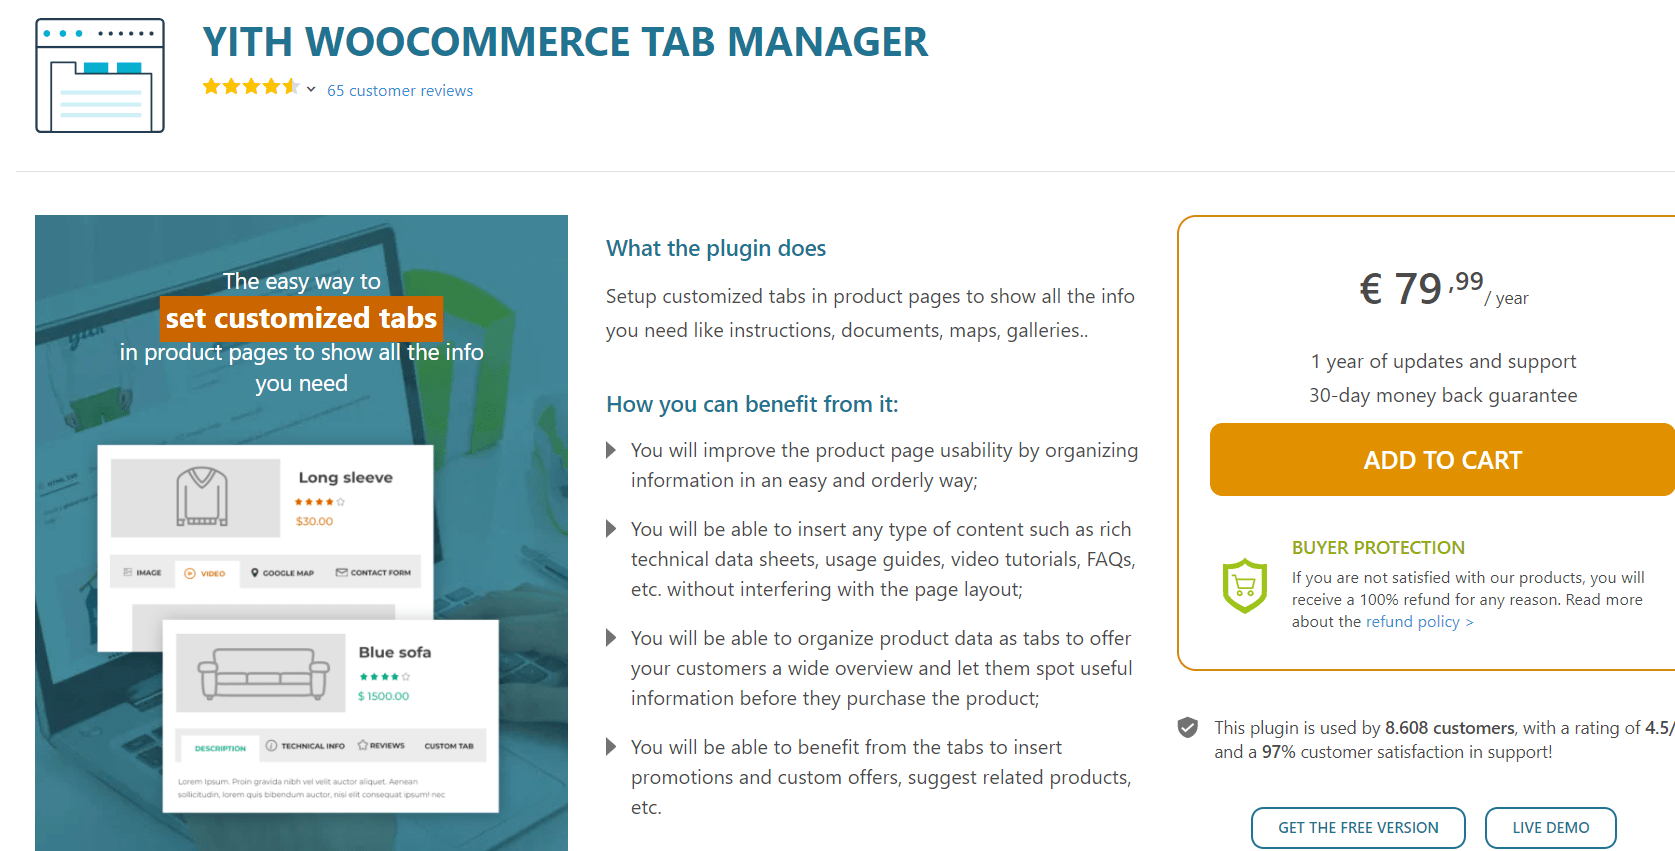
1. YITH WooCommerce Tab Manager
The first must-have plugin is YITH WooCommerce Tab Manager. This is from the well-known brand YITH and has become popular among WooCommerce owners as one of the most premium plugins. Now, it will help you create as well as display various custom WooCommerce tabs within your product page. In general, YITH Tab Manager will improve the overall performance of your WooCommerce store, make it more functional, and catch the attention of visitors to your store. Check out some of its greatest features to see how it outstands other competitors.
Main features
-
Let store owners position the product tabs where they prefer on their product page
-
Allow you to display the tabs for particular products or categories
-
Be able to customize or modify the tab content for specific purposes
-
Be able to exhibit the tab icon next to your tab name
-
Offer up to eight different layouts to make your page layout more functional
-
Be able to hide product tabs for the mobile devices
Pricing: € 79,99/ year
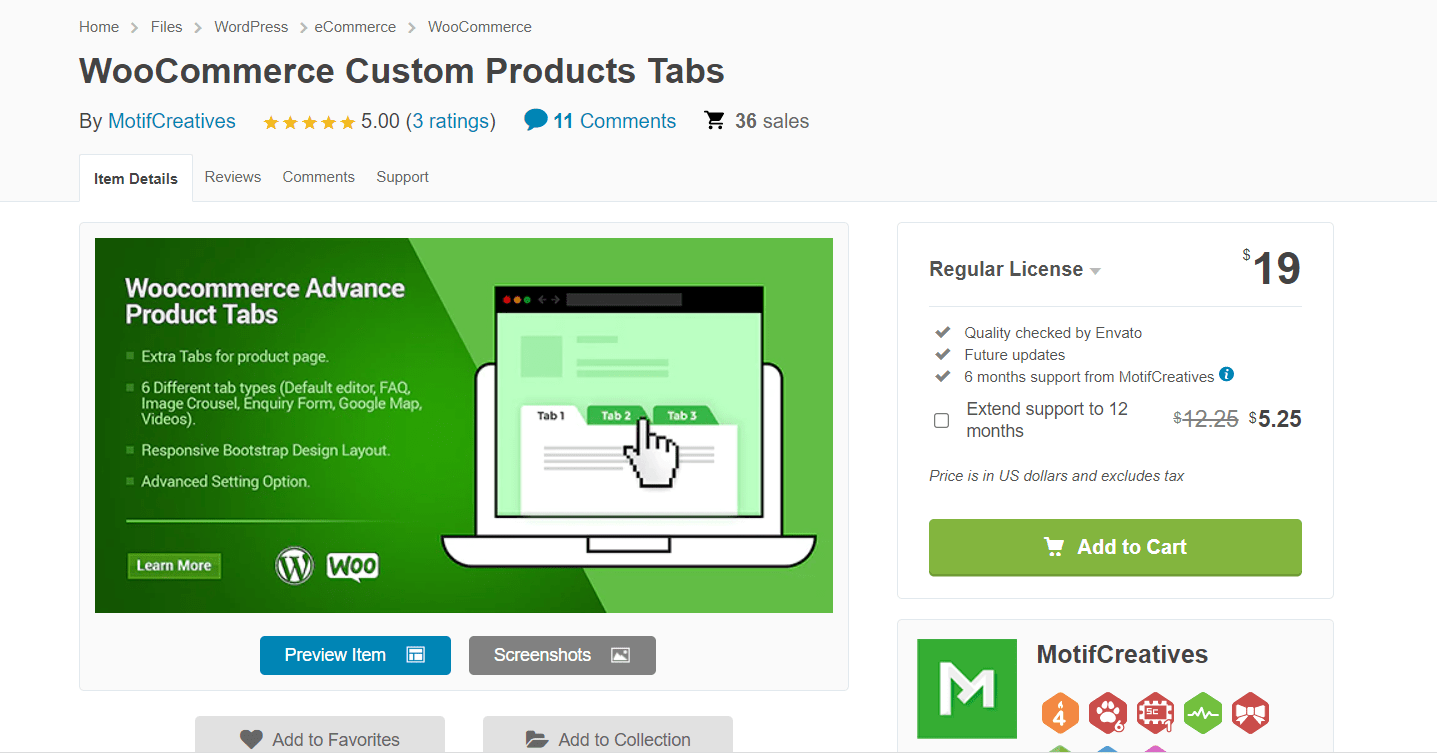
2. WooCommerce Custom Products Tabs
Another great plugin that you should use to create and manage product tabs is WooCommerce Custom Products Tabs. This plugin has a reputation for adding myriad custom tabs to your WooCommerce product page within your store. To be more specific, what makes it outstand the other is that it could help you define where your default tab is placed in each product. There is nothing better than adding more product tabs to turn your WooCommerce page into a professional business. The below are some of the most wonderful features bought about by applying this plugin to your store.
Main features
-
Be able to add and create unlimited product tabs to your need and requirement
-
Offer six advanced tabs: Image that is in carousel with the lightbox, Video carousal, Inquiry form, Default tabs for the editor, Google maps, and Product FAQs
-
Come with the option of displaying the icon near your product tab name
-
Display details of your products on different tab pages
-
Offer quick and effective service
Pricing: $19
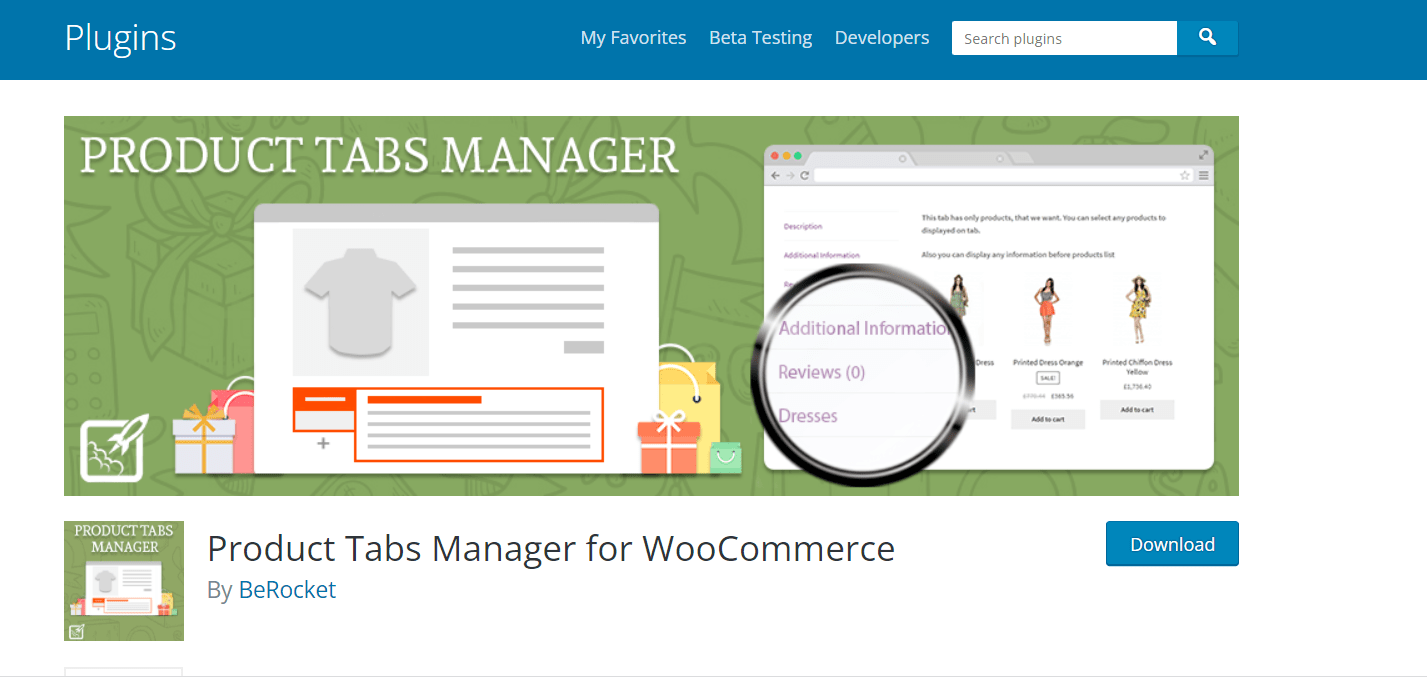
3. Product Tab Manager for WooCommerce
The final plugin that we want to recommend to you is Product Tab Manager for WooCommerce. It will assist you in creating tabs for the type of products that you desire. By displaying as much information on the product tabs, you can advertise more products to your customers. And this is what this plugin can offer you. Moreover, it is also possible to create one product tab and custom product tabs for every product in your store. You could also be able to sort the default as well as custom tabs that you want. And this plugin is efficient in using the editor for creating custom tabs.
Main features
-
Provide the option of hiding your empty tabs or unwanted tabs
-
Come with available shortcodes for displaying gallery, support forms, and so on
-
Help to modify the position of your WooCommerce tab page
-
Offer both .po and .mo files with the purpose of localization
-
Be able to sort tabs with the help from the drag-and-drop interface
Pricing: Free
Conclusion
All in all, displaying more information with creating and managing product tabs in the WooCommerce store well is a perfect way to enhance your product page. You can now convey any information related to promotions, products, and offers through these product tabs. From that, customers and visitors can feel more eager and curious about what you are offering. Hence, the sales, coupled with revenues, will be definitely increased. Hope that you can enjoy our article and find it useful. Do not hesitate to take it into your careful consider, then create and manage your WooCommerce product tabs effectively. Be successful!


