
How to Create an Online Event Registration Form in WooCommerce?

With the advance of technology, the Internet has become a more and more crucial part of people’s lives. They can study via the Internet, shop on the Internet, communicate with other people via the Internet, and more. And now, it is registering an event via the Internet.
Nowadays, businesses can organize multiple events through the Internet, which allows people from different regions and countries to participate. This requires organizers to create another option for the registration form besides the traditional one - It is an online event registration form.
So, what can we gain from this kind of registration form and how to create it on the WooCommerce store?
All will be clarified in this post!
Benefits of the online event registration form in eCommerce
- Streamline the registration process: Instead of downloading the form, printing, and sending it to the event office, people can click on the link and fill in the registration in a couple of minutes. More than that, the registration form can be designed the same as the site, which makes people feel like they are still on your page.
- Verify the registration automatically: After registering your event online, the registers will automatically receive an email from your store to confirm that everything in the form is true. This will help both you and your customers save lots of time for confirming the registration
- Protect your participant’s data: Unlike the traditional registration form, the online registration one provides users with a more secure system that helps them protect customer information more easily. All the sensitive information like cardholder data is stored behind the firewall, and you can prevent the likelihood of leaking customer data.
- Offer reports in real-time: When registering via paper forms, it will take a lot of time to collect data to generate reports. With the online form, organizers will be able to get it after several clicks. More than that, the data is updated in real-time, so organizers will always be kept up with the latest data whenever they open the reports.
-
Protect the environment: Using online registration forms is a useful way to protect the environment; people will use no paper, which means that more papers will be saved and fewer trees will be cut down for paper production. Also, people recently tend to pay more attention to the environment, so offering the online form will help your stores or organizations put a good impression on their minds.
How to Create an Online Event Registration Form in WooCommerce?
Step 1: Install & activate the plugin
First, download the WPFroms plugin from the domain wpforms.com.
Log in to your WordPress account and go to the admin dashboard. There, open Plugins and select Add New. In Add New, click on Upload to upload the plugin you have just downloaded.
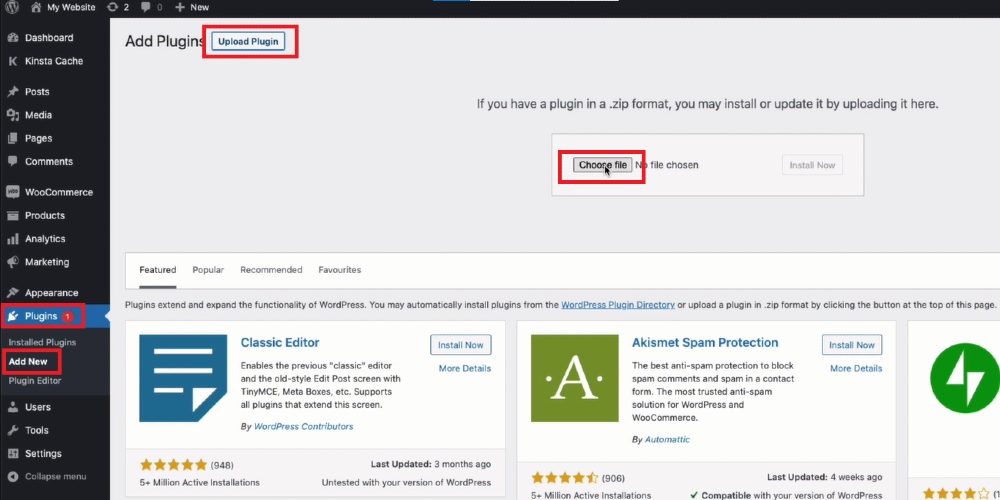
After finishing the installation process, click on Activate to start using it for your WooCommerce store.
Step 2: Activate Form Templates Pack Addon
After activating, a new section named WPForms will appear in the WordPress admin dashboard, open it and select Settings.
There, you are required to verify your License Key. To do that, go to the homepage of WPForms plugins, open Download, and you will see your license type and key. Copy the key and paste it to the license key and click on Verify
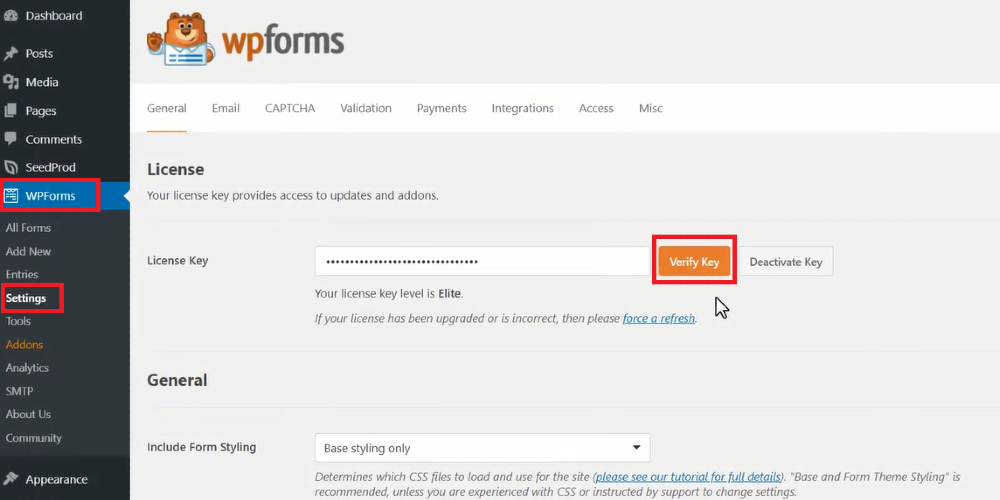
When it is successful, the line informs your type of license will be displayed below the license key.
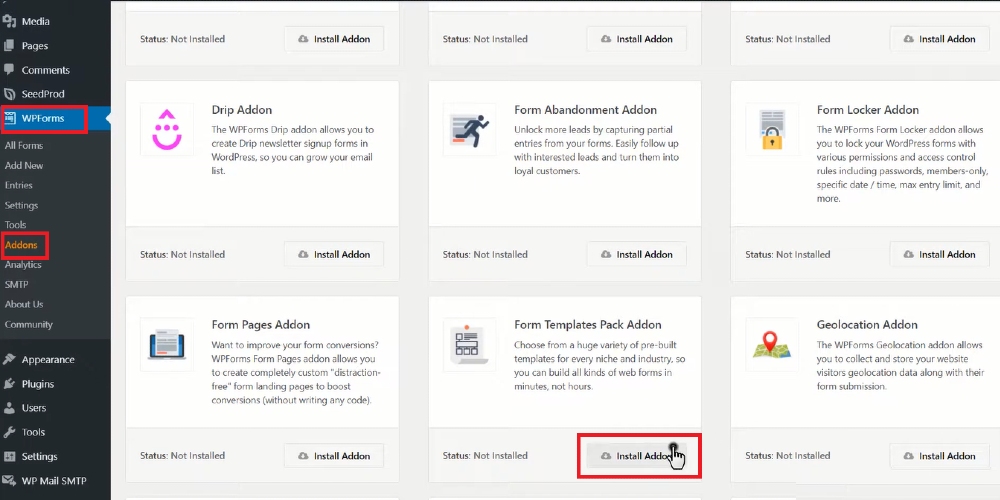
Come back to WPForms and navigate to Addons. Scroll down to search for Form Templates Pack and click on the Install and Activate buttons to install and activate it for your store.
Step 3: Select an online event registration form template
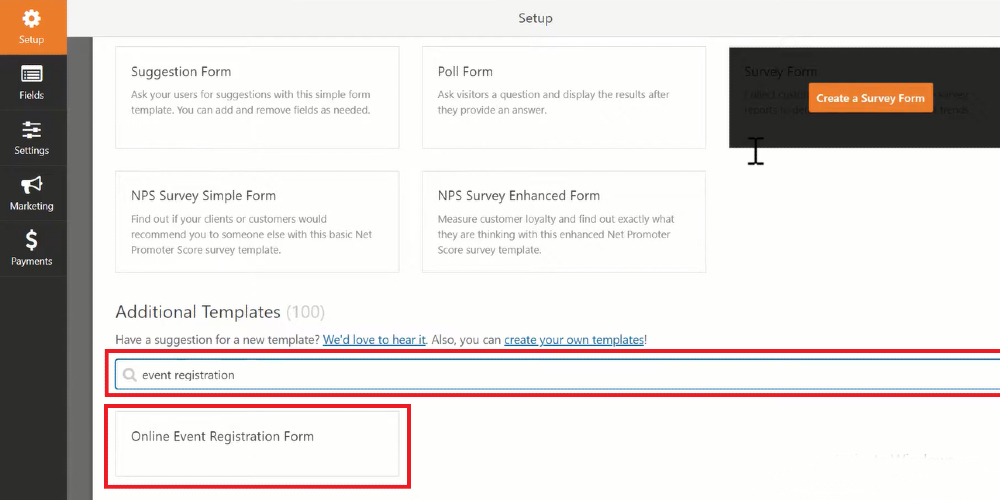
In WPForms, open Add New to create your online registration form. There are plenty of templates for different purposes displayed on the screen. To complete an event registration form, scroll down to Additional Templates and type “online event registration” in the search box to search for it.
When it appears on the screen, click on it.
Step 4: Customize the form’s content
In default, the form includes 6 fields: name, address, home phone, work phone, email, multiple-choice, single-line text, and dropdown.
You are allowed to reorder, duplicate, add, or remove the field you want. To do this, click on the Fields located in the left bar of the screen.
If you want to add a new field, navigate to the section Add Fields in the left corner, select the field you want, then drag and drop it to the suitable location.
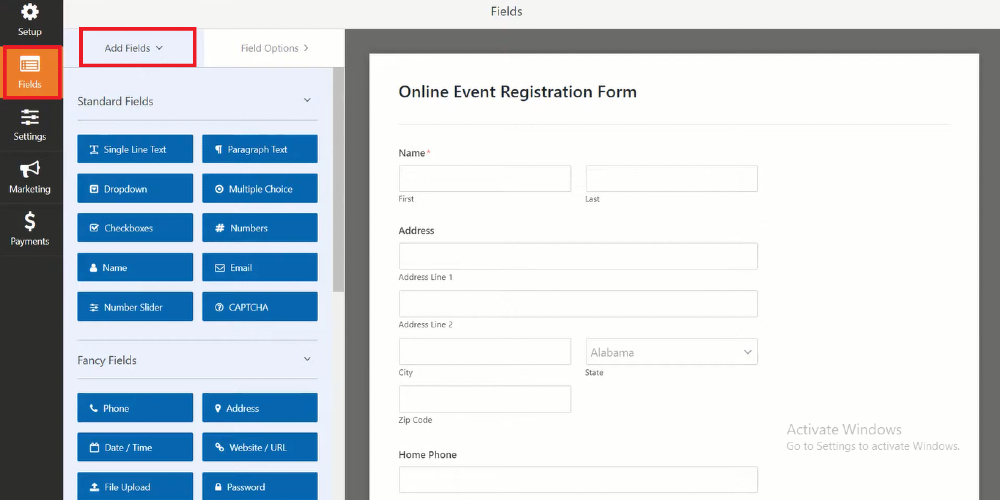
You can also remove a field or reduplicate it by moving the mouse over it and selecting the icon you want, which is placed in the top right corner of the field.
To reorder the field, just click on it and drag it to the place you want.
Step 5: Configure the form
Payments
If your events are free, skip this section.
Still, in Fields, scroll down to Payment then drag the block you want for the payment like dropdown items and total to add the number of tickets and the total money they have to pay for them.
Afterward, move to the next section, which is Payment. You are offered three options which are Stripe, Authorize.net, and PayPal.
Select your favorite one to install and activate it for your form. Then, you will be required to fill in the necessary information for the payment you choose.
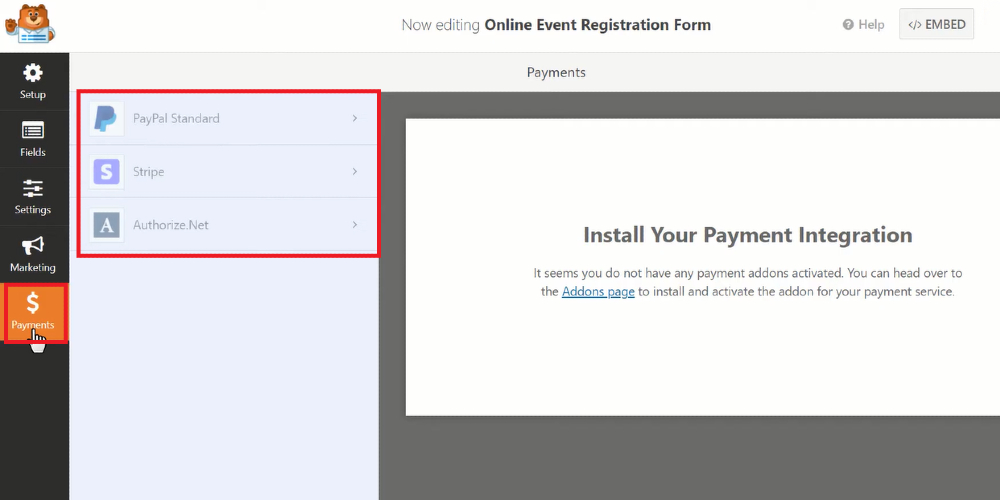
Click on Save.
General settings
In the left bar of the screen, open Settings and select General. In General, you can add additional information about your form like name, description, submit button text, etc.
Don’t forget to select save the changes with the Save button.
Confirmations
Also, you can choose the type of confirmation when a person registers the event in Confirmations. There are three types available for users which are:
- Message
- Show Page
- Go to URL (Redirect)

And choose Save button to update.
Notifications
Open Notifications which are placed below General to activate the feature of notifying you whenever there is a new registration.
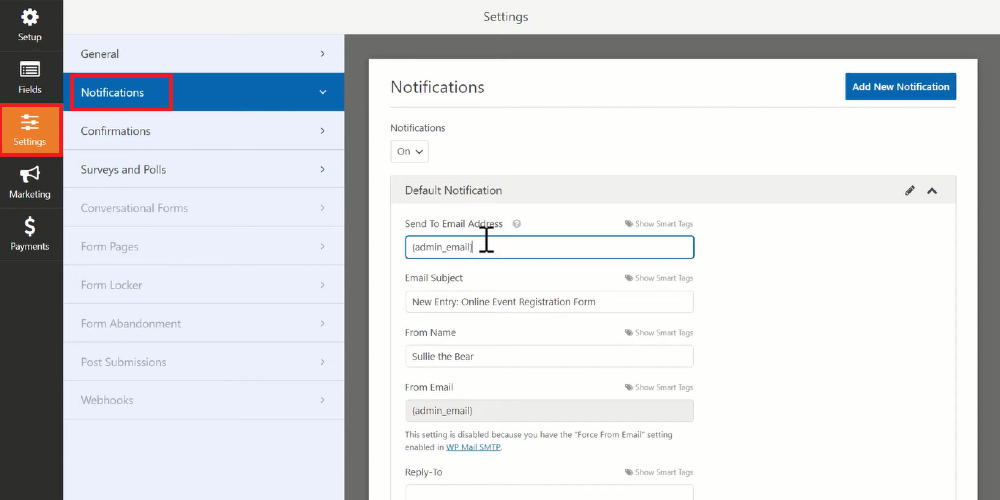
Edit the default notifications settings like send to email address, email subject, name, email, message content, etc., and save changes.
Now, you finish creating your online event registration form. It’s time to move to the next step - add it to your WooCommerce site.
Step 6: Add the form to your site
Come back to the WordPress admin dashboard and go to Pages, and select Add New.
Add the title to the page, then click on the plus icon in the top right corner of the block, choose WPForms.
Select the Event Registration Form, and the form you have just created will appear on the screen.
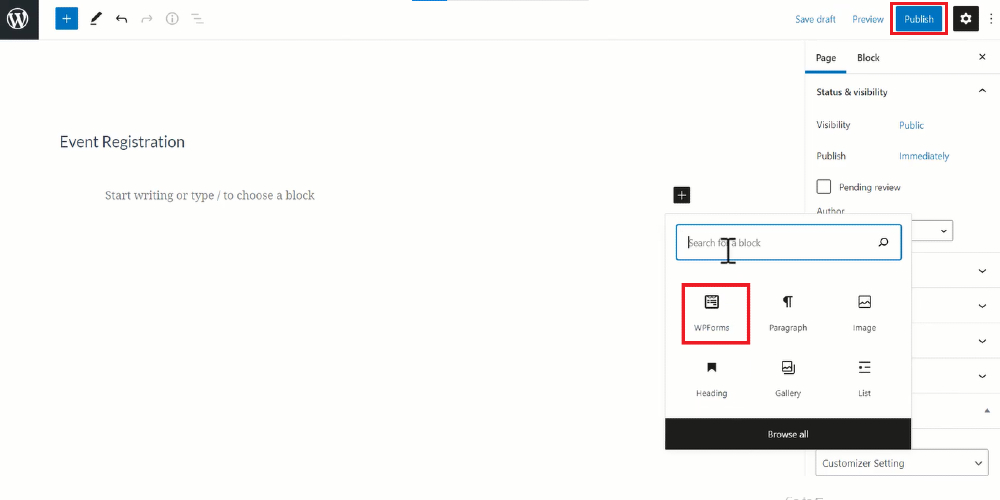
Click on Publish and you can copy the link to paste it to the banner in your WooCommerce shop page or any places you like.
Final thoughts
In conclusion, it is evitable that an online event registration form is a helpful tool for merchants to allow their customers to register to participate in their event easily. With it, you can make your registration simpler, manage the registration performance more efficiently as well as contribute to protecting the environment. So, let’s get started creating your own online event registration form for your WooCommerce store.


