
How to Create a Custom Thank You Page Per Product in WooCommerce?

Are you seeking strategies to get the most out of your Thank You Pages in order to generate more leads? Then you’ve come to the right place. In this article, we’ll show you how to create a custom thank you page per product in WooCommerce.
Benefits of a custom thank you page per product in WooCommerce

Customers are usually sent to a Thank You Page after purchasing your items. This page often provides customers with information about their order, such as the order number, product purchased, payment method, and so on.
Although WooCommerce’s default Thank You page is acceptable, it isn’t the best option for increasing sales or attracting consumers’ attention.
Creating a custom thank you page for each product in WooCommerce has numerous advantages.
-
A custom thank you page could help you increase your sales. You may encourage consumers to purchase related items, provide special offers, and promote new products, etc.
-
A custom thank you page can make you outstanding among the majority of e-commerce websites.
-
With a custom thank you page, you can provide a better post-sale experience for your online customers.
How to create a custom thank you page per product in WooCommerce?
This section will show you two different ways to create a custom thank you page per product in WooCommerce: using a plugin and coding.
Method 1: Using a plugin
We’ll use the free version of the NextMove WooCommerce Thank You Page plugin here. It’s a user-friendly plugin, and its shortcode-ready design makes creating Thank You pages really convenient.

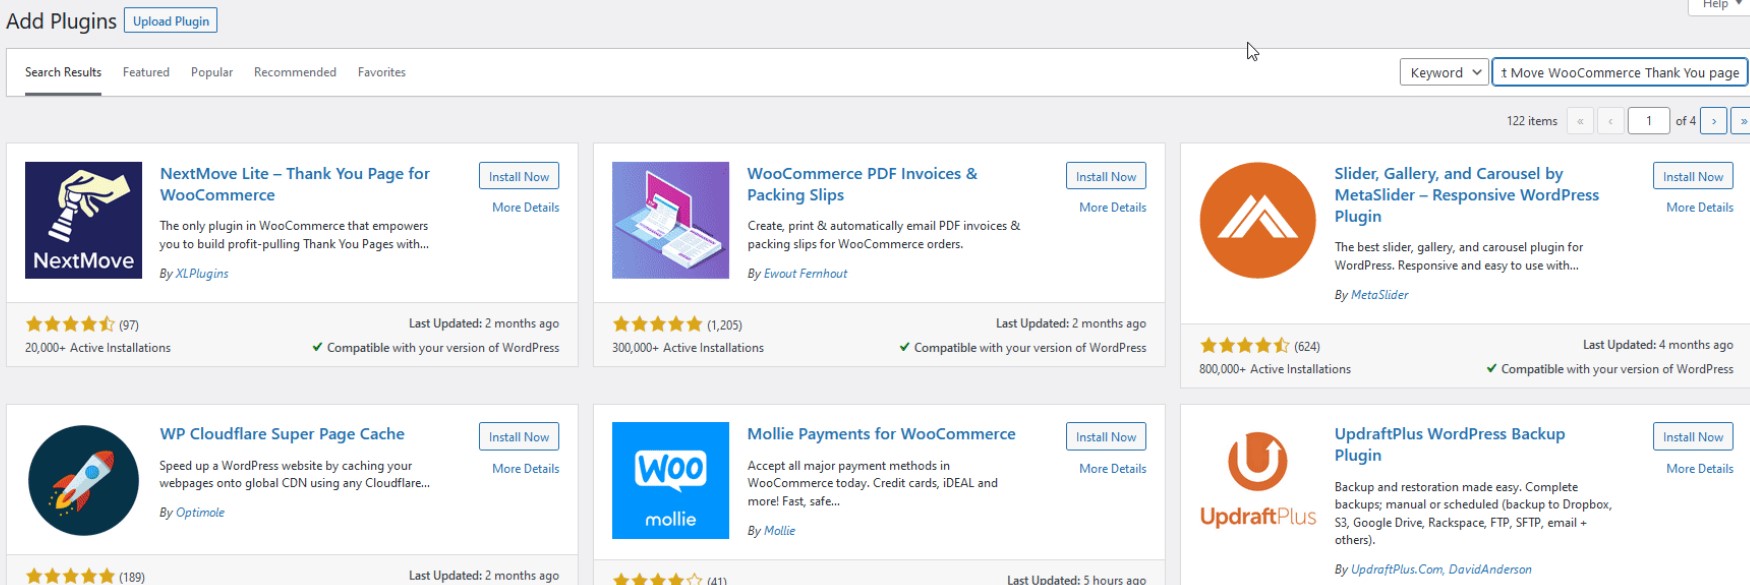
Step 1: Install the plugin
To begin, navigate to Plugins > Add New from your WP admin dashboard. Then, in the search field on the top right, type Next Move WooCommerce Thank You Page. After that, under the plugin’s tab, click Install.
After that, once the button has updated, click Activate.
Step 2: Edit and customize thank you pages
Go to XLPlugins > NextMove Lite and under Thank You page, click on Components.
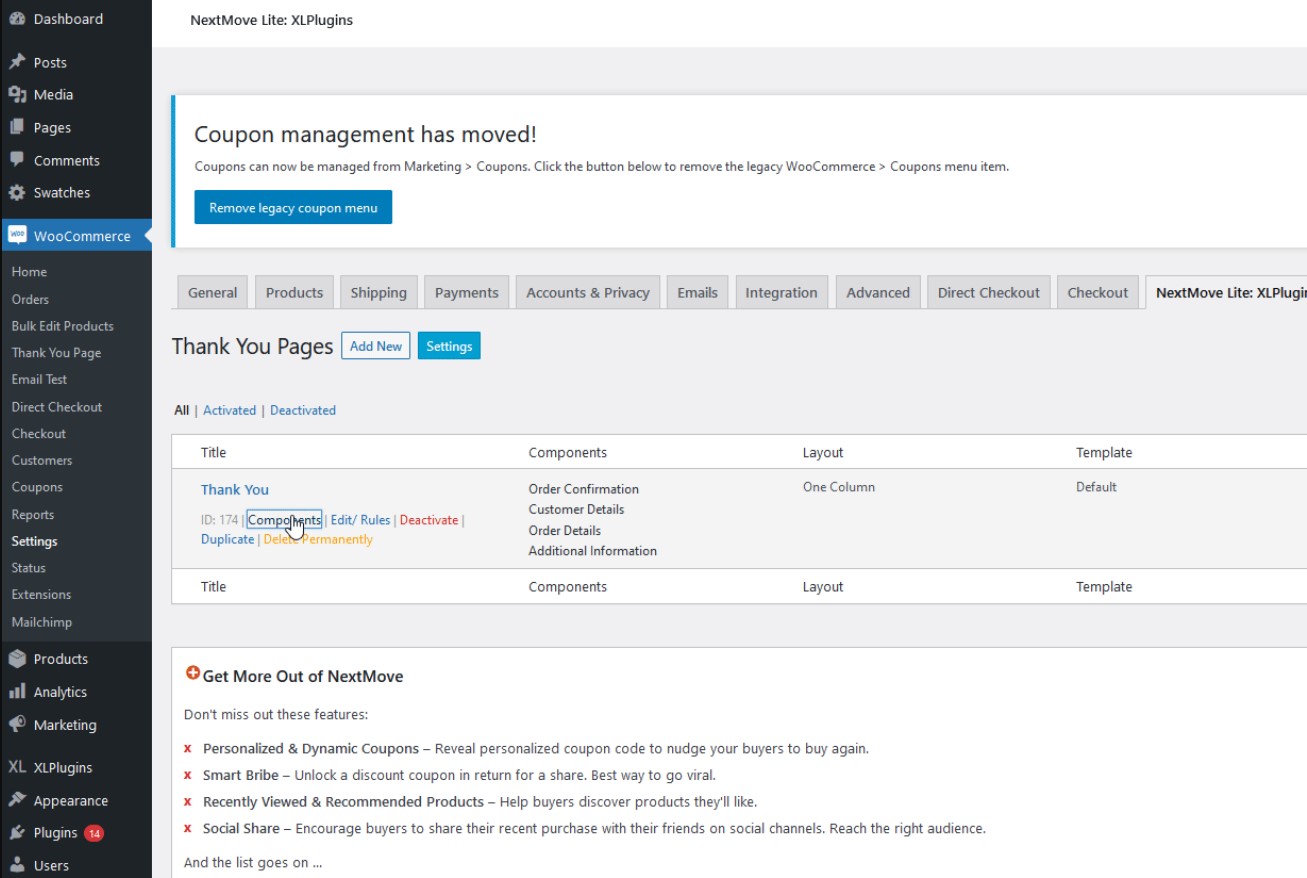
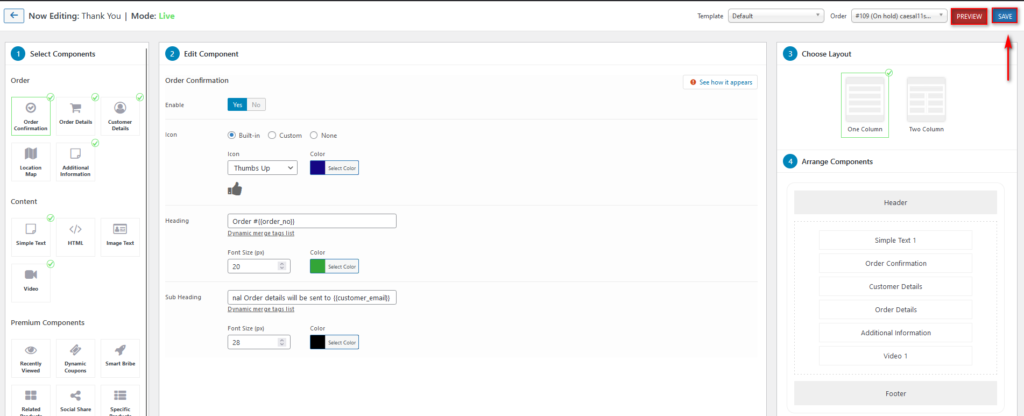
You’ll now be directed to a new page called Thank You Page customizer, where you can add and modify any of the components on your Thank You Page.
Simply choose any component from the Select Components column on the left and choose Enable on the center Edit Component screen.
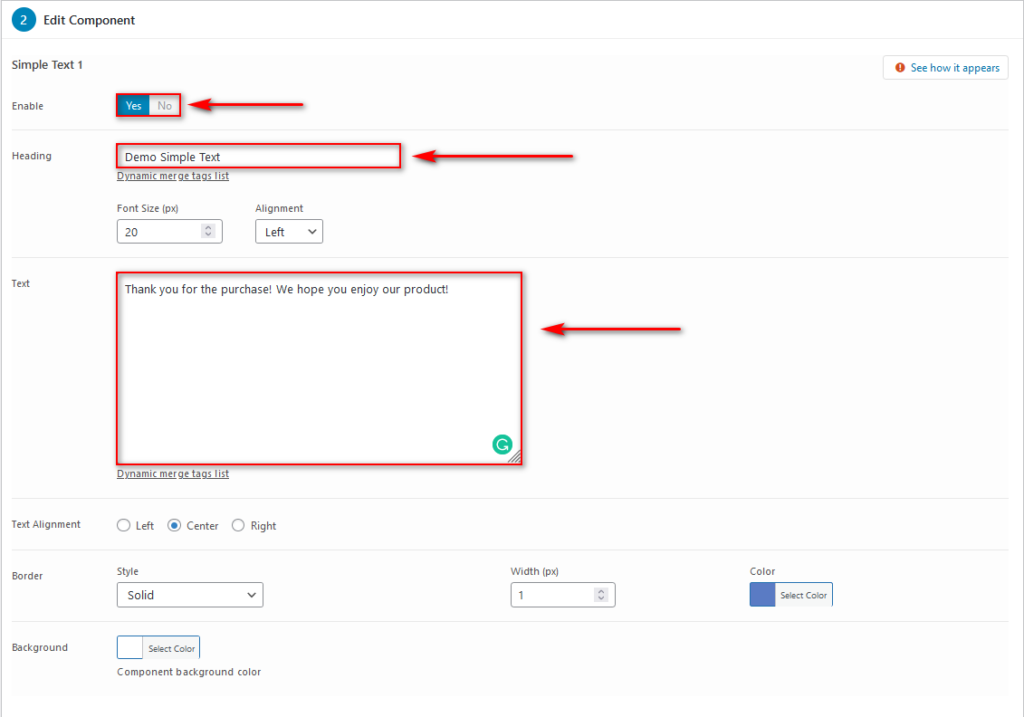
1. Add a text component
To begin modifying your text, choose Simple Text and press Enable.
You can include a heading, required text, and font colors.
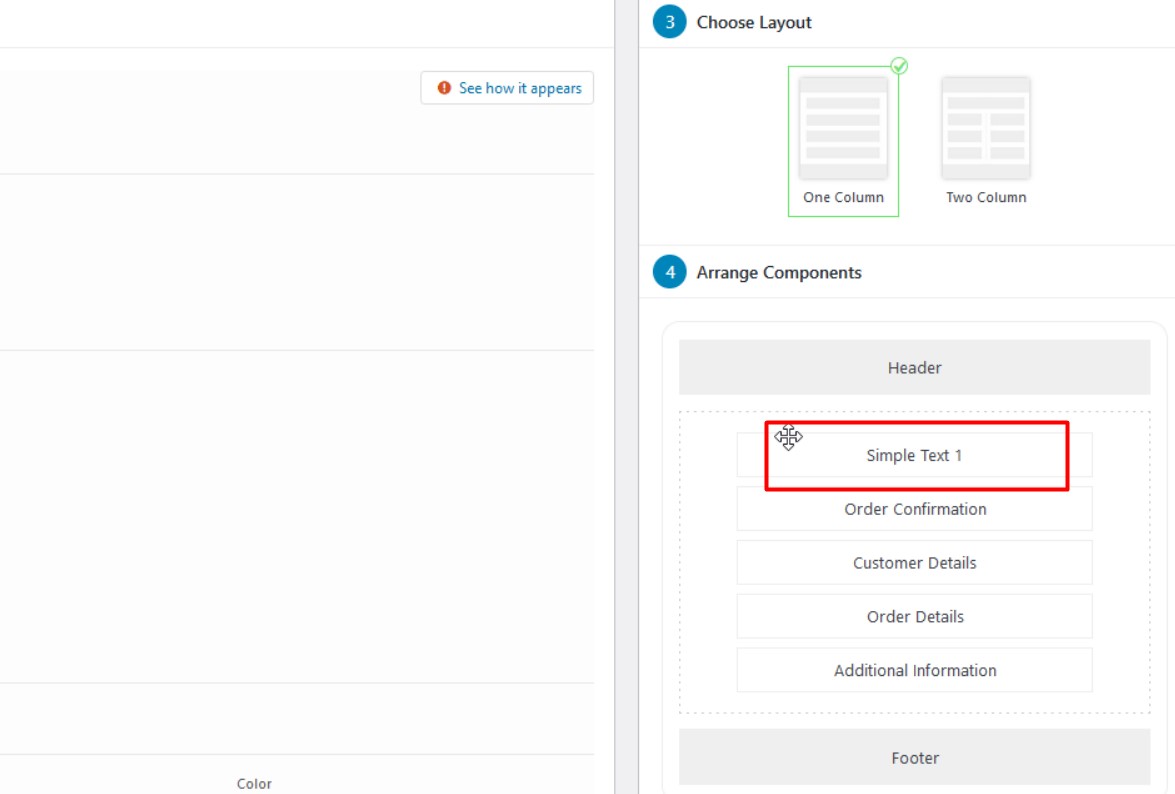
Next, you can use the right column, pick between a single column and a double-column layout for your Thank You page. Afterward, you can drag and drop your components from the list to rearrange them.
Here we want our simple text to be at the top of our Thank You page, so we just drag our Simple Text component to the top, as seen below.
2. Add a video component
If you wish to add a video to the Thank You page, simply follow the same instructions as adding text.
Select Video and enable the component.
Next, using a URL or an Embed Code, you can add a title and a description text, as well as the video source.
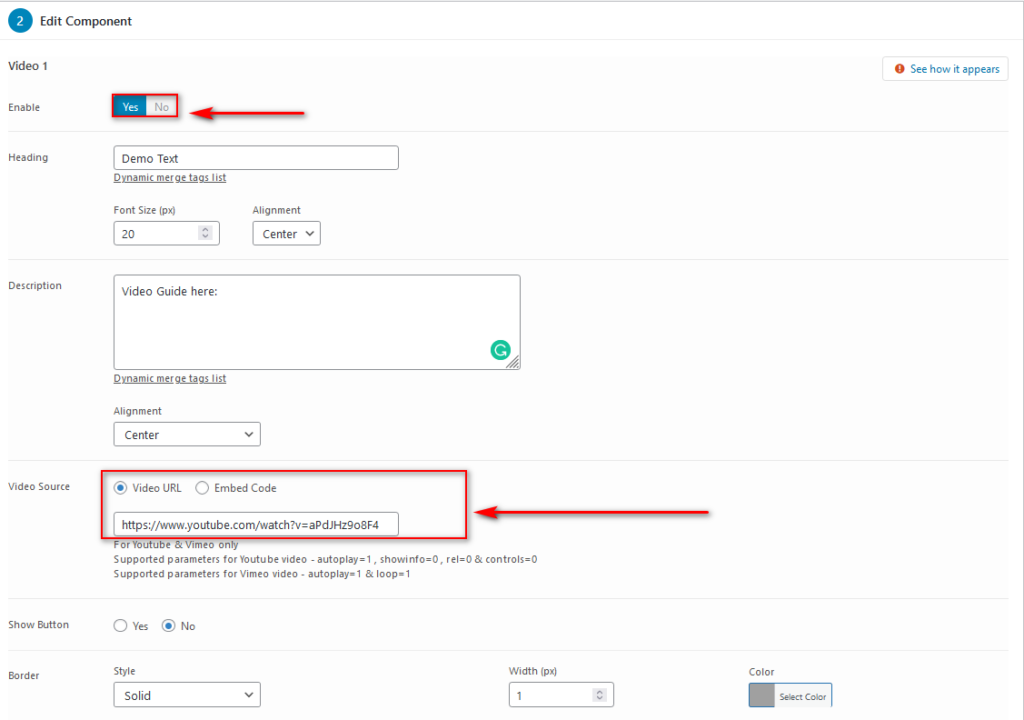
You can also select a layout and rearrange your components, as well as allow more settings for the components.
3. Edit and customize existing components
Other existing components, such as order information and order details, can also be edited.
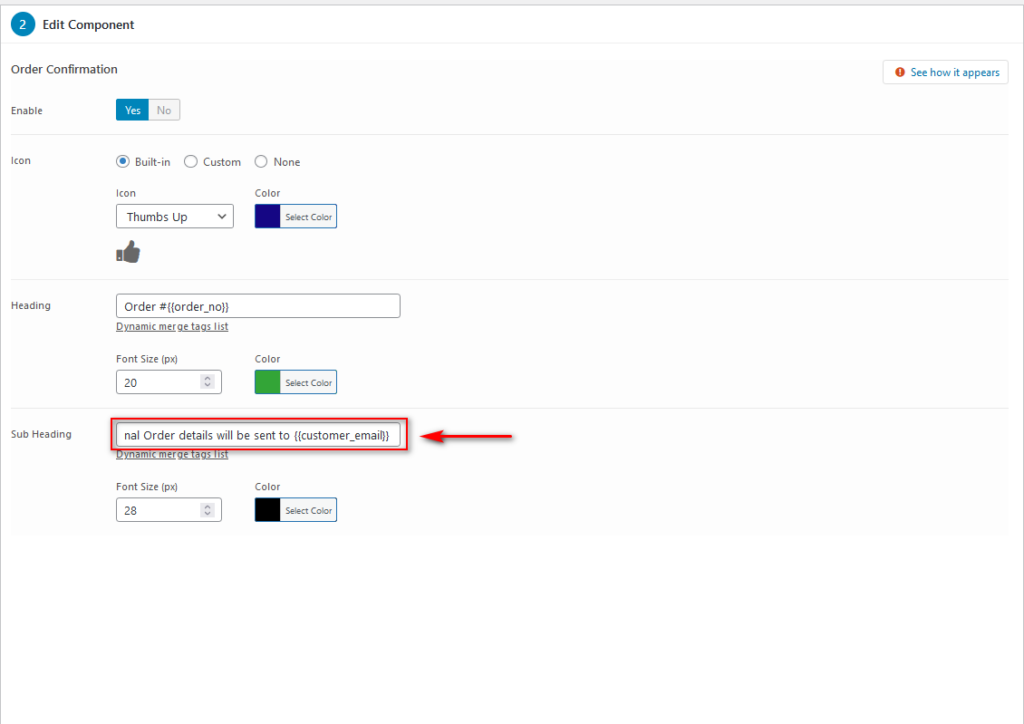
With order information, click Order Information and from that, you can choose the icons, order headers, and subheadings. You can also use the plugin to create customized dynamic tags that change depending on your customer’s order details and information.
Here we’ll add an extra line to the subheadings, “The Additional Order details will be sent to ”.
When you’re finished customizing your Thank You page, click the Save button in the top right corner to save your changes. Click Preview to see how your Thank You Page will appear on the front end.
Step 3: Add priority and redirects
You can select which page the Thank You page will redirect users to on the right sidebar. Next, you choose the My Account page and your Page Priority.
If you have several priorities, this allows you to define a page’s priority. Because this page should be applied to any bundled product first, let’s make it the most important (1).
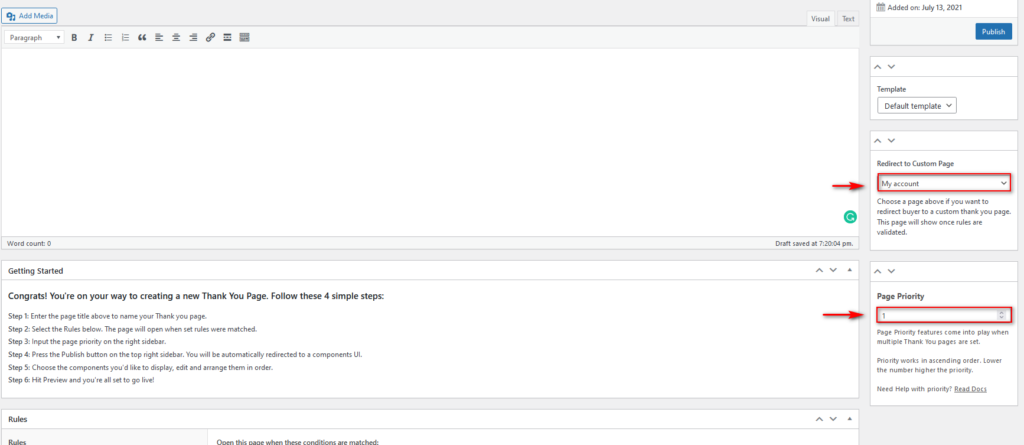
Then, when everything is ready, click Publish.
Method 2: Coding
Coding is an excellent alternative for more advanced WordPress/WooCommerce users, but it does require some coding expertise.
It’s worth noting that you should make a full backup of your site and install a child theme before proceeding with the steps below.
Basically, we will add a basic WooCommerce hook to your child theme’s functions.php file. By doing this, when your customers arrive at your Thank You page, you may send them customized texts or messages.
Step 1: Open Theme Editor
Go to Appearance > Theme Editor.
Step 2: Add code to the functions.php file
Now locate the functions.php file on the right sidebar. Then, as shown below, add the following code into your child theme’s functions.php file.
add_action('woocommerce_before_thankyou','Mageplaza_before_thankyou');
function Mageplaza_before_thankyou(){
echo "Thank You for Purchasing From Mageplaza";
}
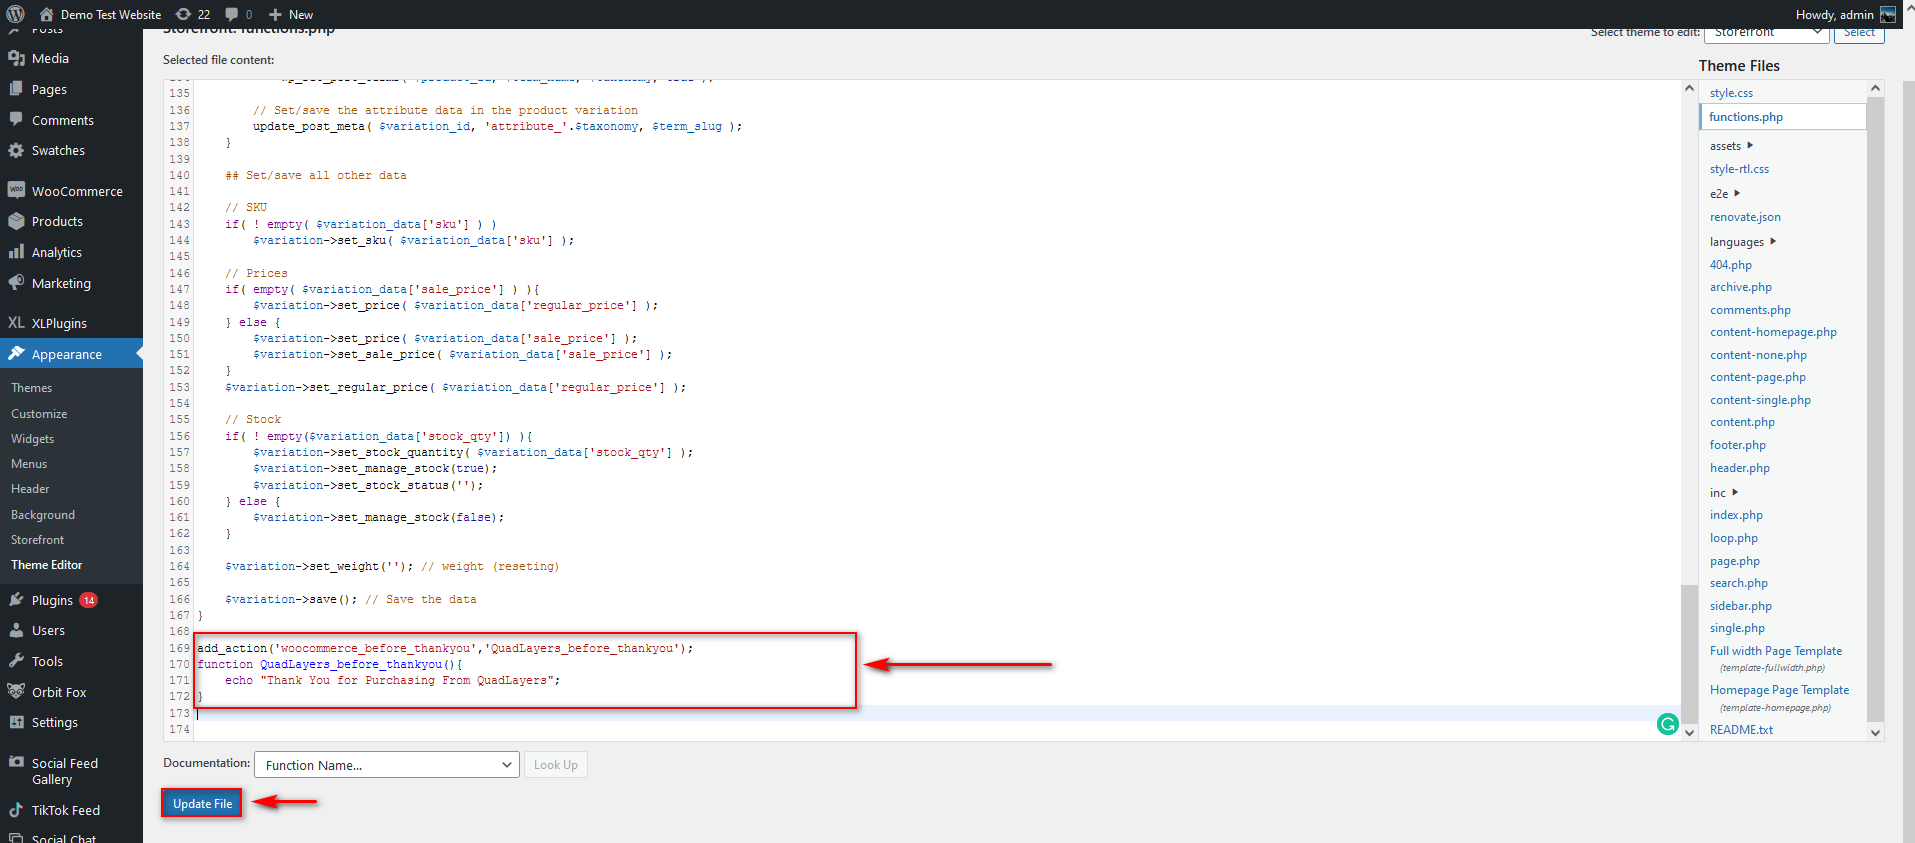
Step 3: Update file
Click Update File to finish.
It’s essential to note that there’s a lot more you can do to create a custom thank you page by coding, and the above is just a simple way to get started.
4 Recommended plugins for custom thank you page in WooCommerce
In this part, we’ll introduce you to the four best plugins to help you create custom thank you pages in WooCommerce.
1. Custom thank you pages

With the plugin Custom Thank You Pages , you can create custom thank you pages for each product. The plugin also allows you to show the upsell recommendations and notify consumers about the onboarding process. You can also show referral offers, product instructions, warranty details, and other information about the characteristics of the items you’re selling.
Features
-
Create custom thank you pages for each purchase
-
Show upsells, onboarding assistance, offers, and subscription forms
-
Use a priority system
Pricing: $49 per year
2. WooCommerce thank you pages

You can discover amazing marketing opportunities of thank you pages using the plugin WooCommerce Thank You Pages . With the plugin, you can publish discount offers, FAQs, and more information on this page. It also allows you to customize thank you pages on a global or product-by-product basis.
Features
-
Provide discounts and special offers to encourage repeat purchases.
-
Provide relevant data about the order’s products.
-
Customize WooCommerce thank you pages in accordance with your store’s strategy.
Pricing
The Basic and Pro licenses of the plugin cost $49 and $89 per year.
3. Store apps custom thank you page for WooCommerce

Store apps custom thank you page for WooCommerce allows you to customize your WooCommerce thank you pages in a variety of ways. With this plugin, you’ll be able to display product suggestions, videos, discount coupons, social share buttons, and more. You can take advantage of the plugin’s custom templates.
Features
- Enable a custom thank you page for each product
- Enable a custom thank you page for each product
- Custom thank you page templates
- Redirect customers to any page after checkout
- Upsells, discounts, email list…
Pricing
$39 per year and $119 one time.
4. WooCommerce redirect thank you

With the WooCommerce redirect thank you plugin, you can create a checkout experience unique to each customer, which includes membership instructions, rewards, and social media sharing encouragement. Without overriding template files, this plugin can help you create custom WooCommerce thank you pages.
Features
- Create friendly, functional thank you pages in WooCommerce
- Global thank you page setting
- Thank you page custom URL
- Custom thank you editor
- Redirect customers after checkout based on the product purchased
Pricing
The Personal, Business, and Agency licenses are charged at $79, $139, and $199 per year respectively.
Final Words
The Thank You page is one essential page that can help boost your sales.
In today’s article, we’ve given you a comprehensive guide to creating a custom thank you page in WooCommerce. Hopefully, you can make the most out of your thank you pages.
If you have any questions, please feel free to comment down below. We would love to help you out. Thanks a lot for reading and we’ll see you soon.


