
How to Change WooCommerce Product Page Layout

The product page in WooCommerce plays a crucial role in the performance of your online store. Therefore, it is essential to have a particular layout of your WooCommerce product page to impress visitors to your site. That is why you should make the layout of your WooCommerce product page as appealing as possible because the default page layout is not fully impressive for customers to glance at.
Now, let’s go on with this instruction to know how to change the WooCommerce product page layout. Hence, you could produce a unique experience for customers to shop with your products on WooCommerce.
Why should we change the WooCommerce product page layout?
Before going into details of how to change the layout of product pages, we advise you to spend some moments looking at why you should change it. So, you could know how important it plays to your WooCommerce store.
-
Provide great customers’ shopping experience: As you are competing with other stores for the same product, you need to make your product page layout as special as possible. So, by changing this layout, you can provide your customers with an amazing shopping experience.
-
Differ your store from others: When you choose the default layout, your product page will look similar to others. Hence, changing the layout of your product page brings about a significant meaning to differ your store from others.
-
Catch the attention of new customers: The content on your page is not enough. Customers can skip reading the content if the layout of your WooCommerce product page is poor. So, keep it attractive to draw the attention of new consumers.
How to change WooCommerce product page layout?
In changing your WooCommerce product page layout, we recommend using one of the two ways below. So, read each of them carefully and see which method will fit your needs and requirements. These two ways include using CSS and using a plugin.
1. Use CSS
Using CSS has now become much simpler. By following this guide, you will find it easy as you do not need to be good at coding. What you need to do now is just paste the provided codes to your correct box. By applying CSS, you could be able to control your website design, such as fonts, colors, backgrounds, or button sizes.
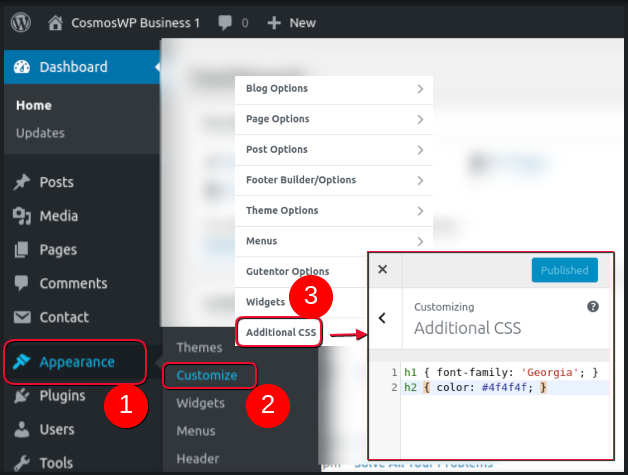
Step 1: Head to WooCommerce’s “Appearance”
Now, it is time to navigate to your dashboard and select the section “Appearance”, then click on “Customize” before picking up “Additional CSS”.
Step 2: Implement some changes
When you are here, you can make some changes related to the layout of the WooCommerce product page. For different parts in your product page layout, there is a different code to be applied. So, keep reading to see what and how you could change your layout specifically.
- Change product titles’ font size
In case you are not fond of your product titles’ font size, you will use the following code to change it. In particular, changing the product titles’ size to 36px is preferable. To complete it, you can make up your mind to change the “36” into the number you want.
.woocommerce div.product .product_title {
    font-size: 36px;
}
- Change product titles’ color
Colors play an indispensable part in your product page layout within WooCommerce. This is to say, it is very vital to make some modifications to your page color to enable it to be more attractive. To change your product titles’ color, there exists a specific code.
This is a kind of code that includes six digits to represent a certain color online. In this case, using the hex code is the utmost way to complete your task. The below code will be used to make a change to the color of your product titles to a hex code name #FF5733.
.woocommerce div.product .product_title {
    color: #FF5733;
}
Especially, you could choose any other hex code that you like to replace this hex code. A suggestion for you is to apply the color picker to get this code for the color you like.
- Display variation labels in the bold text
There are some situations that you do not satisfy with the variation labels in your bold text. Just change it to the one you like by using the recommended code below for showing the variations titles in the bold text.
.woocommerce div.product form.cart .variations label {
   font-weight: bold;
}
- Italicize your variation labels
In case you want to emphasize any variation label or want it to differ from the others, just italicize it. To implement this, this code is useful for you:
.woocommerce div.product form.cart .variations label {
   font-style: italic;
}
- Change the colors of the button “Buy Now”
The button “Buy Now” is a significant part of your WooCommerce product page layout, especially it’s color. Therefore, it can affect the decision of shoppers if they are about to buy your product or not. Hence, pay attention to this button’s background color. The following code is the one you should use to change it as per your expectation. Moreover, the color picker is also suggested to get your hex code to choose the color that you are fond of.
.woocommerce div.product .button {
   background: #000000;
}
2. Use a plugin
There is no denying that using a plugin is always simple, fast, and effective. By using it, you could save a lot of time as well as maximize the efficiency of your implementing process. Moreover, you could be able to utilize the plugin’s features, coupled with functions, to make your WooCommerce product page layout better.
In this situation, Elementor is one of the best plugins when it comes to changing the layout of your WooCommerce product page. So, with some more simple steps, you can complete your job successfully.
Step 1: Install and activate Elementor
First and foremost, installing and activating Elementor to use it. From your WooCommerce dashboard, you will go to the section “Plugins”, choose “Add New”. Here you will enter the name of this plugin on your search bar on your right hand to search for “Elementor”. After that, hit on the button “Install Now” before activating it.

As soon as you finish the activation, you will see the button “Edit with Elementor” appearing. However, if you have bought a pro version, you must upload this pro version on the top of your free plugin, then get it activated using the license code for accessing pro features.
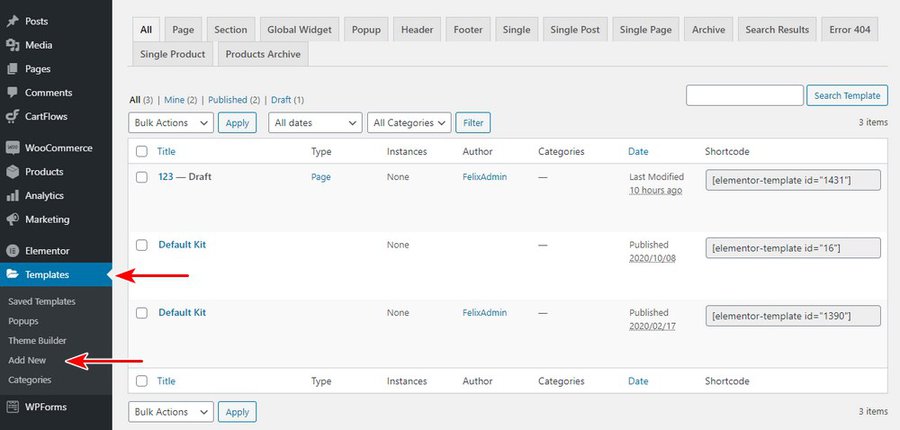
Step 2: Select the template for your pre-design WooCommerce product page
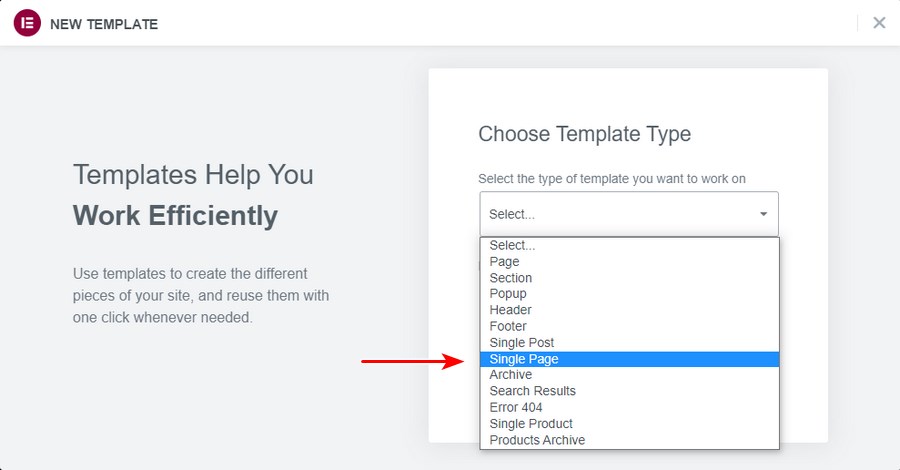
The next step involves selecting the template for your pre-designed WooCommerce product page. Your task now is to hover under the section “Templates” to choose “Theme Builder” and “Single Product” before hitting on “Add New”.
From your dropdown, select “Single Products” and name it as per your need. After that, you will click on the button “Create Template”.
You could also create your new template if you are equipped with extensive technical knowledge. Creating it might be time-consuming; however, it is worthwhile if you have skills.
Now, pick up a single block of the product, then insert. Check out the below screen to understand deeper:

This aims at fetching the template; hence, you are able to add some new elements that you want them to appear on your product page. The chosen template is added to your Elementor canvas. This lets you execute the customization of the template that uses the widgets.
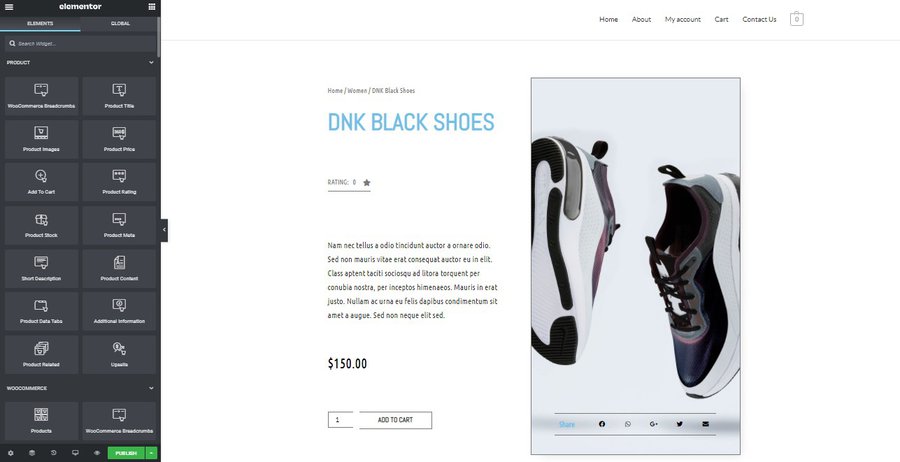
What is more, you could also decide to customize your current widgets. In some cases, you can also get rid of the elements that you do not need. The good news is that Elementor will allow you to control fully how you will customize the style as well as the layout. There exist several elements, including Product Price, Product Title, Products Images, and so on your left sidebar.
Before adding these widgets for customizing this page, you should guarantee that you are currently working on the full-width WooCommerce product page. This plugin lets you drag those elements, then put them at a correct needed spot.
Step 3: Add color matching your brand & product widgets
Your product page layout now might look good. Nevertheless, it is still not enough to fit your business brand perfectly. So, to make them better, a nice way is to adjust the font color, background color, and myriad typography settings.
Specifically, to modify the element on your page, do not hesitate to choose your pencil icon on the right corner of your block.
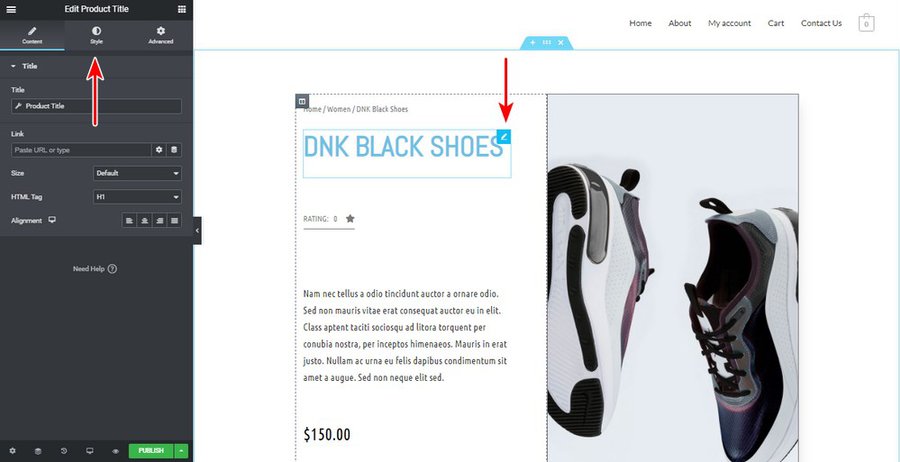
In case, you are fond of implementing any visual or styling customization, move on to the tab “Style” that is displayed below:
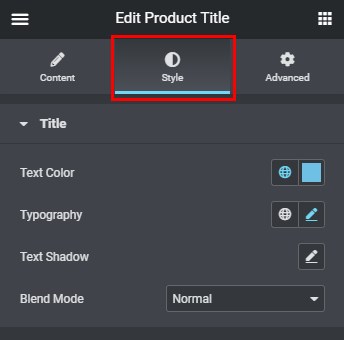
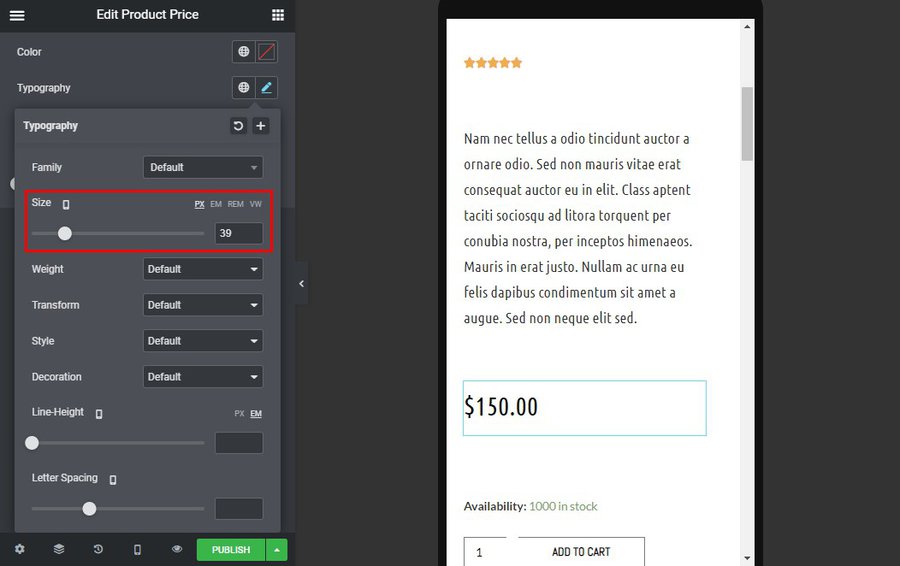
And you could also change your typography, text color, along with the shadows for your block “Product Title”. All will be perfectly done with just some clicks when you use the Elementor plugin.
Hit on the tab “Typography” and you will be taken to another box that comes with the settings of typography. Here, you could change the wanted font or some other parameters.
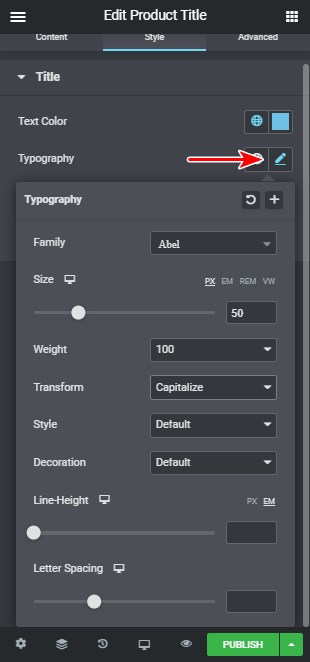
Besides changing the typography, you can also change text color or shadows. So, proceed the same for those sections. And you could edit till you get the desired result. Furthermore, regarding your price block, you should pay more concentration on how it would be displayed. Bear in mind that this kind of block should be clear for customers to see them easily without feeling confused.
Step 4: Add product widgets
Another not-to-be-missed step to change the layout of your WooCommerce product page is to add product widgets. This is useful to provide your customers with an amazing shopping experience when they shop on a single page. Therefore, it would be better if it includes several product widgets.
With Elementor, you could keep the feel as well as the look of these elements in full control to make up your product page. You can have different new available widgets such as Images, Gallery, Product Title, Short Description, Rating, Price, Upsell, Breadcrumbs, Stock, Data Tabs, Add-to-cart button, Content, Meta, along with extra information.
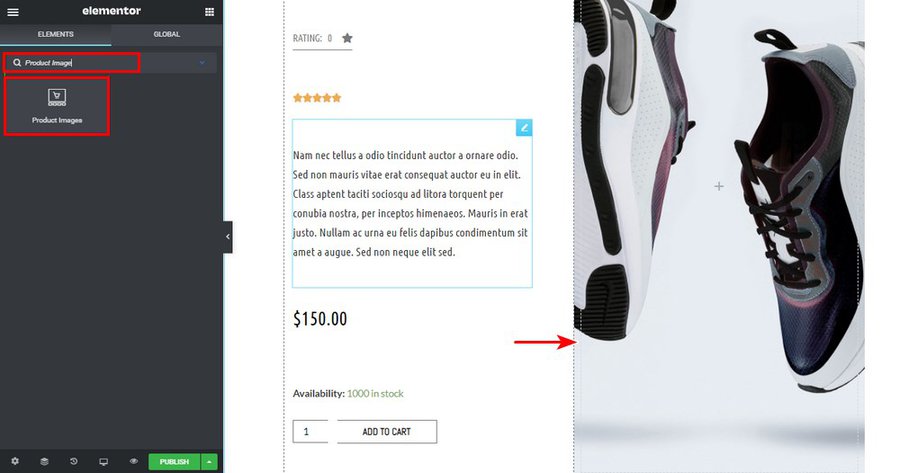
In this situation, some product widgets that you are able to add to your product page layout are Menu Cart, Breadcrumbs, Product Titles, Product Price, Product Rating, Short Description, Product Stock, Add-to-cart button, Meta Data, Product Images, and Tabs. The details for each widget will be as follows.
- Product Image
The image widget for your product will be applied to set your gallery or image that you are keen on displaying.
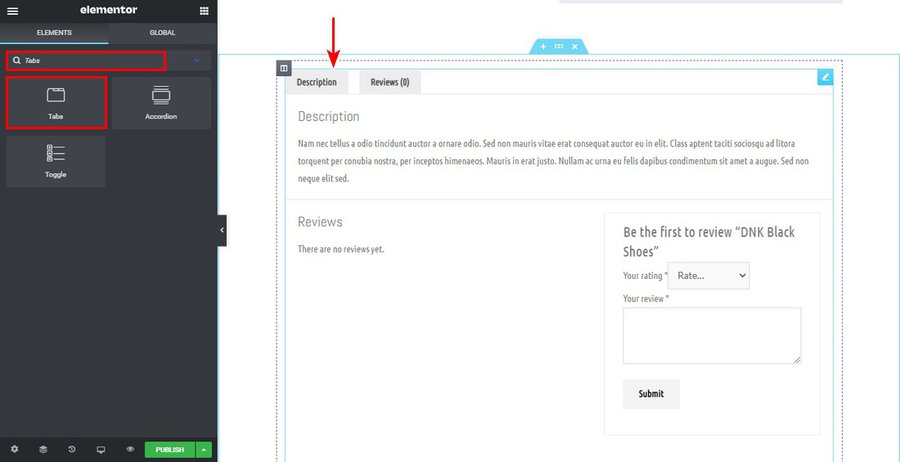
- Product Tabs
When it comes to the product tab widget, it aims at housing the principal information of your product. Therefore, to get an awesome layout, it is a must to make your product tabs to be visible for users to understand your products easily.
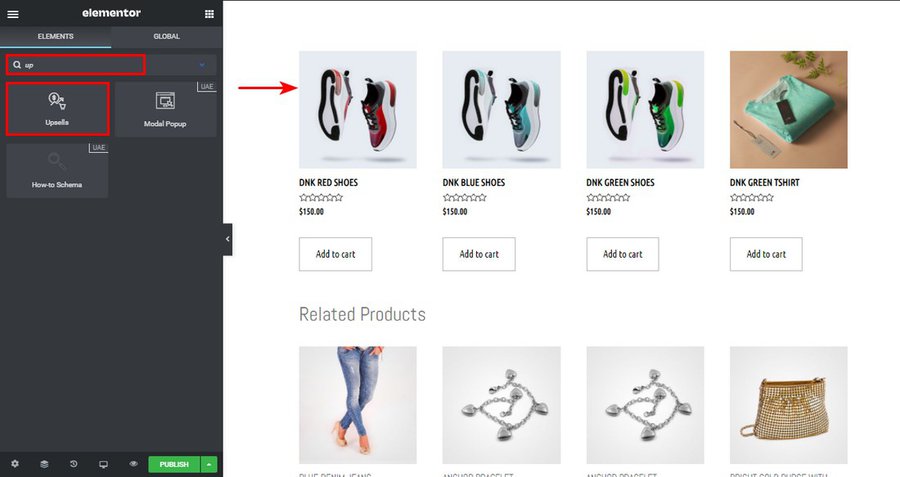
- Upsell
The widget related to upselling will give you an opportunity to set the style to upsell products. This section could be used to add the product that is purchased together.
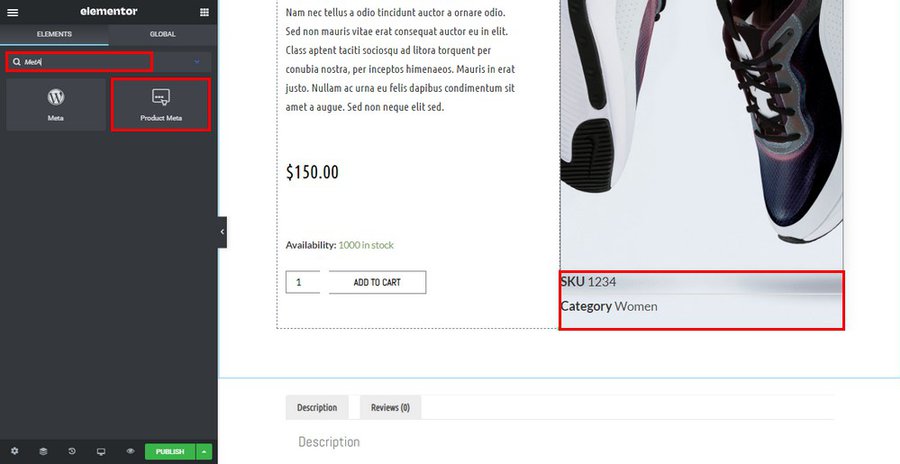
- Meta Data
This kind of metadata widget aims at setting the distance among the texts. Therefore, you can choose to display it inline or stacked. Moreover, you could also control your metadata style.
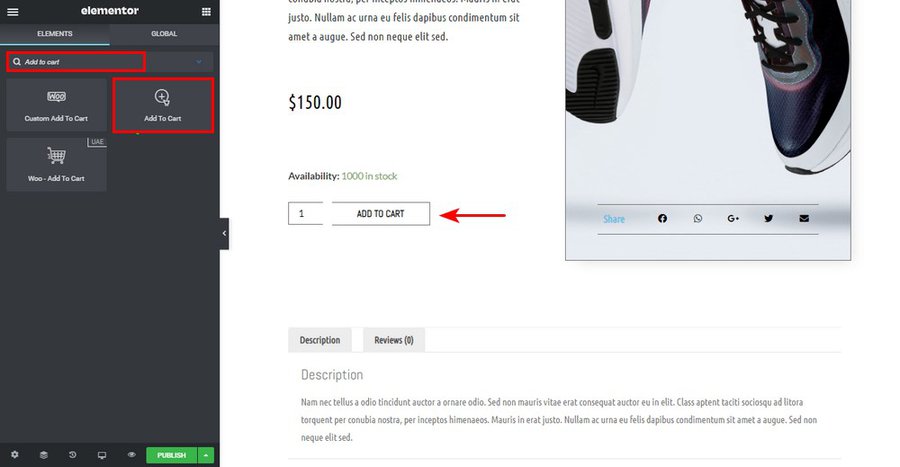
- Add-to-cart button
The Add-to-cart button widget will help you to control the style as well as the layout of the add-to-cart button. This button is important due to being the call to action. Therefore, do not miss this. The widget will let you add the product to the cart with the later checkout at the store’s checkout page.
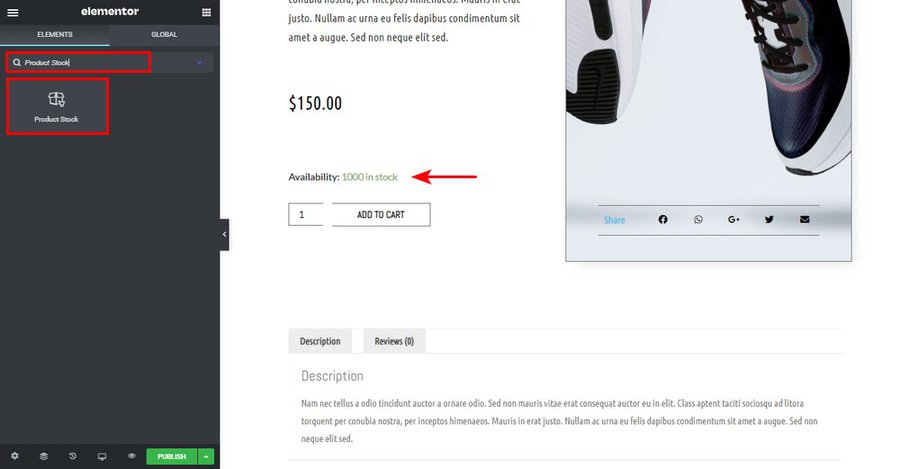
- Stock
The widget for product stock will represent the rest of your product stock. You could be able to add details of your stock on the data section as you create any product.
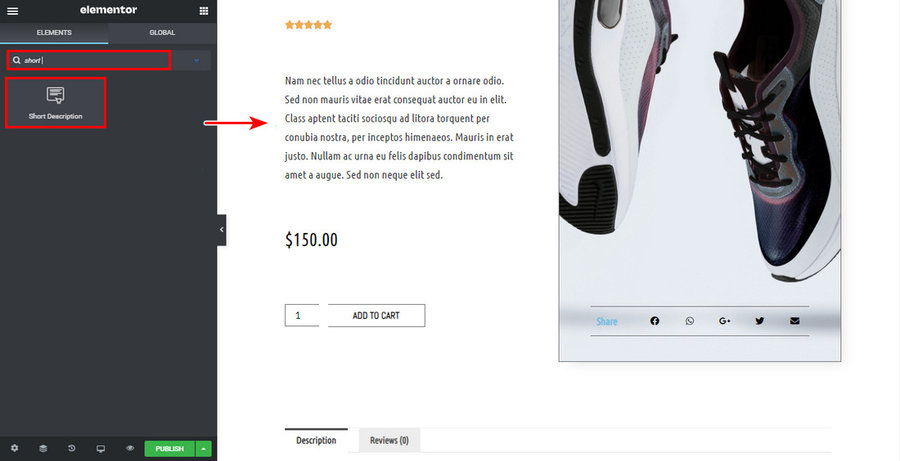
- Short description
This kind of description widget will control the description style and layout. If you fancy adding one short description to a field, you can totally do it when you create any new product. A recommended tip is that you should display the widget next to the top of your single page of products.
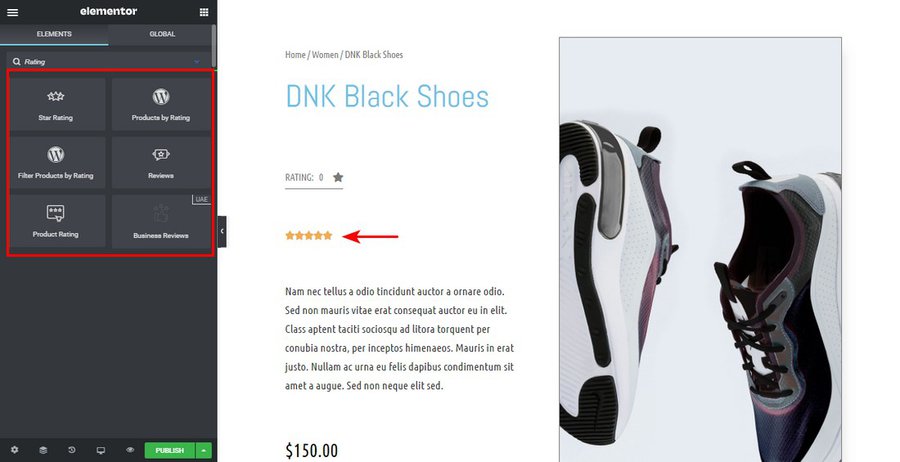
- Product rating
The widget related to your product rating allows you to show the rating of your product. You could display it on a single page to encourage potential consumers to purchase your products. This is to say, you will need to have several ratings first.
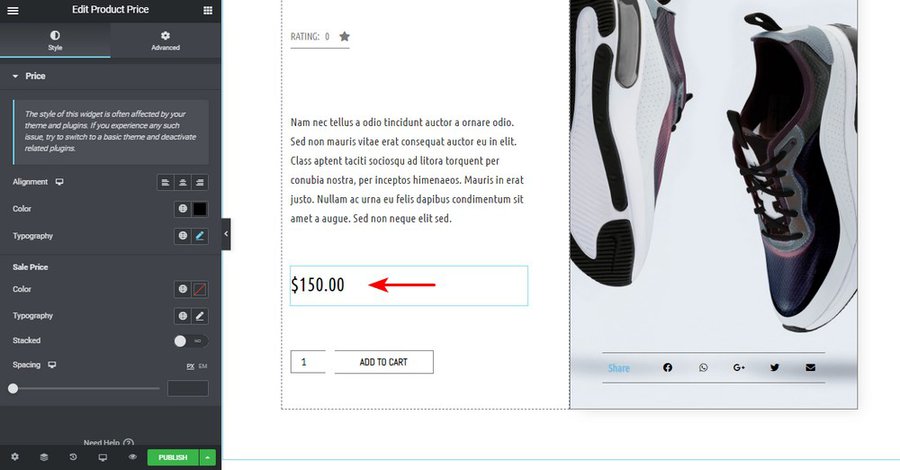
- Product price
How you display your product price is also an important part of making a great product page layout for your WooCommerce store. Hence, the widget for this product price is used to set the style, coupled with the position of your product price.
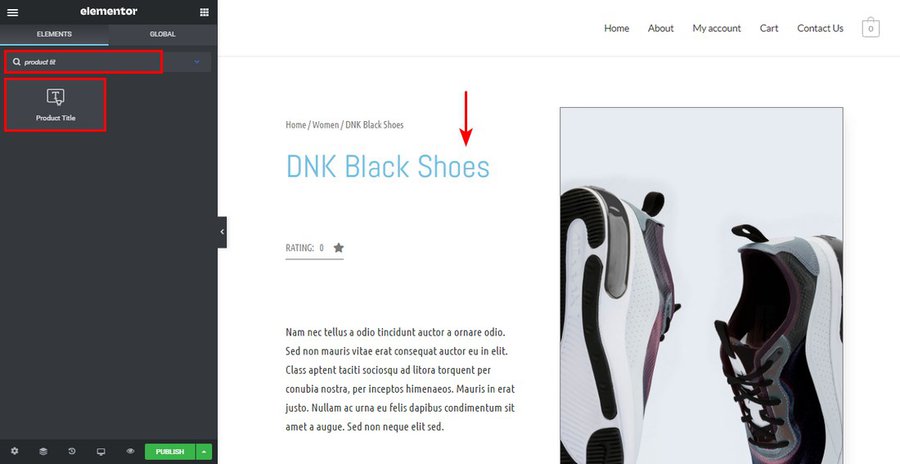
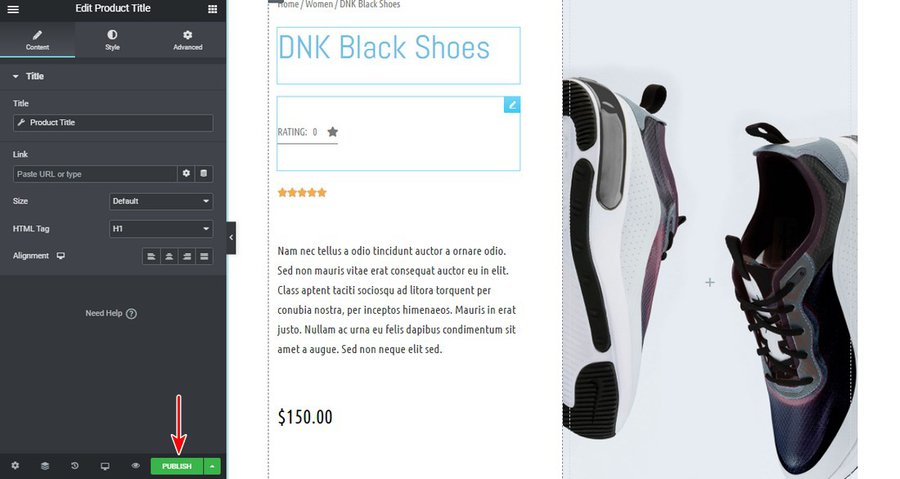
- Product title
It is undeniable that product titles will be of great significance to give customers general information about your products. The widget for this part will come with the ability to control the layout and the style of that product title.
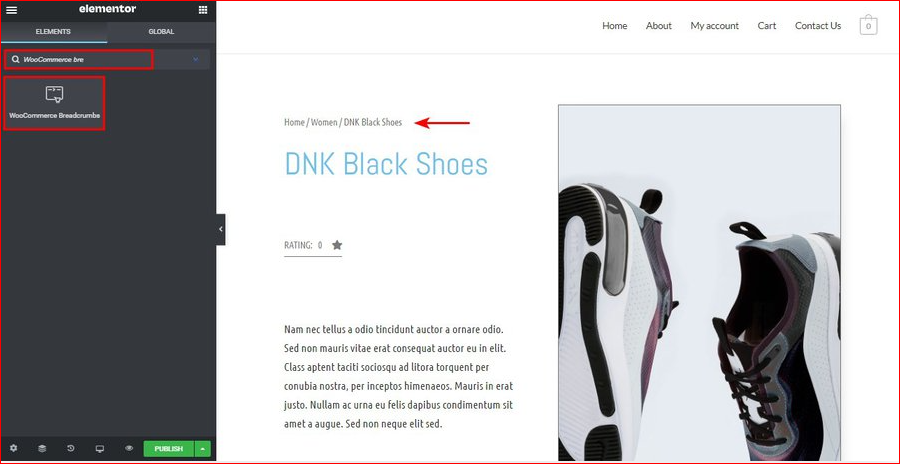
- Breadcrumbs in WooCommerce
The breadcrumb widget in WooCommerce will keep the color as well as the layout of your page’s breadcrumbs in control.
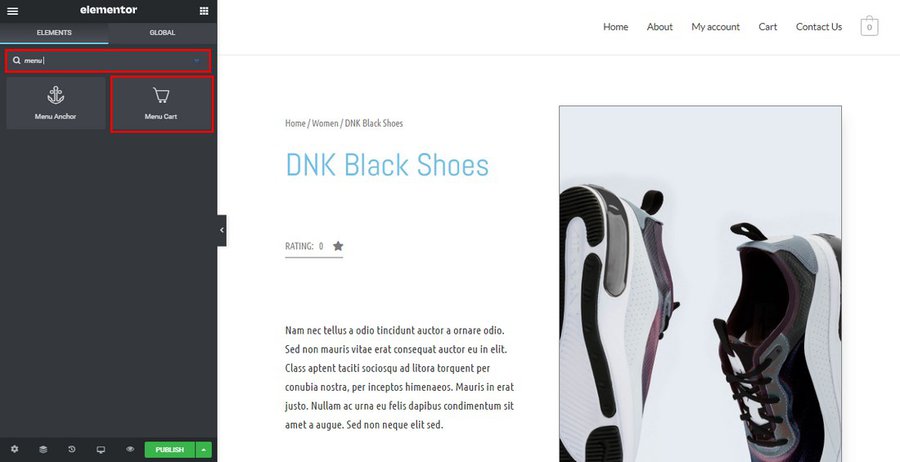
- Menu cart
If you want to impress visitors to your site, opening up the carts in another window will be a nice idea. And the widget for the menu cart can help you perform that. This kind of widget is helpful for displaying the carts on any WooCommerce page.
Step 5: Adjust tablet and mobile views
You could notice that a lot of people prefer accessing the website from smartphones to accessing it from desktop or laptops. This means that besides offering customers desktop or laptop views, you should also work to optimize your store for the mobile view. Otherwise, this could exert a negative effect on your store’s sales.
Do not worry because WooCommerce is user-friendly with mobile optimization. So, you should manage it well to make sure that the layout of your WooCommerce product page will look the best on customers’ mobile devices.
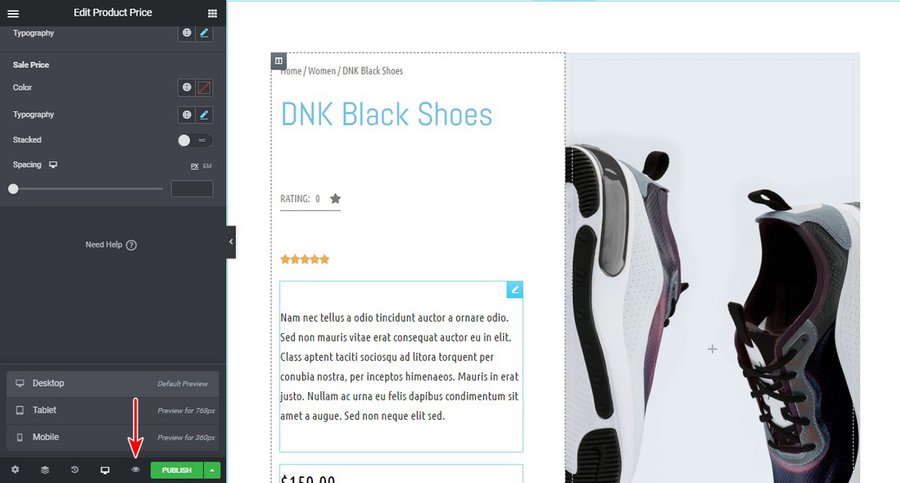
In checking this to see how your page layout will look on the mobile device, you should hit the button “Responsive Mode”.
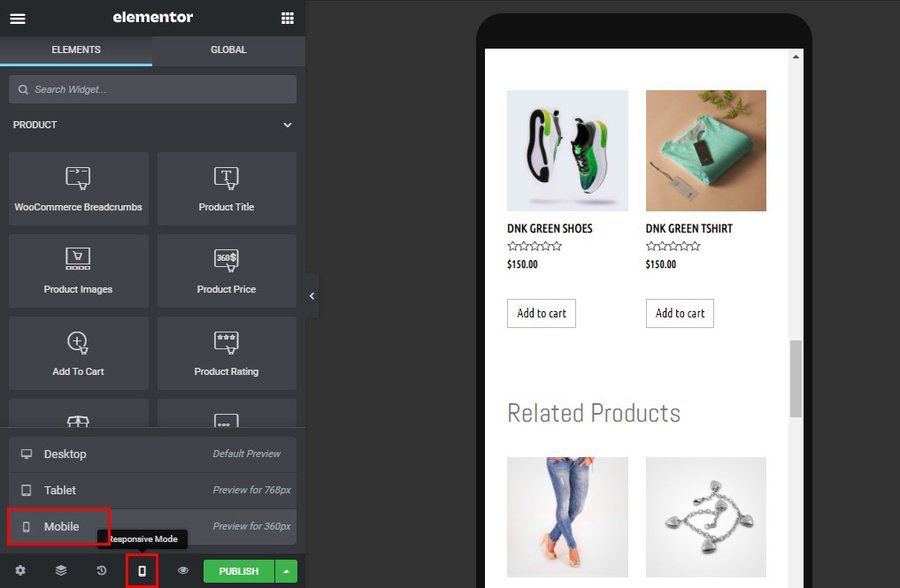
By hitting on this button, you will be allowed to switch among Mobile, Tablet, or Desktop views. It is convenient, right? Furthermore, you could even tweak each view’s design as per your wish and requirement.
To be more particular, changing the display settings of your blocks is what you are able to do. Hence, they could be shown amazingly on both tablet and mobile views. Let us take an example, when you are keen on increasing the font size of your price block on the mobile view, your job is to select your pencil icon that lies in the section of the price element.
Step 6: Preview and publish the new layout of the product page
Previewing the layout of your WooCommerce product page is a must-have step to make sure everything would be nice. So, to check if you customize your desired style and layout, you should preview this with some other products as well.
In doing so, your task is to hit on your eye icon at the left panel before clicking on the section “Settings”. And remember to select the product that you are fond of displaying under the WooCommerce preview settings. Next, proceed to apply to view how it is about to be displayed.
When you are satisfied with this change layout, you can proceed to publish the product page layout that has been changed within WooCommerce. Now, hit the button “Publish” at the left corner of your Elementor interface.
After clicking on this button, you can notice one new window appearing where you are asked to add the condition when you should use this template.
Step 7: Set your conditions
The final step in changing the layout of your WooCommerce product page involves setting the conditions. This step is so important. As you might know, the created template by default might exert an effect on your WooCommerce product pages. And owing to setting the conditions, you could be able to pick up a certain product category.
When you are here, it is time to hit on the button “Save and Close”. Then, all the added conditions would be set. This kind of action helps you to save as well as replace your default page of products. What is more, if you are keen on visiting the product page to observe how it would be displayed, you can navigate to your front end for observation.

Top 3 plugins to change your WooCommerce product page layout
Plugins are always a helpful method for any in-depth customization on your WooCommerce store and it makes no exception to changing the layout of your WooCommerce product page. So, if your default product page layout options in your WooCommerce store are limited, you should look into these plugins below and you could get a lot of benefits from it.
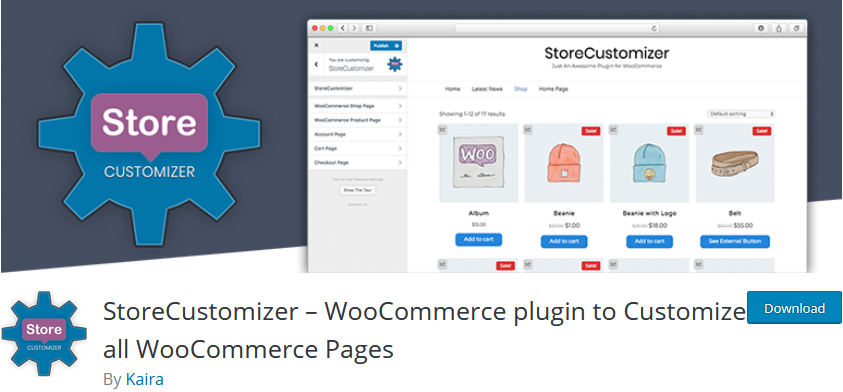
1. WooCommerce Store Customizer
One of the best plugins to assist you in changing the WooCommerce product page layout easily is WooCommerce Store Customizer. It has a reputation for being the all-in-one plugin in which you can use it to customize a lot of things in your store. Thanks to it, you can add, create, or even remove any button or element to your WooCommerce product page layout. Hence, there is no need to worry if you have an undesirable layout. Let this plugin change it for you.
Main feature
-
Add, create, or remove myriad buttons, modules, and elements in your product page layout
-
Be able to edit font size, font colors, or typography for your WooCommerce checkout, shop page, and product page layout
-
Come with the ability to enable the add-to-cart decrements or increments
2. WooCommerce Single Product Page Customizer
Another not-to-be-missed plugin is WooCommerce Single Product Page Customizer. As the name indicates, this is a perfect tool to change or customer the layout of your product page within WooCommerce. You can add text, HTML elements, and media to your page layouts. What is more, adding customizable HTML hooks or elements and executing different unique designs are what you can do with the help of this plugin.
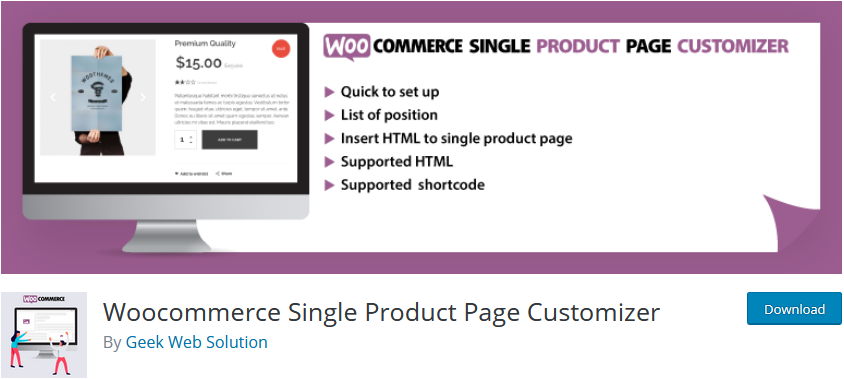
Main features
-
Be user-friendly with the helpful visual editor
-
Support custom HTML codes, texts, links, embeds, and media
-
Be able to select choose the position for customization
3. Product Addons for WooCommerce
The last plugin to appear in this list is Product Addons for WooCommerce. Being a lightweight plugin with plenty of advanced features, it allows you to construct myriad fields on the WooCommerce product page. To be more specific, you could even personalize pages with many custom product fields and options. It is undeniable that it will provide users a great form builder for creating a lot of fields on your page layout.
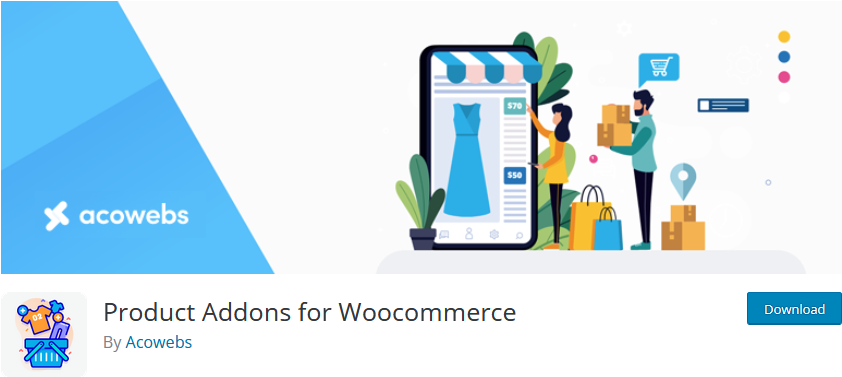
Main features
-
Come with the ability to add certain fields for collecting customers’ data
-
Help users collect dates, customer notes, and engrave texts
-
Be able to add many fields to your page layout
-
Offer one dedicated builder form
Conclusion
When it comes to WooCommerce product page layout, it has become a part of your store. Whether you could boost your sales and revenue or not, depends a lot on the layout of this page. Hence, right now, you should pay attention to it properly to make it perfect in the eyes of customers. Hope you could find our article helpful to assist you in changing your page layout. Share it with others to help concerned people know it.


