
How to Cancel a WooCommerce Order

If you are selling products online, you may have to deal with customers canceling their orders on a daily basis. Normally, this implies that you may have to perform some steps to create a cancellation order. Fortunately, canceling a purchase is quite simple if you are using WooCommerce.
In today’s article, we will be discussing How to create a WooCommerce cancel order in two separate methods: manually and using a plugin. If you are interested in the same topic, keep reading to find out more!
How to cancel an order directly from WooCommerce dashboard?
It’s very simple to cancel a purchase manually. Within our 3 basic steps, you can quickly remove an order from your managing system. However, if you want several other advanced settings while deleting an order then you can use a plugin, which will be in the next section of our tutorial.
No more beating around the bush, let’s get started:
Step 1: Locating Orders page
The first thing we are going to do is to navigate to the “Orders” page located in the left-hand sidebar of your WooCommerce Dashboard:
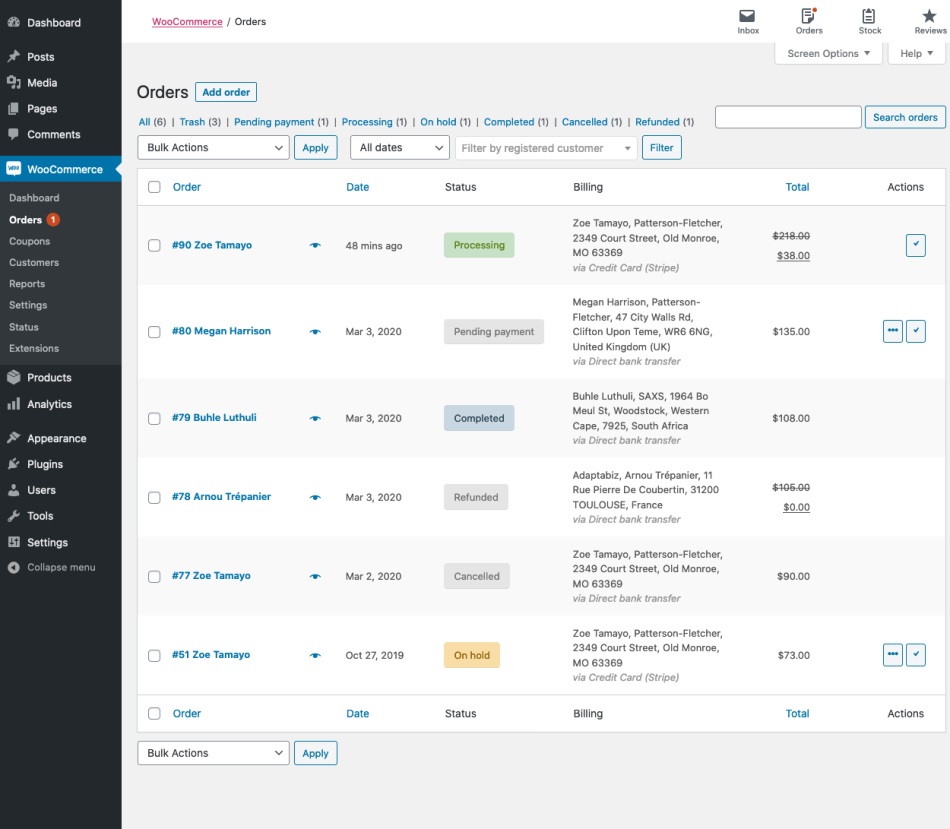
Step 2: Change the order status
A list of all your orders is now available. Most of the online customers will provide their order information, including order number, name, address and so on. You might have to search for a specific order if you handle a wide scope of orders at once. Therefore, you can type in the order number onto the search bar located on the top of your screen. In case, if your customer is a registered member of your site you can filter the search with “Filter by Registered Client” option then type in their name:

After that, click on order you wish to cancel, and an “Edit” panel will appear. Change the “Status” dropdown from “Processing” to “Cancelled”:
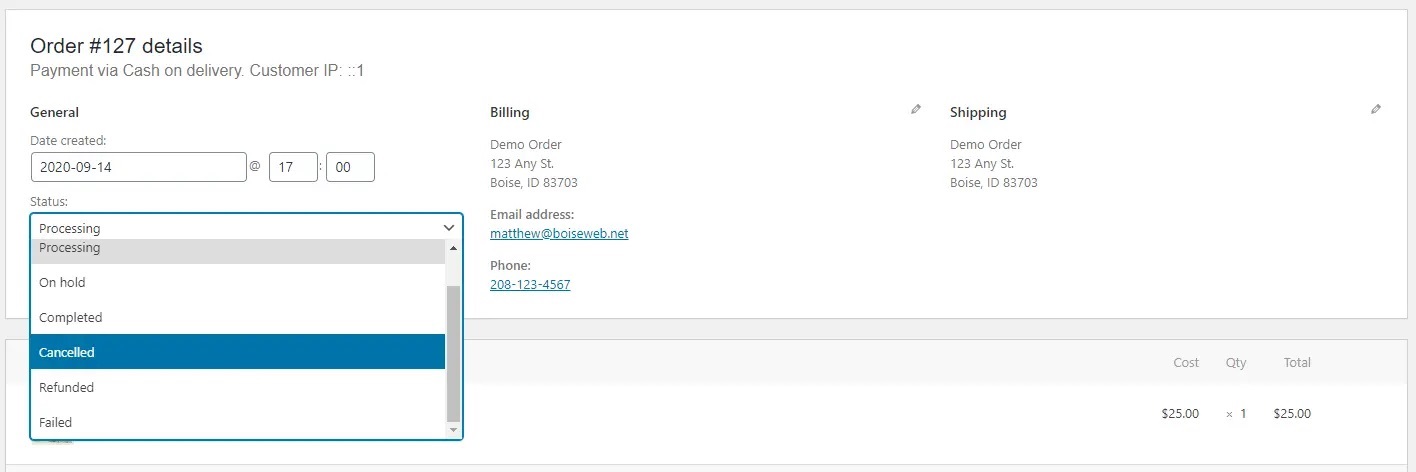
Step 3: Save your changes
Move your mouse over the “Update” button to save your changes. Now, the order appears on both your order page and the customer’s account will be labeled as a WooCommerce cancel order.
How to create a WooCommerce cancel order using a plugin?
Using a plugin for a WooCommerce cancel order will allow you to save up more time and avoid product returns and refunds rather than performing the task manually. Plus, the processing system of plugins will allow you to manage these cancel orders way more efficiently.
Step 1: Download the plugin
If you have worked on WooCommerce for a while, installing a plugin is no need for a tutorial to quickly move on to the next step. Conversely, for those of you who are newcomers, you will need to download the plugin file called “Advanced Cancel Order for WooCommerce”, then navigate to the Plugins > Add New page from your WooCommerce Dashboard and start upload the file by selecting the “Choose File” button:

Continue to choose “Install Now” and “Activate” to wait for the installation to complete.
Step 2: General settings
The user may cancel his order only by default while his order is in “Pending Payment” state. If you wish to cancel your orders under different conditions, activate the option “Allow user to cancel your purchase”.
Select the order state suitable for cancellation from the selection “Eligible order statuses for cancelation”. By default, only statuses of “Processing and On Hold” are displayed. If you have custom order statuses set, this alternative is also accessible.
Moving on to the “Eligible Payment Methods”, just pick out the payment gateways which you find eligible for a WooCommerce cancel order. For the “Eligible Payment Methods for Refund” would be the ones that you allow receiving refunds automatically.
In the “Approval Mode” option, if you want to evaluate and accept a cancelation request, then select the value as “Manual”. For canceling requests and reimbursements to be issued automatically, then choose “Automatic” under the “Approval mode” option.
Step 3: Cancellation fees setting
If you want your users to charge a cancelation fee when your users cancel their purchase: Activate the option “Cancelation Fee”. Along with that, select the kind of fee you wish to charge from the user under the “Fee Type” option. Once the type has been chosen, feel free to type in any value that you will charge whenever a WooCommerce cancel order is made.
Step 4: Restriction setting
By default, all registered users may cancel their purchases. You may modify the “User Filter” option if you wish to limit the number of WooCommerce cancel orders to particular use or user roles. On the other hand, specify the lowest total order value and the maximum value of an order in the “Minimum/Maximum Amount to Cancel the Order” if you want to restrict the cancellation of orders within a particular range.
Step 5: Create cancel form
The reasons for cancelation are shown to the user at the front end by default. You may adjust the reasons under the option “Reason for Order Cancel Order”. If you wish to require your users to choose a reason, activate the option “Force users to select a reason”.
Furthermore, when you scroll down, there will be several more sections for you to make changes to, such as:
- Advanced: In this area, the appearance and feel of the cancelation form may be customized using CSS coding.
- Email: In this area, e-mails sent via the “Advanced Cancel Order” plugin may be enabled and modified.
- Localization: If you attempt to cancel your purchase from your account, you may modify the labels and messages displayed to the user.
Step 6: Types of approval
Once a WooCommerce cancel order has been made, online store owners can either approve or deny these cancellation requests. There are two ways to do this - Manual or Automatic Approval.
First of all, with the Manual mode, the user sends a request for cancelation from their website. The admin will be informed via email after the request is submitted and they must evaluate the request then decide to approve/reject the request for cancellation. If the user already pays, the money may be reimbursed to the user without leaving the website. The money must be reimbursed outside the site for other payment gateways. If you set out a Cancellation fee, they will not be charged if the order has been paid beforehand.
Besides, we also have an Automatic Approval feature while using a plugin. After a cancellation request form has been filed, the money paid to the website is immediately reimbursed to the user. And the Cancellation fee for this mode works the same way as the Manual Approval one.
Final thoughts
To sum up, cancellation is inevitable if you are running a business in general. But to maintain a good reputation and still make your customers come back is a different matter. We hope that our tutorial on How to cancel a WooCommerce order will help you increase your shopper trust and loyalty and avoid the worst-case scenario.


