
How to Add Social Login to WooCommerce

As an e-commerce retailer, pleasing your consumers will be a priority. Providing better services to your consumers will imply more loyalty over the long haul. When looking at online shops and websites, you will notice that a majority of them provide an option to log in via social network accounts. It will be easier for customers to connect by using their social media accounts since this will spare them the burden of remembering another login information.
That will also be the main topic of our article today. Keep reading to find out more! We will be explaining the benefits of using social login buttons and guide you through the tutorial on How to add WooCommerce social login to your online store.
Why should we use a WooCommerce social login?
WooCommerce social login, also known as Social Sign-in, is a single-sign-on option that utilizes your current login credentials from a social networking website like Facebook, Twitter, Linked In, or Google+, among others. Instead of establishing a new account for a third-party website, you may utilize the login to sign in to that site. In this way, it will help your customers to speed up their shopping journeys in your WooCommerce store.
The rising popularity of WooCommerce social login these days is because of its significant benefits, such as:
- Trustworthy: Social login offers a recognized, consistent way of logging in regardless of the site users visit. Users may feel more comfortable providing their data with new and unfamiliar sites and applications if they do it via social networking platforms they already trust.
- Secured network: Social login adds an extra degree of security, ensuring that access requests come from genuine, reliable visitors. This kind of authentication also necessitates social platform verification, adding even another layer of protection against spam and other potentially dangerous logins.
- Time-saving: When customers check in to a website or app using their social network account, the site owner may utilize the data from that platform to figure out what their preferences are.
- Intelligence database: When users log in to a website or app using their social media account, the site owner may analyze data from that platform to determine customer preferences.
- Economically effective: Integrating social media logins necessitates the use of APIs for each social network, such as Facebook Login and Google+ API.
How to add social login to your WooCommerce store?
Now that you have acknowledged how a typical WooCommerce social login works and the advantageous side, we will be moving on to the setting up phase. Our tutorial will guide you through answering the question of How to add a WooCommerce social login to your website.
There are only a few steps, which will not account for too much time for you so please keep a close eye on each of them or you may have to start all over again. Let’s get started!
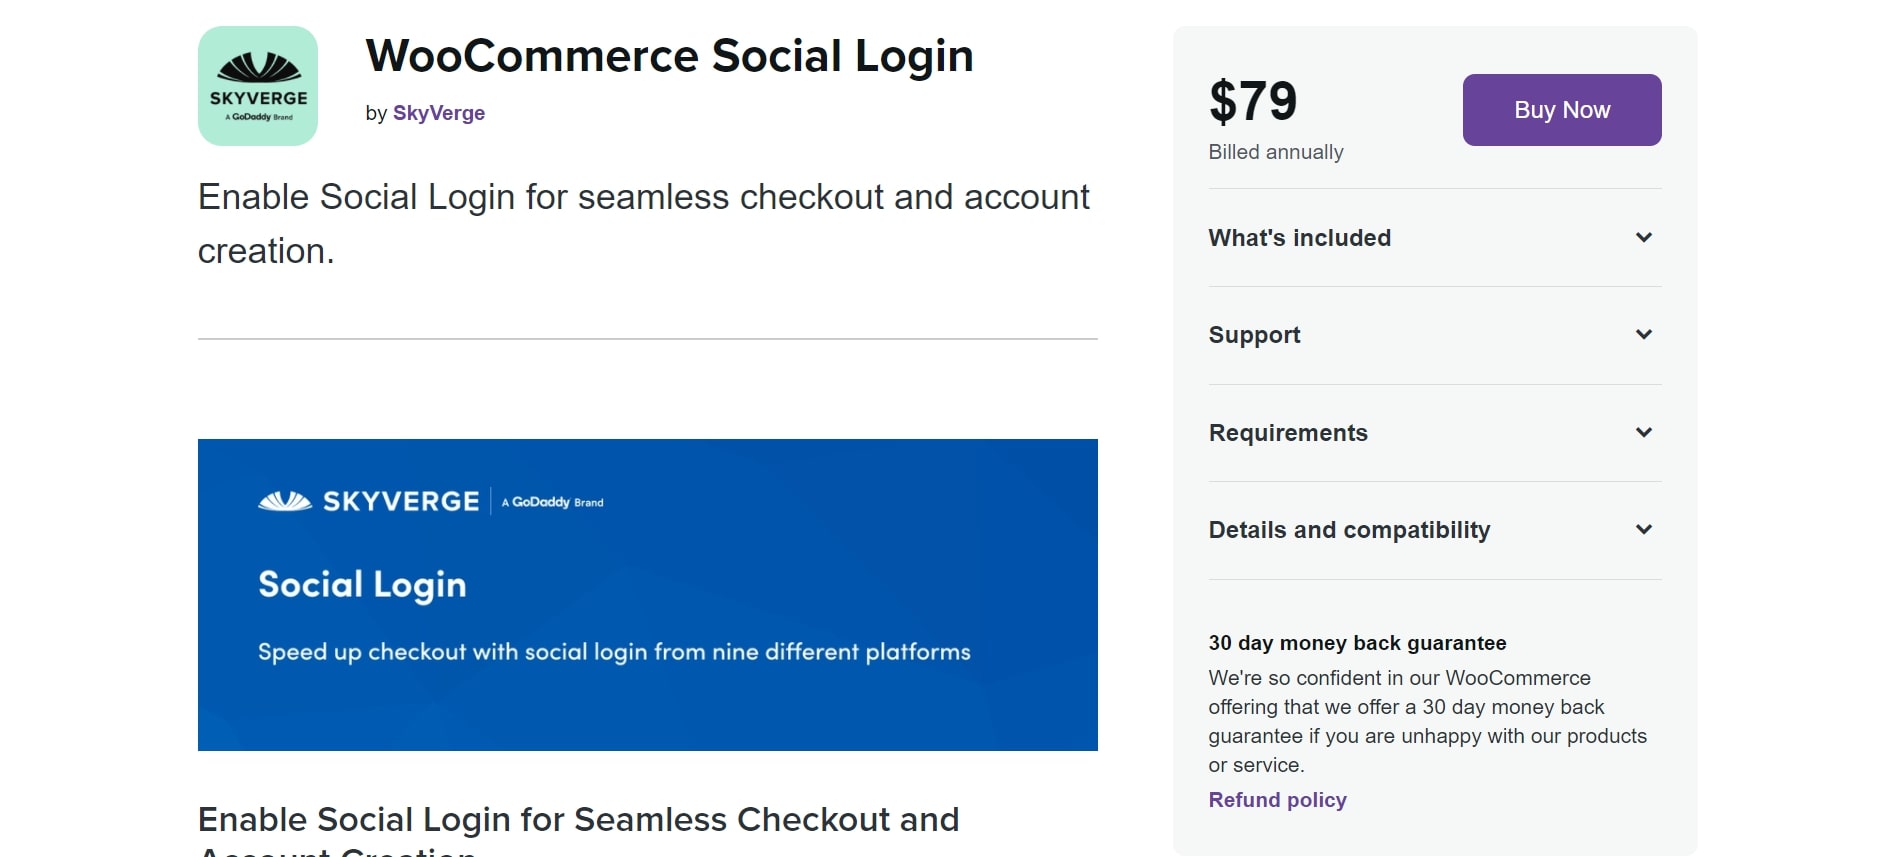
Step 1: Install the plugin
This must be the easiest step out of all, especially if you have been an online merchant on WooCommerce for a while now. On the other hand, for those of you who are new to the platform, navigate to the link and click on “Buy Now” button to download the .zip file of the plugin:
Then, go to your WooCommerce Dashboard and look for the Plugins > Add New section on the left sidebar:

You will quickly notice a button in the center of the screen saying “Choose File”, selecting this one means that the .zip file will be uploaded to the system. After that, continuously click on “Install Now” and “Activate” to take the next step!
Step 2: Configurations
After installing the extension, you can configure some basic settings for all social buttons before enabling settings for each social network.
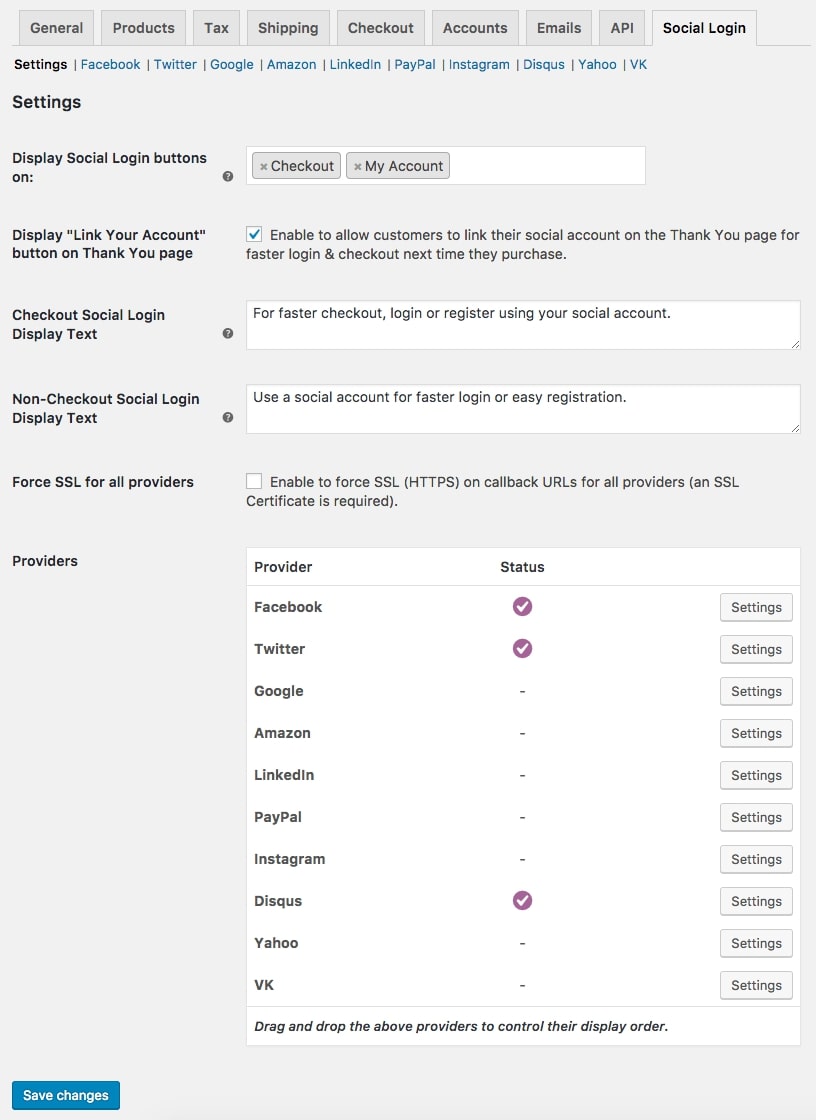
First, let’s take a look at “Social Login Options” section, where all the following configurations for WooCommerce social login are available:
- Display Social Login on: This determines where the social login choices appear:
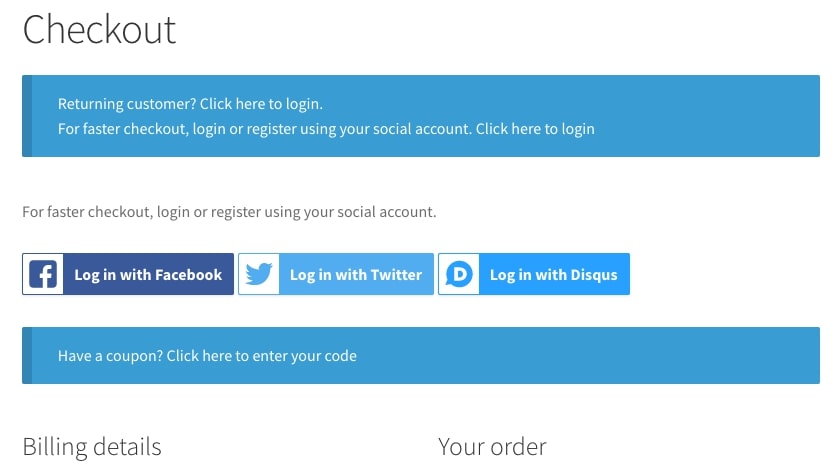
- Checkout: while checking out, your customers will receive a “LogIn” notification
- My Account: on the “My Account” page
- Checkout Notice: another distinctive notice about social login appearing on the checkout page
- Product Reviews Pro Login: This option appears if Product Reviews Pro is enabled, allowing you to display WooCommerce social login on Product Reviews Pro login windows.
- Display “Link your account” button on Thank You page: This will show a message at the top of the Order Received page, requesting that logged in users connect their accounts for future quicker checkout.
- Checkout Social Login Display Text: This affects the wording that appears above the social login buttons during checkout.
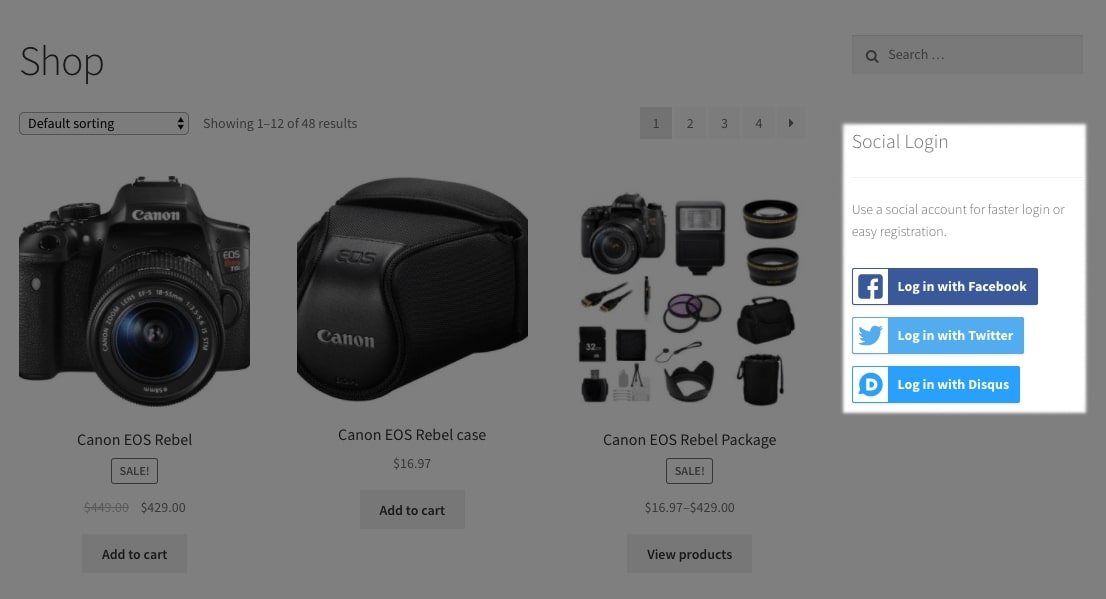
- Non-Checkout Social Login Display Text: Outside of checkout, such as if used in a widget, this affects the text shown to users above the social login buttons.
- Force SSL for all Providers: Enable this to require SSL for all callback URLs as they return to your website. However, you will only be capable of turning this feature on in case your online store has installed an SSL certificate.
- Providers: Drag and drop to rearrange the order of linked providers on the interface.
That is everything you need to do during the “General Settings”. Apart from that, you can also make more advanced changes to your WooCommerce social login in the “Provider Settings” section by entering the WooCommerce > Settings > Social Login > [Provider Name] page:
As you can see in the image, there are six fields in total that you have to decide on, including:
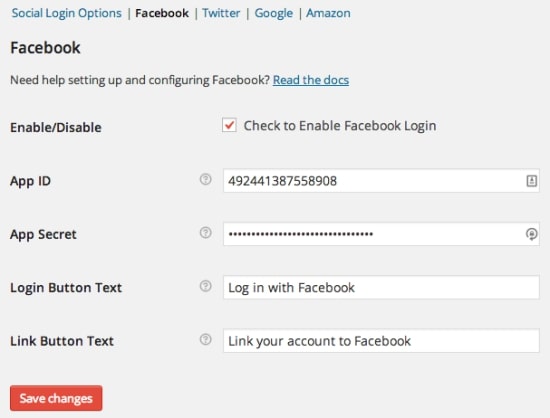
- Enable/Disable: Check this box to utilize this provider’s login when social choices are shown.
- App ID: This field’s name may vary, but it’s the Key or ID you receive when you create your app for each provider.
- App Secret: This field’s name may vary, but it’s the Secret key you receive when you create your app for each provider.
- Login Button Text: The text that will appear on the provider’s Social Login Buttons.
- Link Button Text: The language that appears on the “My Account” page in order to encourage existing customers to link their social media profiles to the provider.
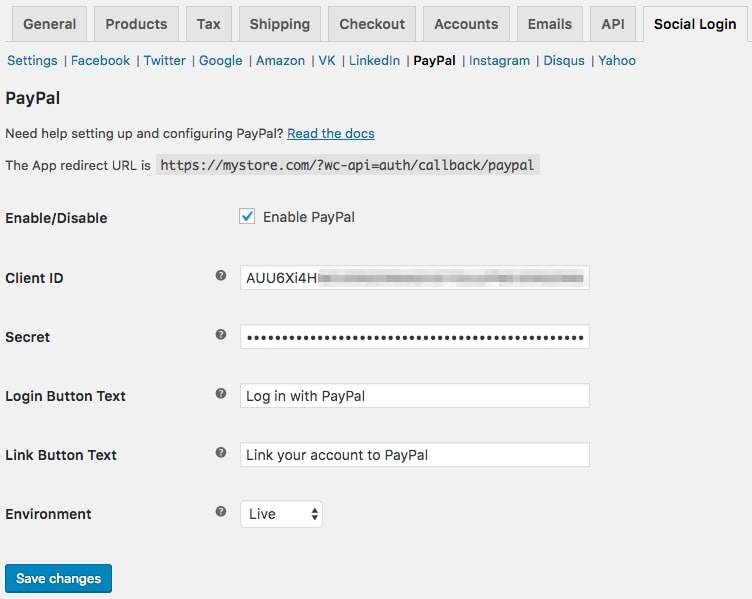
If you are attempting to connect with PayPal, there will be an additional field called “Environment”. The recommended mode for this option is to put it live instead of Sandbox as Sandbox may only be utilized with a special PayPal sandbox account, which necessitates a significant amount of settings:
Step 3: Integrate with your social media
Here comes the most wanted part of the article: connecting with your social media account. Feel free to integrate your WooCommerce store with a wide range of networks such as Facebook, Twitter, Amazon, Google and so on. For this one, we will perform the Facebook connection as an example. Checkout this link to create multiple WooCommerce social logins for your online business.
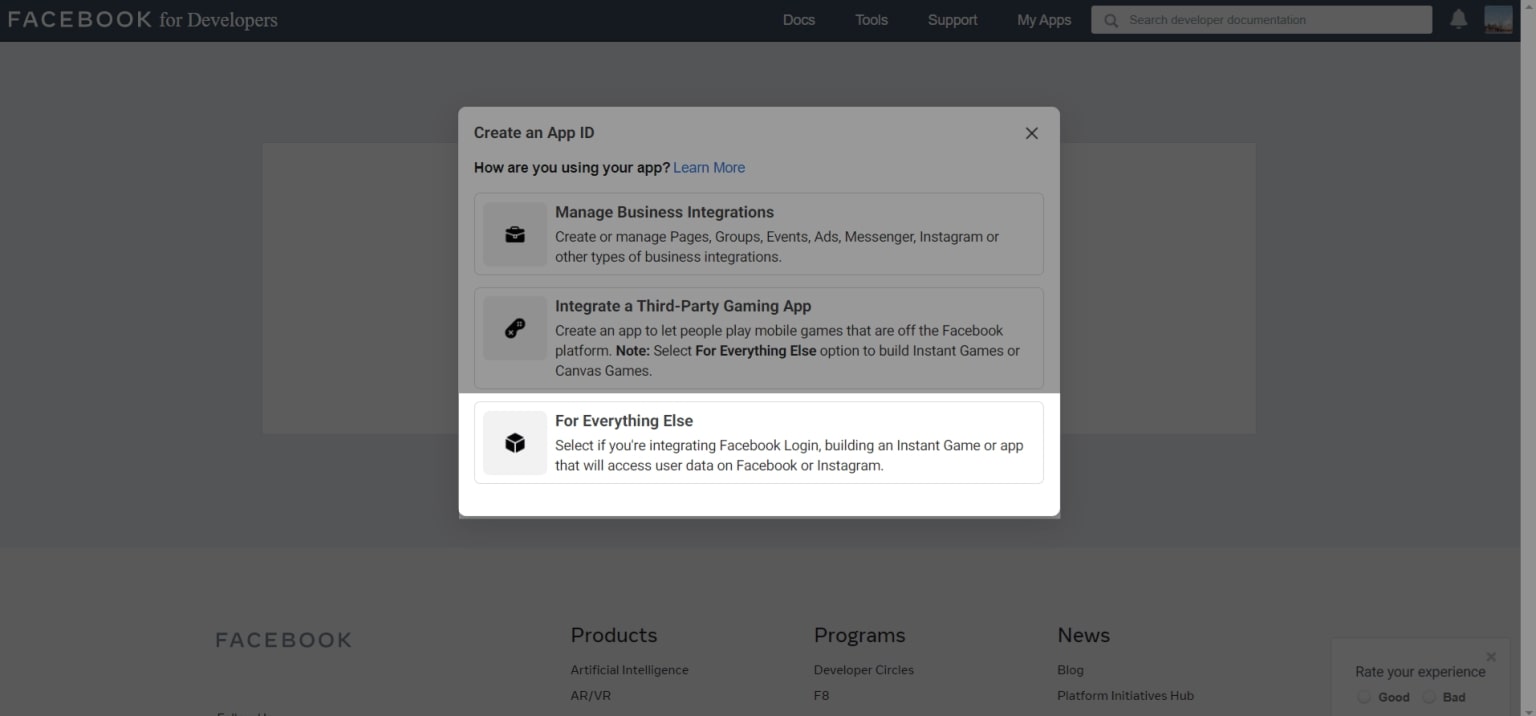
Log into your Facebook account to link your WooCommerce shop to Facebook. While signed in, go to developers.facebook.com and choose the “My Apps” option. You’ll see a “Create App” button if you’ve never built an app before, or a “Add a New App” one if you have. As soon as you finish clicking on it, there will be a pop-up appearing on your screen. This software will be used to incorporate the Facebook Login option in your site, so you may utilize the “For Everything Else” option:
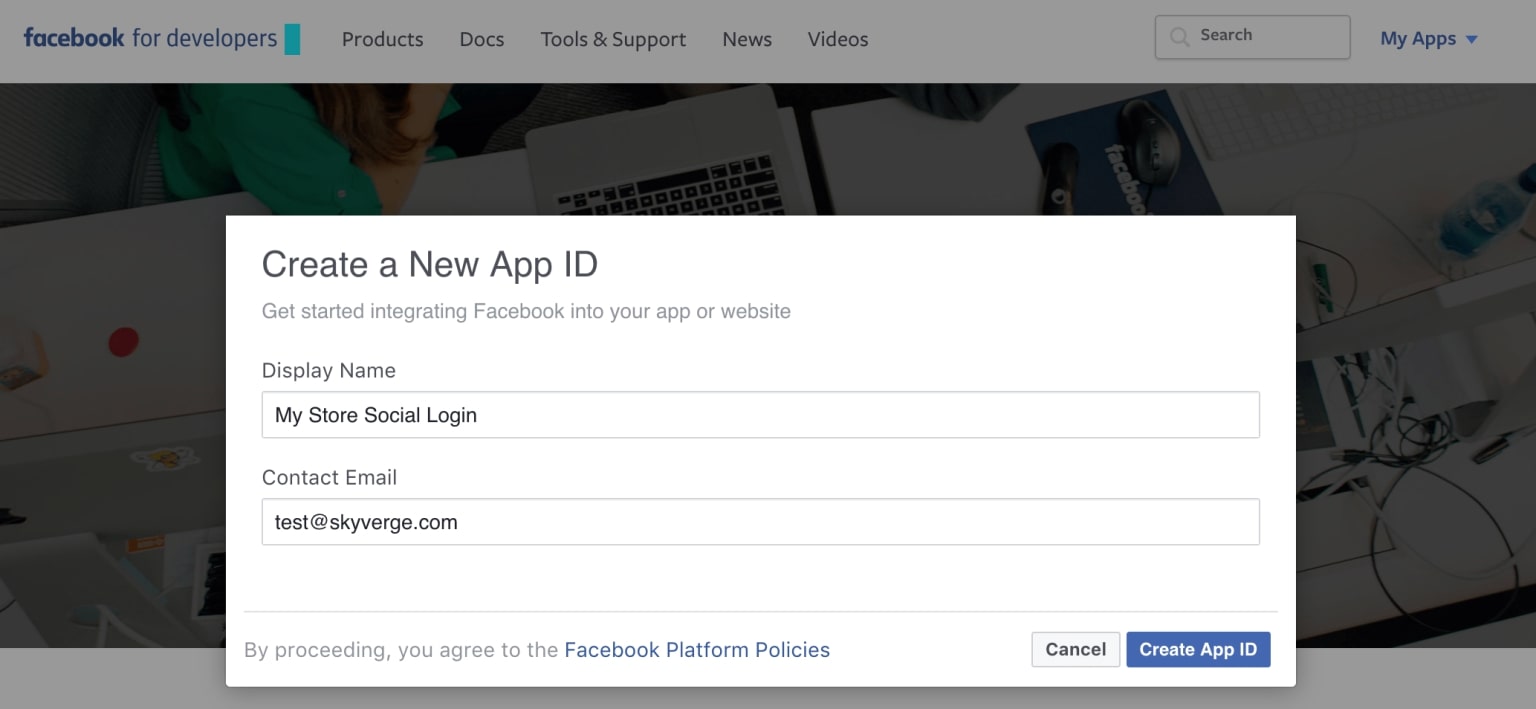
Fill in the name of the application along with your email address. You can skip the “Business Manager account” if you want to:
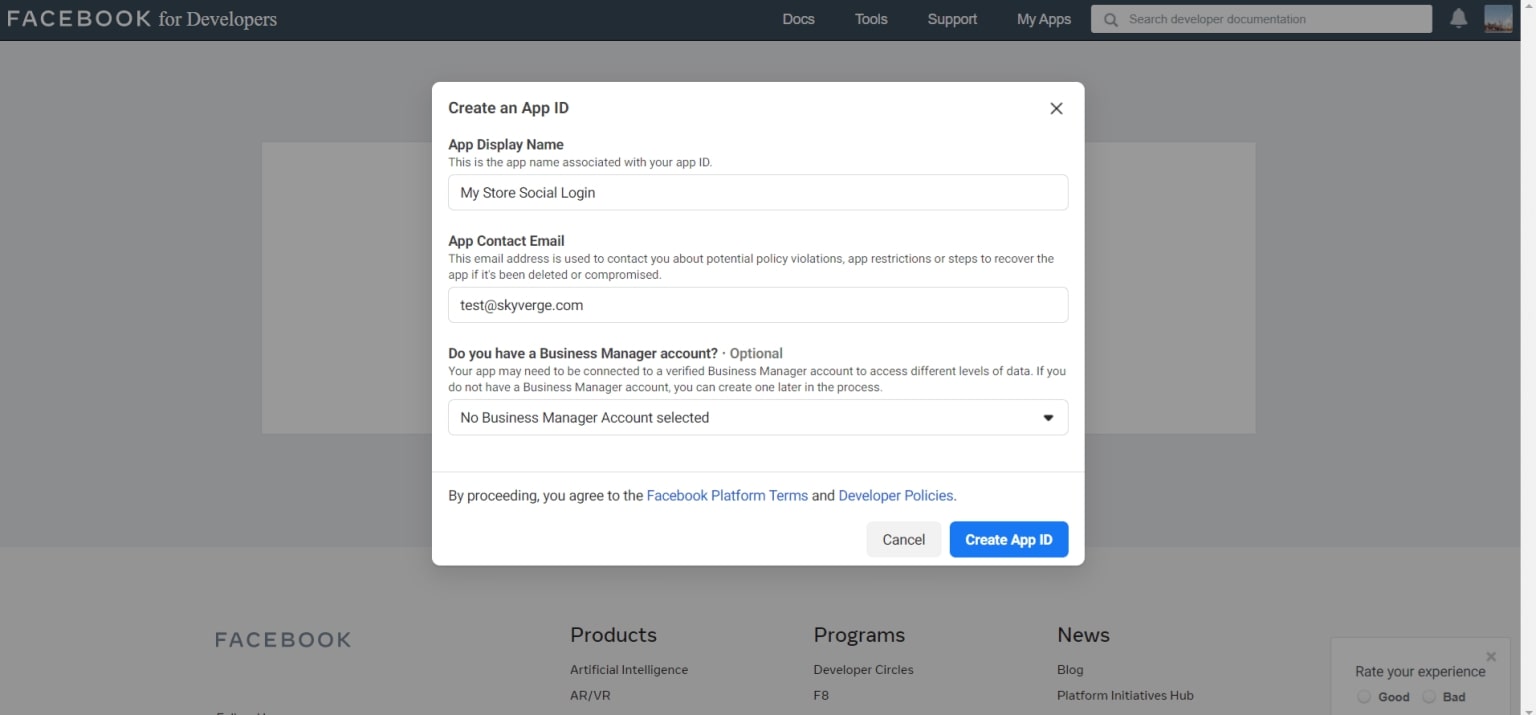
Choose “Create App ID” to continue:
And then you will notice the “Set Up” button under the box of “Facebook Login”:

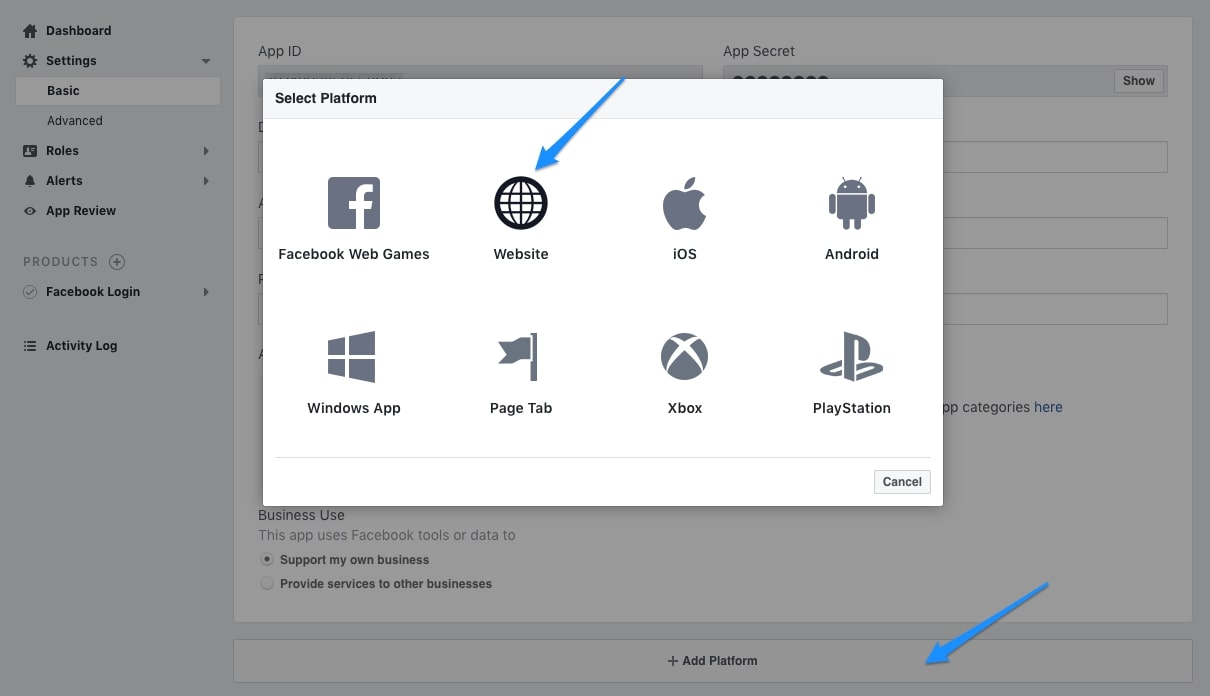
Instead of using the “Quickstart” that will be shown to you, go to “Settings > Basic” for the app then Add Platform > Website just like what we did below:
Now, it’s time to enter everything related to your WooCommerce social login into the information page:
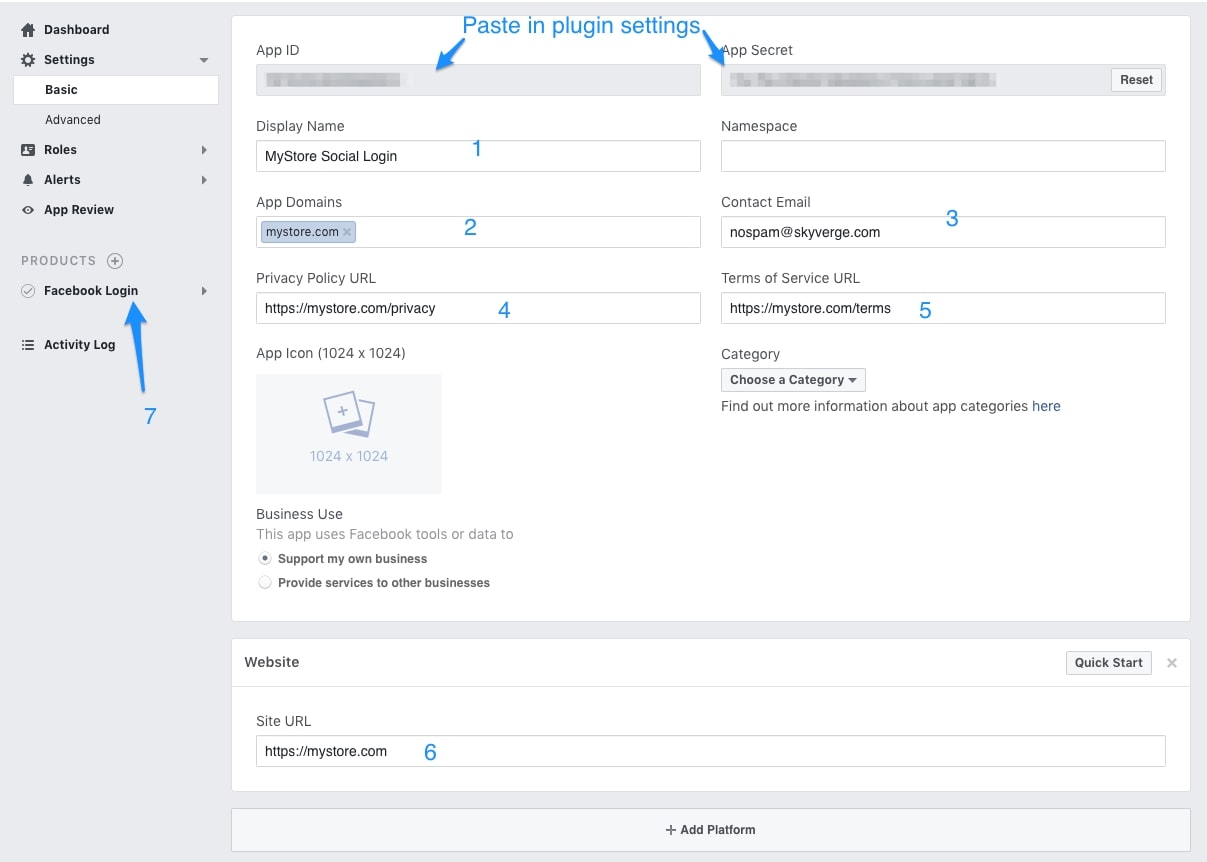
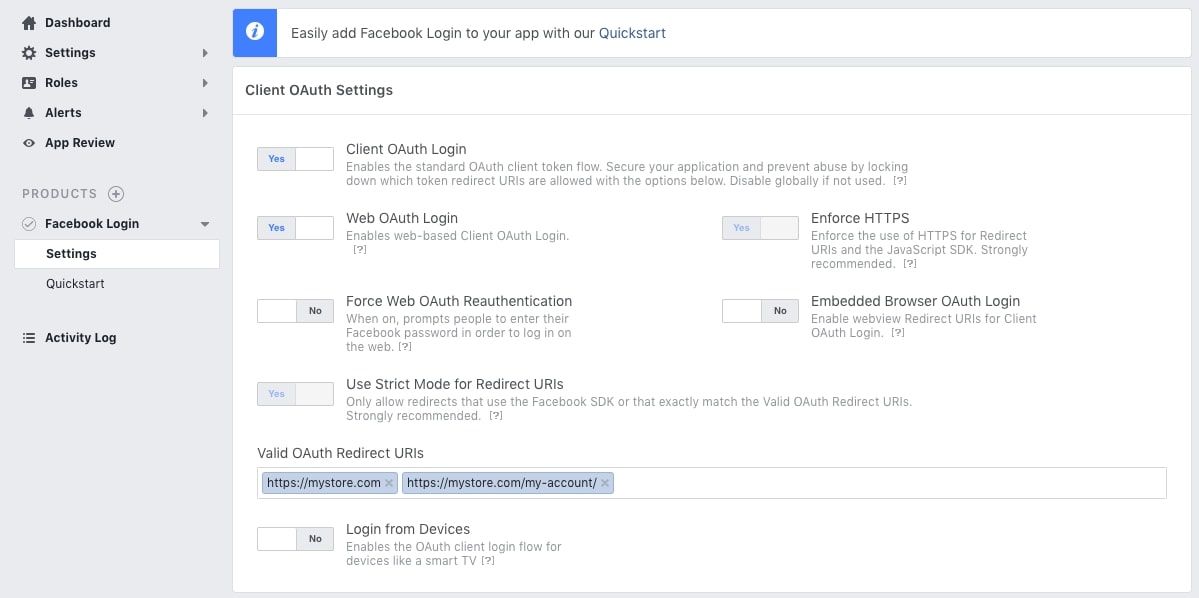
Locate the Facebook Login > Settings page on the left-hand sidebar, copy in the URL links of all your website pages:
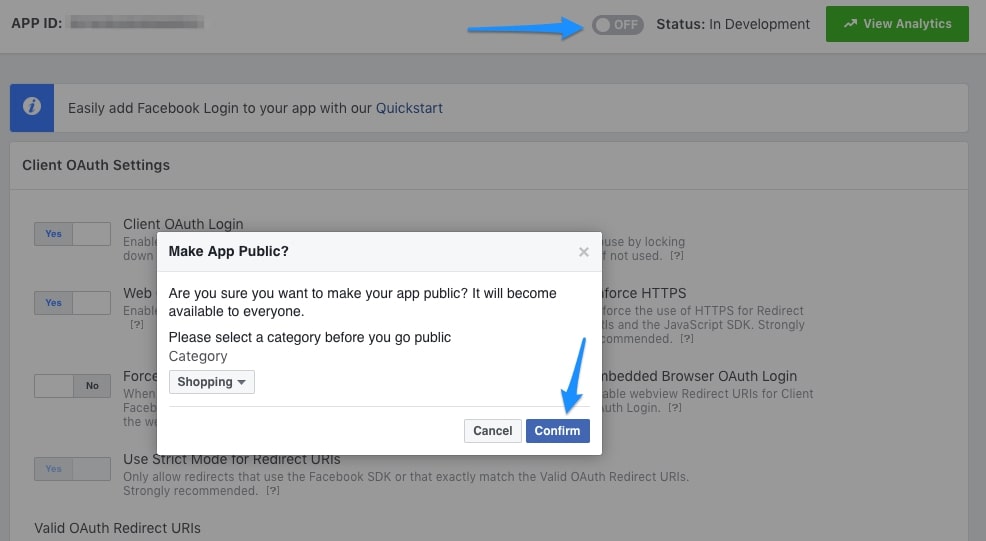
Here comes the very last step: change the app’s status to live/public under the “App Review” button:
The set-up is complete! You may now get your App ID and Secret by going back to “Settings” or “Dashboard” from WooCommerce > Settings > Social Login > Facebook is where you’ll find them.
Step 4: Keep track of your WooCommerce social login
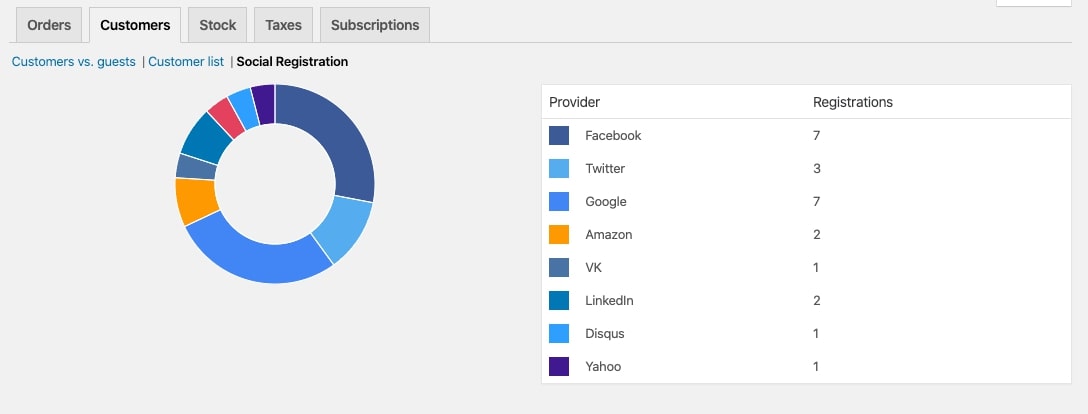
If you want to see how this is utilized, go to WooCommerce > Reports > Customers and look under “Social Registration”. This graph shows the total number of registrations by each social network:
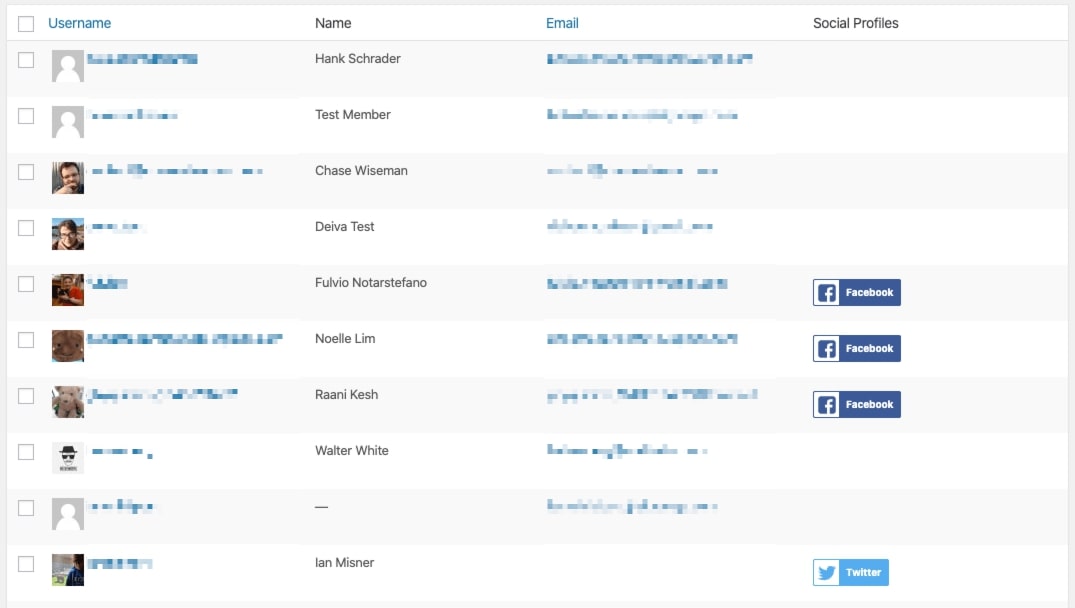
You may also access this information by going to your “Users” menu and looking for a new column called “Social Profiles”. This will show which of a customer’s accounts have been connected:
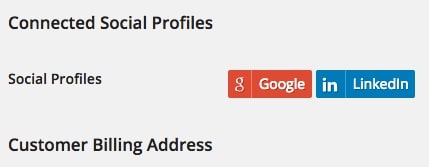
You may also see connected account information in the customer’s user profile:
Step 5: Common problems
It is inevitable that you might run into some problems while setting up and managing your WooCommerce social login. These steps might help you to deal with them:
- Make sure that the App ID and Client IDs are correctly entered
- Verify that you’re using the default permalink structure by going to Settings > Permalinks.
- If the message “You do not have access to YOURSITE.com”, quickly navigate to this tutorial to solve your issue.
- To view the social login buttons, ensure that you enable cookies on your browser or try a different browser.
- Are you using the iThemes Security plugin on your WooCommerce site? Please check the iThemes Security options to see whether Filter Long URL Strings are enabled. It is impossible to log in to Facebook with this option on.
Best 4 plugins used for setting up WooCommerce social plugins
When it comes to WooCommerce social login, just like any other platform and features, they provide users with a handful of plugins to enhance the store’s performance. To save up as much of your precious time as possible, we have conducted research and gathered up a list of the best 4 WooCommerce social login plugins that you can try out. On the basis of its popularity, customer reviews and how it can improve your experience, these might be helpful for most of you.
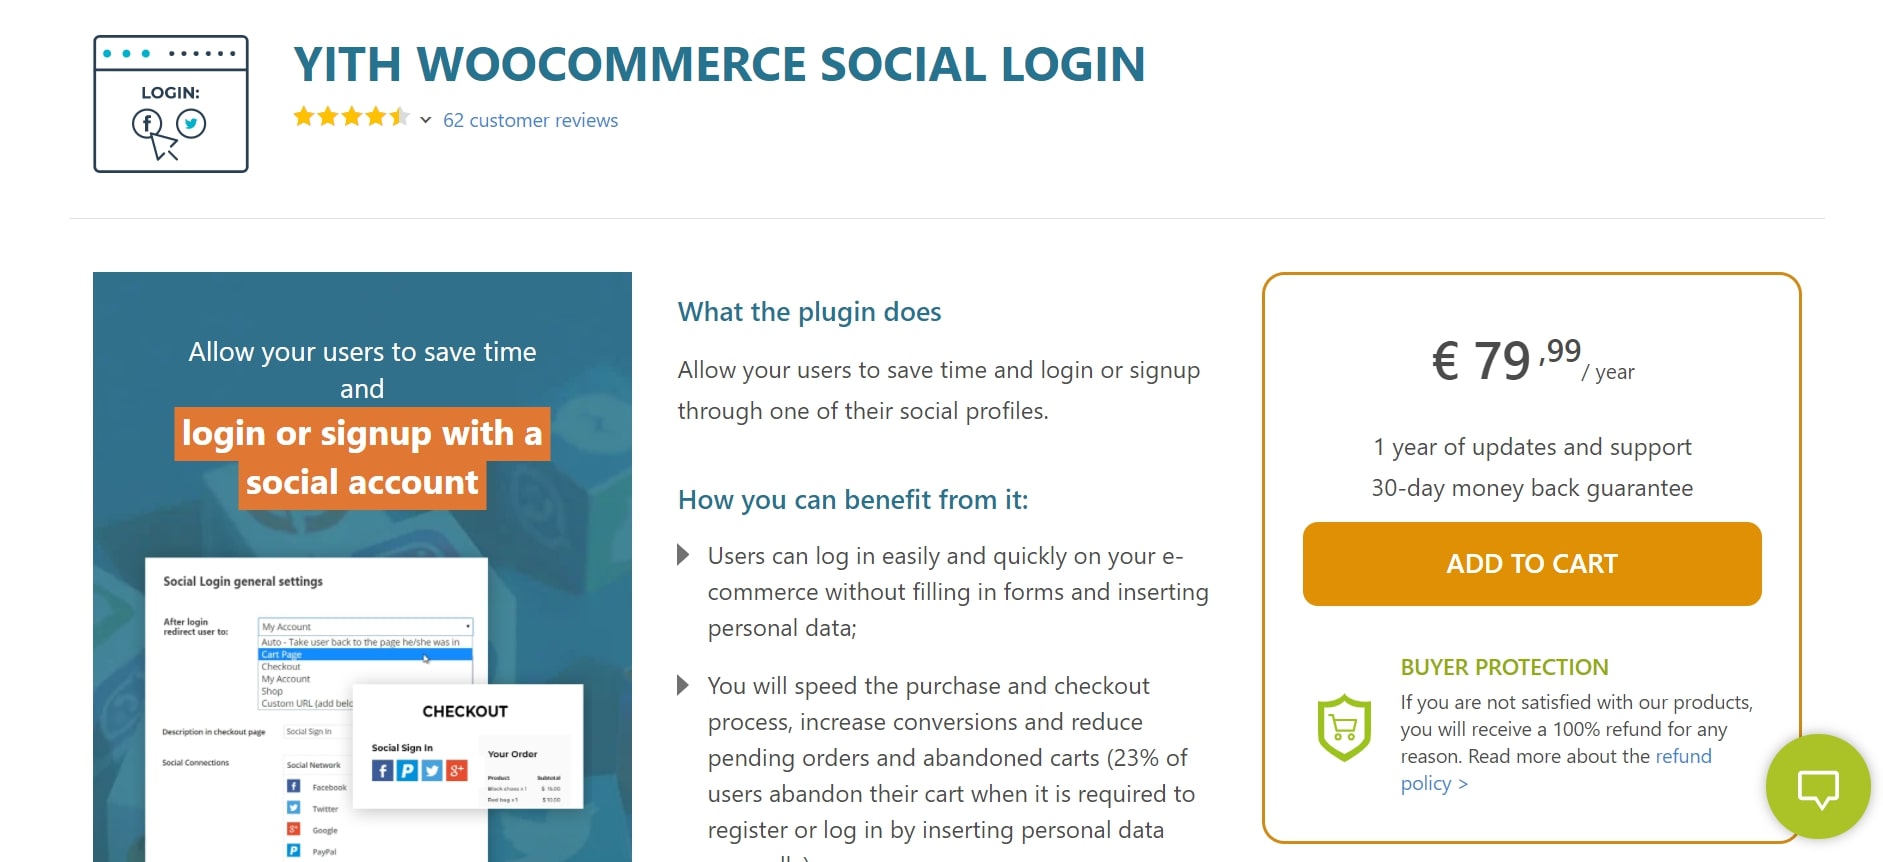
WooCommerce Social Login
WooCommerce Social Login makes it easier for your consumers to access your website using their preferred social network accounts such as Facebook, Twitter, Google and so on. They will be able to sign in and transact on your platform using the same login credentials that they use elsewhere. And, more importantly, your current consumers will be able to use their social network accounts while on your site. On the other hand, online merchants will be offered social media reports whenever it is needed.
Outstanding features:
- Connect all your social media accounts, such as Facebook, Twitter, Google, LinkedIn, Amazon, and more.
- Sign your consumers up for an account with their social networking sites, so they can log in to your WooCommerce shop.
- They will be able to make purchases again without having to provide any login information.
- Social media login reports are detailed supported
Super Socializer

Super Socializer is a completely free and lightweight plugin that gives you the ability to insert social login buttons into various locations such as the login, registration, checkout, and comment areas. This plugin is responsive, so it might be wiser to utilize it if you have a lot of mobile traffic.
Outstanding features:
- Allow the WooCommerce Social Login interface to show up on WordPress login, registration, and comment forms.
- Make it possible to abbreviate URLs for social sharing.
- Enable Social Login in the customer login forms and on the WooCommerce checkout page.
- Syncs the fundamental social profile information of customers with their WooCommerce profile.
YITH Social Login
A common alternative for letting people login and register via their social media accounts is the ultimate plugin YITH Social Login. It will save consumers from having to provide information before making a transaction. You may also improve your marketing by creating social media profiles for your consumers that are connected to your business. The plugin’s purpose is to help connect together over a dozen social networking sites, including Facebook, Twitter, and LinkedIn, for example. It can definitely make checkout times faster and lead to higher conversion rates.
Outstanding features:
- Help your consumers connect their social network profiles to registration and login through their customer login panel.
- The ability to easily locate social network icons thanks to shortcode support.
- Detailed social media reporting.
- Change the way you lead people on the path once they log in.
Nextend Social Login
Last but not least, the user-friendly interface of Nextend Social Login will definitely impress even their toughest customers. It makes easy user registration possible, without requiring more information. User registration and login procedures are improved and user login performance is better with this feature.
Outstanding features:
- Enables social login for your WooCommerce site, allowing anyone to use their social media account to sign in.
- The ability to fully customize the WooCommerce social login buttons.
- Ability to control who has access to an organization’s social media accounts by issuing two different passwords for login.
- Set restrictions on who may log in using social media.
Wrapping up
In conclusion, we hope that our article has answered all of your questions on How to set up a WooCommerce social login button on your website. From then providing a better shopping experience for your customers as well as increasing conversion rates in the future!


