
How to Add a Manual Order in WooCommerce?

Even though WooCommerce intends to accept orders for your products as simple as possible, it does not support manual orders out of the box. Therefore, you may sometimes need to add an order for your customers manually.
In this article, we’ll show you how to add a manual order in WooCommerce. Let’s get started!
Why Add a Manual Order in WooCommerce?
Numerous online businesses need to work with customers who want to place orders by phone, email, or live chat. It means that they will give their order information, payment details, delivery method, etc. and you have to add a manual order for your WooCommerce customers.
However, if possible, you should have customers sign up by themselves at the front end of your website. This way, you will receive accurate information, correct spelling, and save your precious time.
How to Add a Manual Order in WooCommerce?
Step 1: Go to Orders

From your WooCommerce admin dashboard, go to Store > Orders > Add Order.
Step 2: Complete your customer’s information
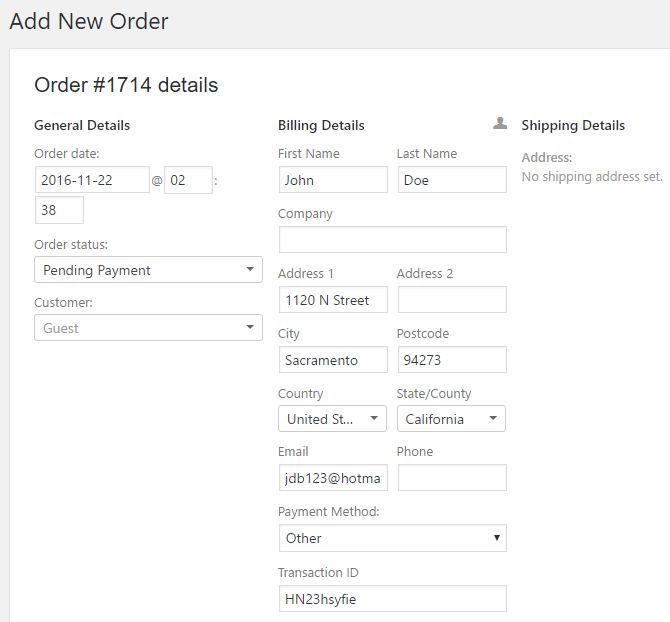
On the left side of the Add New Order screen, click the drop-down Customer and enter the customer’s name.
If the customer already exists, simply choose them from the list of options. If no results are returned for the search, you must create a new customer by clicking the little pencil icon next to Billing Details. Then simply fill out all of the required information.
Next, in the billing section, under Payment method, select your customer’s preferred method. If they are paying in cash or this is a complimentary order, select Other and add notes later.
The shipping information section would be completed in the same manner as the payment method section. However, if your customer purchases a virtual product, this is not required.
Step 3: Add products to the order
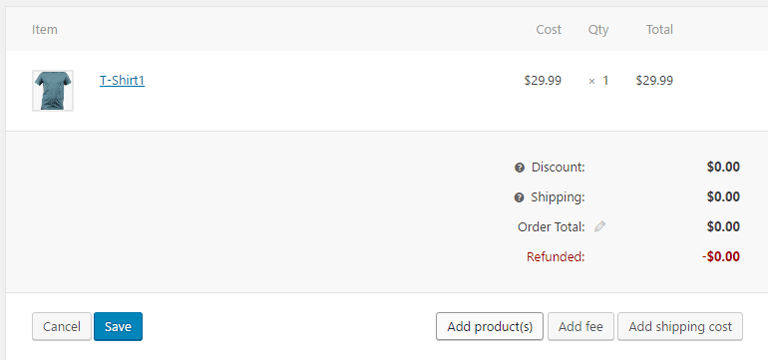
Now you need to add some products to the order. Scroll down to the Order item section of the page. Click the Add item(s) button, and then the Add product(s) button.
Following this, enter the name of the product your customer wants in the pop-up, then click on it to add it to the order.
It should be noted that, as of the time of this post, Woocommerce does not facilitate adding non-existing products or sales. You could use a plugin or use this tip. You add an item as a “fee”, edit it and add a description. It’s not the best way to handle non-existing item sales, but it gets the job done.
If you want to change the price of a product because it is a free or complimentary item, take the following actions. Hover over the product line item you’ve just added and click the pencil icon near the Total field to adjust the price.
Adjust the number in the Total box to what is needed. If this is a free item, for example, set the “Total” to 0. If you’re giving a $20 discount, simply subtract $20 from the total. Then, click the blue “Save” button (below and to the left), updating the order item line.
Step 4: Click Save
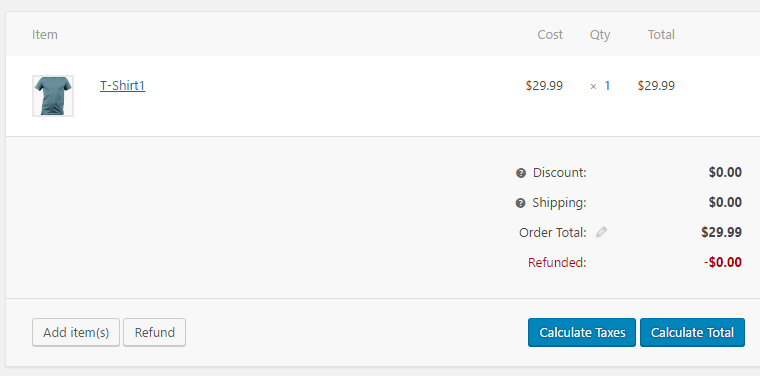
After you’ve finished adding line items, click the Save button. If you already have the order items completed and ready to calculate, you can save them by clicking the Calculate Total button.
In addition, you can include a tax line, a fee, or a coupon.
Step 5: Set order status
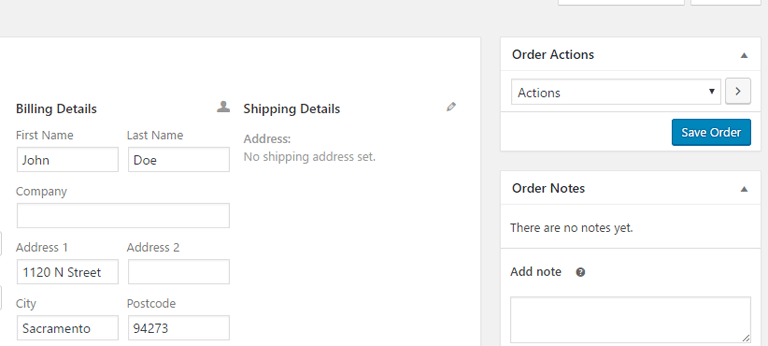
If payment has already been received, set the order status to Completed and click the Save order button. If it is a new order, change the status to Pending payment and click Save Order.
Step 6: Send an email and a note to your customer
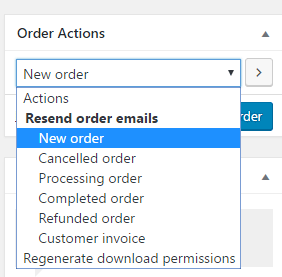
This step aims to resend the order emails to your customers. To do so, navigate to the top right Actions dropdown and select the email. For example, by selecting the email “New Order” or “Customer Invoice,” you can send the customer an email with a “Pay Now” link.
Then click the Save Order and Send Email button.
You can also send the customer a note informing them that their order has been processed. You can add it in the Order Notes section by clicking Customer Note and then clicking the Add button. This will send your customer a second email.
Click on Private Note and the Add button if you just want to make a note to yourself that you’ve already collected payment.
That’s all you need to do to add a manual order in WooCommerce. Your customer should have received the order email and, hopefully, made payment by now. You’ll probably have to do some manual follow-up to confirm that.
Final Words
So, the next time a customer wants to place a phone or email order, we hope that our article about adding manual orders in WooCommerce will help you successfully add manual orders. Hopefully, you will be able to increase sales and improve your customers’ shopping experience as well.
Thanks a lot for taking the time to read this post, and we’ll see you in the next one. Please leave your questions and comments below.


