
How to Add a Guest Checkout in WooCommerce

The number of internet accounts under our names grows in tandem with our online activity. You have to “sign up” or “sign in” on almost every website you visit these days. The procedure is seldom straightforward. Passwords may be forgotten or insecure if they aren’t kept to the same standards across different websites. Most online brands choose to set up a guest checkout to solve such problems.
In today’s article, let’s have a look at the advantages of using guest checkout and a tutorial on How to enable a WooCommerce guest checkout on your website. Keep reading to find out more!
Why should you consider the availability of WooCommerce guest checkout?
Consumers may buy a product without creating an account or logging in using the guest checkout option in the eCommerce industry. This system in your database will not store your clients’ personal information. Another way of saying it is that when WooCommerce guest checkout is activated, your visitors’ data is used just once instead of keeping it in the file for future orders. Most one-time-sale companies will be fond of this type of checkout process.
There are reasons why so many websites nowadays prefer to set up a WooCommerce guest checkout, including:
- Time-saving: customers will no longer have to log into their account to purchase a product. In this way, the entire checkout process will become less of a hassle for them.
- Increase the number of completed orders: Due to the rapidity of the procedure, abandonment rates are on the decline. If potential consumers or leads aren’t confronted with roadblocks, they’re more inclined to purchase.
However, there are still downsides to the WooCommerce guest checkout process. Therefore, it is important to understand your customers’ insights, the reordering rate as well as the amount of refund, and exchange orders before making your final decision.
How to enable WooCommerce guest checkout manually?
Now that you are familiar with the term WooCommerce guest checkout and how it can benefit your website, it’s time to dig a little deeper. This section will guide you through a tutorial on How to enable WooCommerce guest checkout for your online store. It has been divided into small basic steps so that you can easily follow and compare the results without having a decent technical knowledge in this field.
No more beating around the bush, let’s get started!
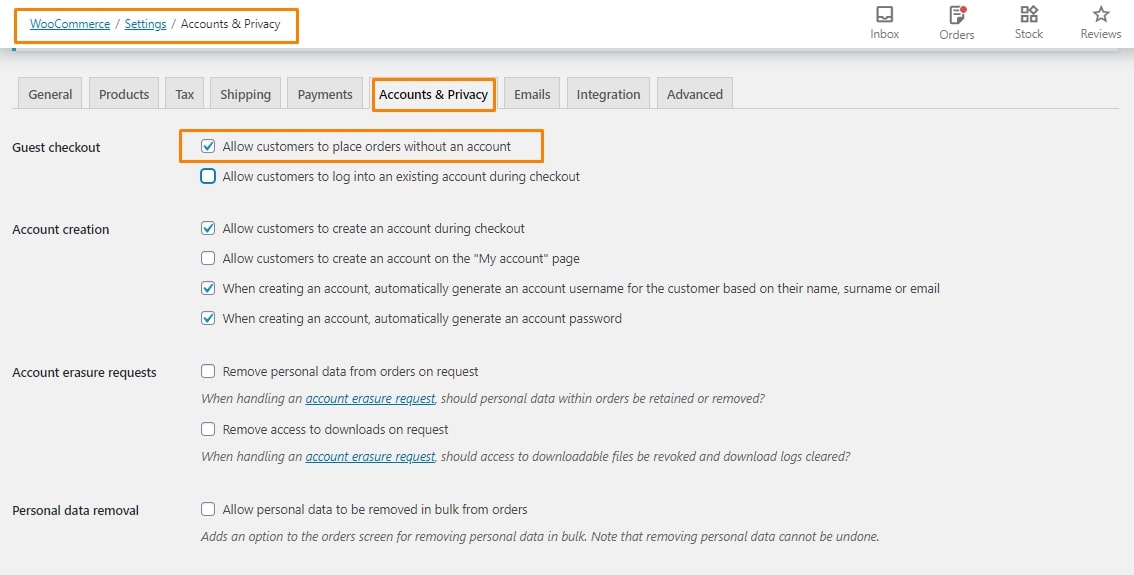
Step 1: Locate the Accounts and Privacy
First thing first, just locate the “Settings” page on the left-hand sidebar from your WooCommerce Dashboard:

Step 2: Tick the checkbox
Here, take a quick glance at the “Accounts and Privacy” section where the checkbox saying “Guest checkout” is available. Tick on it and you have successfully added a WooCommerce guest checkout to your website:
Step 3: Allow customers to use their existed account (optional)
Under the “Allow customers to place orders without an account” box, there is another option saying “Allow login for existing users during checkout”:
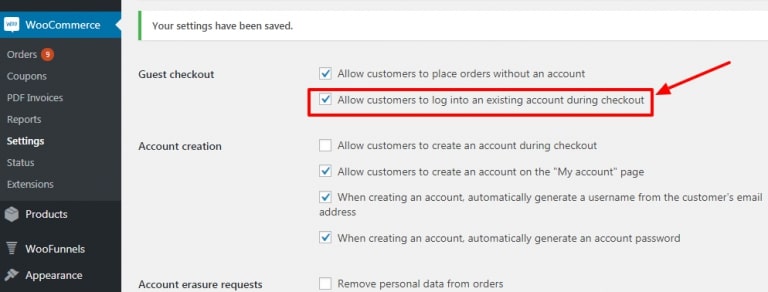
Allowing people to check-in using their current account on your website is possible when this setting is enabled.
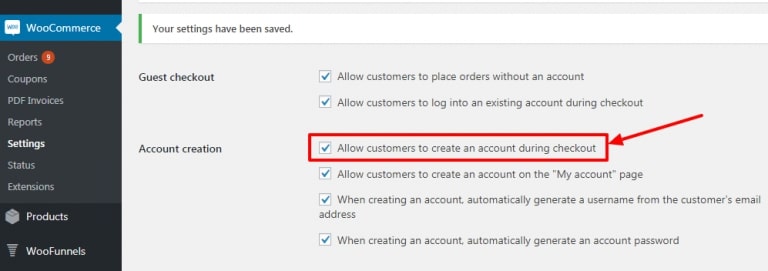
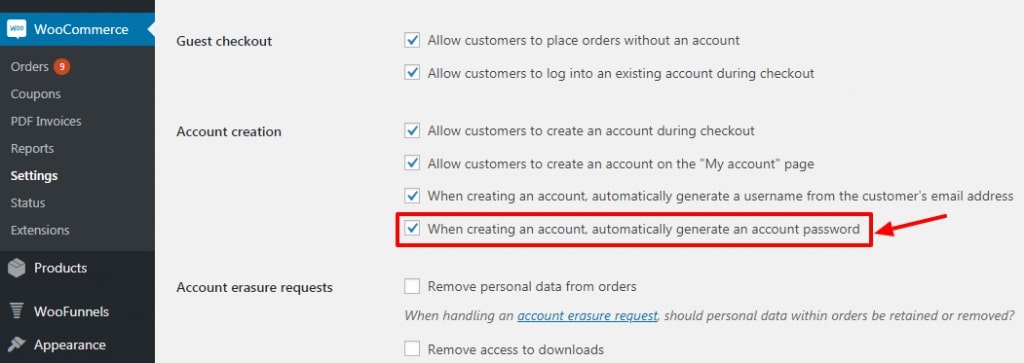
Step 4: Create an account while checking out (optional)
Besides that, on the checkout page, you may enable consumers to register for a new account by enabling the “Allow customers to create an account during checkout” option like what we did in the example below:
Furthermore, you can totally check the “When creating an account, automatically generate a username from the customer’s email address” box so that the email address your customers provide into WooCommerce will be used to create a username automatically:
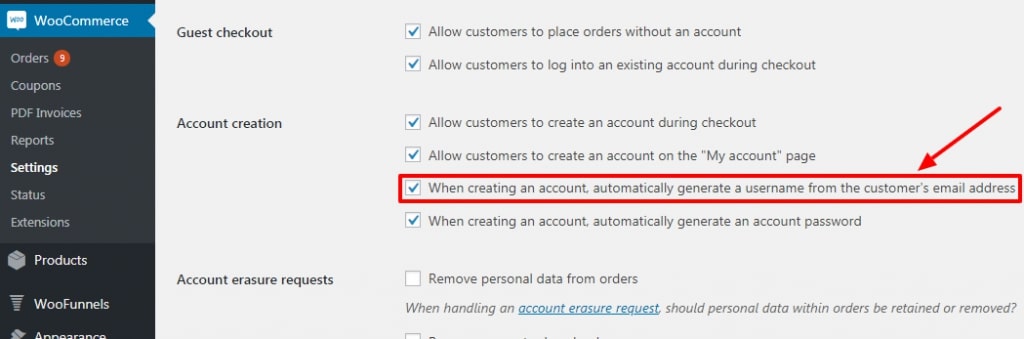
This works the same way for passwords as long as you enable the option “When creating an account, automatically generate an account password”:
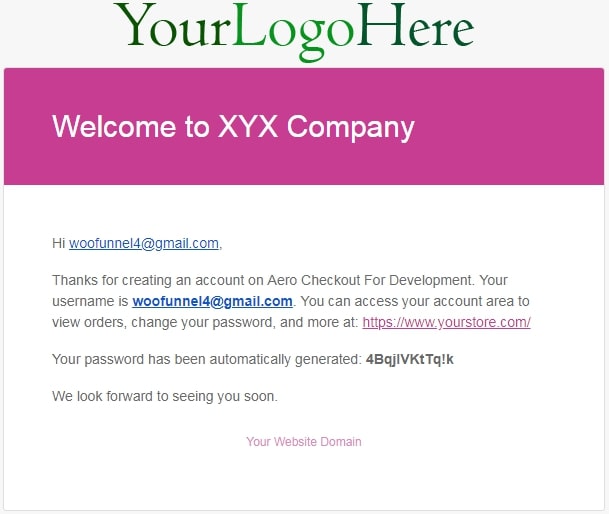
An email including the Username and Password is delivered to the client after registration on the checkout page has been successfully processed:
Step 5: Save your changes
Last but not least, don’t forget to “Save changes” before moving on to the next step! Also, remember to double-check your front end before leaving the website, too.
How to add a WooCommerce guest checkout to your website using a plugin?
Even though WooCommerce’s built-in features for setting up WooCommerce guest checkout may have fulfilled the basic requirements, installing a plugin for other advanced features is recommended. For this reason, below is how you will add a WooCommerce guest checkout using a plugin:
Step 1: Install the plugin
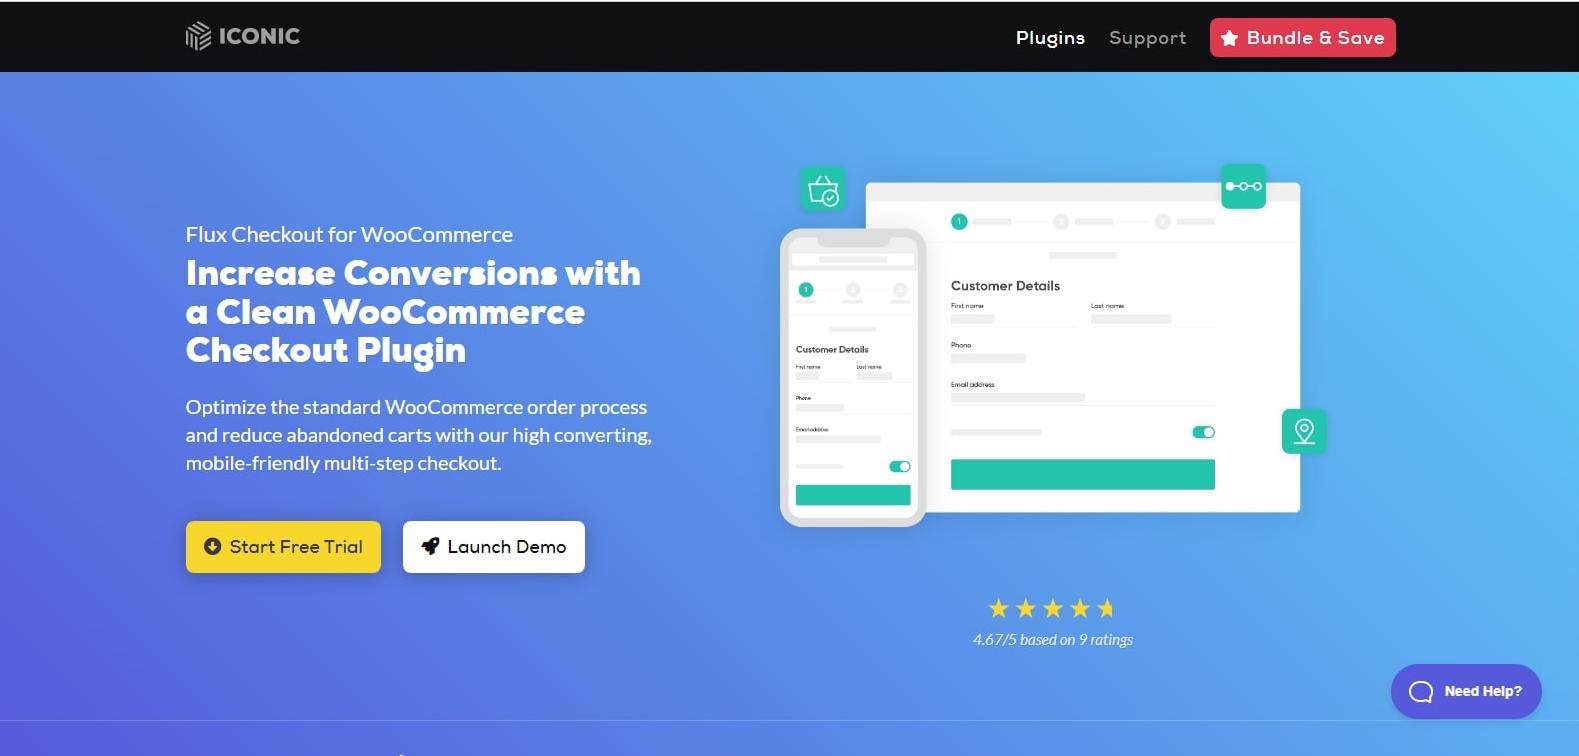
This must be the easiest step for most of you, especially those who have run their online business on WooCommerce for a while. We will be installing an extension named “Flux Checkout for WooCommerce” by Iconic WP. The great thing about this plugin is that it gives users the ability to customize their WooCommerce guest checkout in any way they want to and still fits in with the overall theme.
In order to start the installation, go to this link and quickly download the .zip file for the plugin:
Once the download is finished, open another tab to WooCommerce Dashboard and hover your mouse over the Plugins > Add New page and click on the “Choose File” button in the center of the screen to upload the file:

Continuously choose “Install Now” and “Activate” to complete the first step!
Step 2: Turn on guest checkout
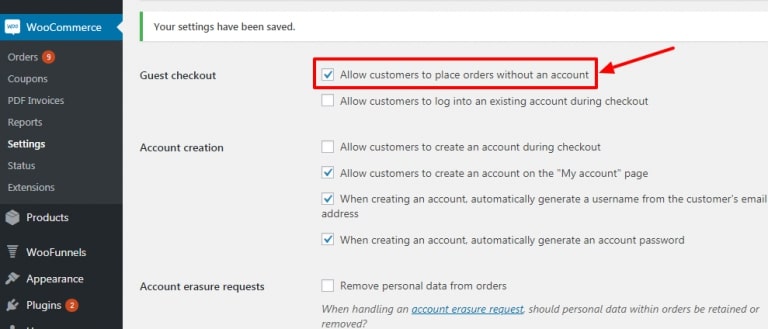
WooCommerce allows you to implement a guest checkout option without too much hassle. Once Flux is set up, all you have to do is make the following modification to get started. This one is similar to the first step of the previous tutorial. Also go to your WooCommerce > Settings > Accounts & Privacy tab, where you will be able to tick the checkbox saying “Allow customers to place orders without an account”:
Step 3: Change the settings
This is where Flux is really helpful. You’ve enabled WooCommerce guest checkout in your shop, but you may want to make a few changes to fit your business’s style and requirements better. Navigate to the WooCommerce > Flux Checkout from your Dashboard and you will notice that there are three tabs in total. We will take a look at each of them respectively.
With the “General Settings” tab, when the “Disable Desktop” is enabled, information related to the Flux Checkout will be displayed solely on your mobile device. Feel free to disable the alternative if you are using both smartphones and desktops:
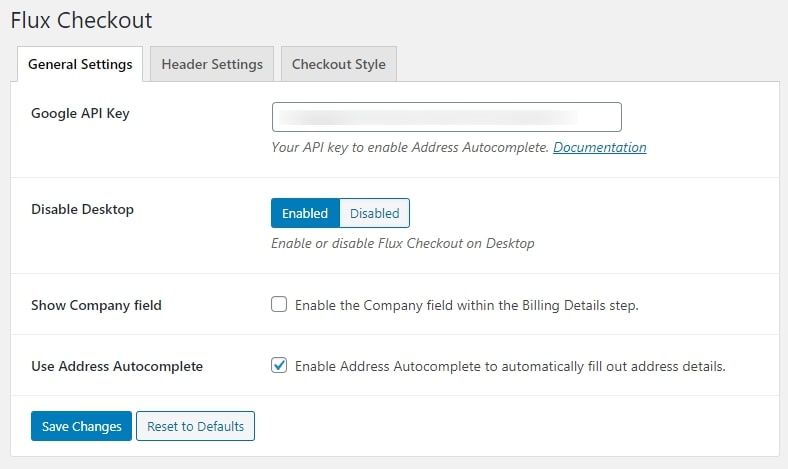
At the last field, toggle address autocompletion on or off throughout the check-out process.
Moving on to the second tab, or the “Header Settings” which is something looking like this:
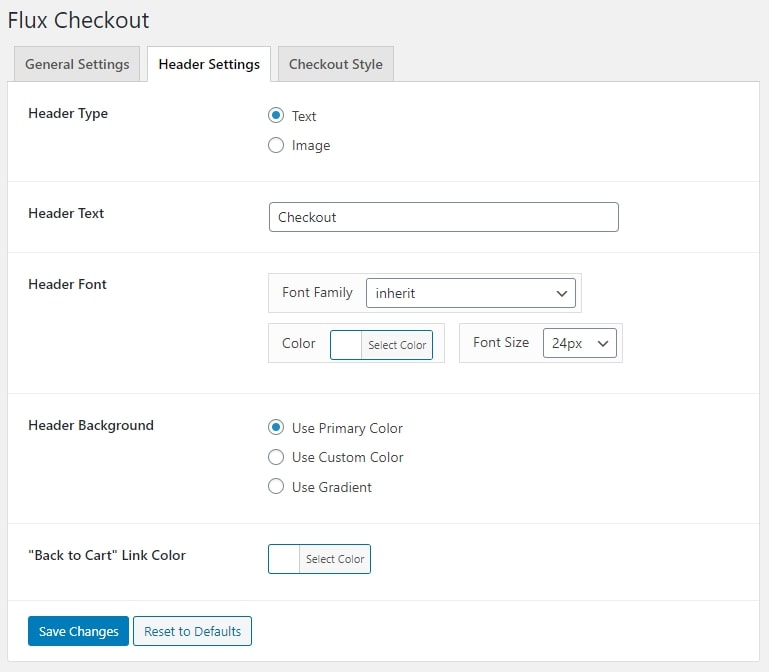
- Header Type: Decide on the type of your header between text and image form. You may add your company logo to the checkout by using the image option.
- Header Text: Fill in the text for your header in the Checkout page
- Header Font: The font style, size, and color may all be customized to fit your business.
- Header Background: Choose the background color so that it looks good with your website design
- “Back to Cart” Link Color: Modify the color for your “Back to Cart” button
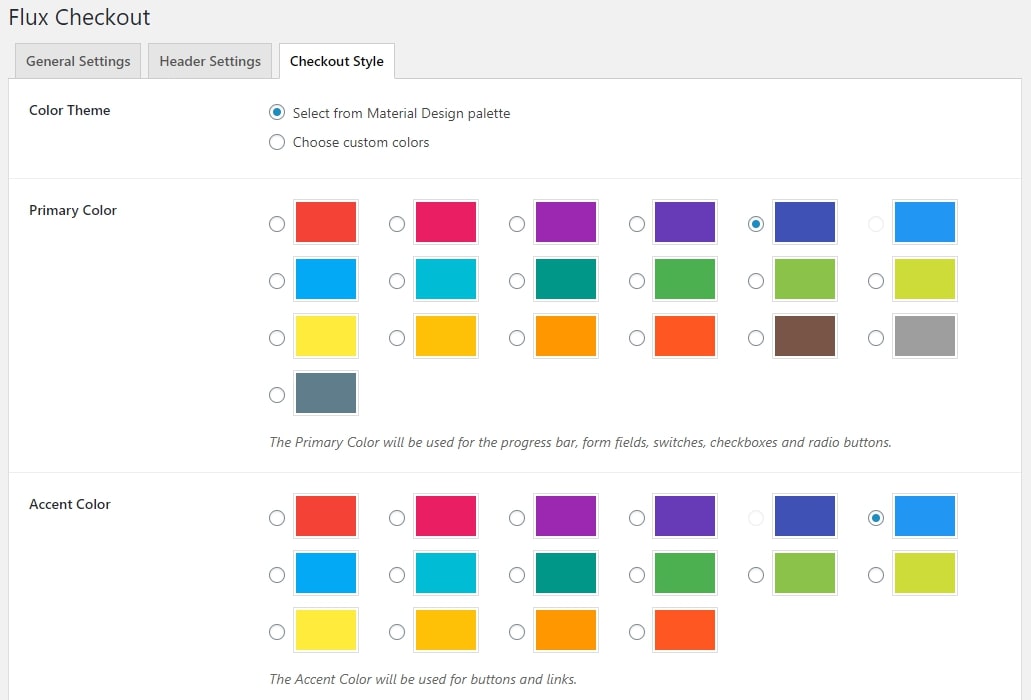
The “Checkout Style” tab, on the other hand, lets you alter the appearance of Flux Checkout completely. You may pick out a color scheme from a palette of hues or use the color picker and hex code:
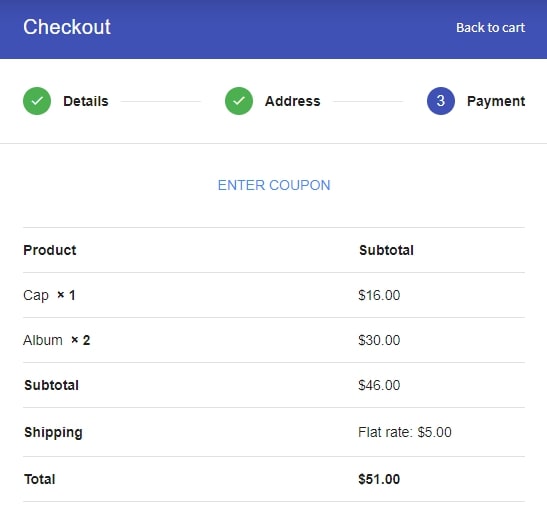
Step 4: Check the results
Click “Save Changes” and view your freshly modified checkout after you’re done customizing it to your store’s design. This is how our WooCommerce guest checkout turns out after configuring the settings:
Conclusion
To sum up, customers will be able to buy from your online business more casually and quickly once the WooCommerce guest checkout is up and running because they won’t be required to register. We hope that our article today on How to add the WooCommerce guest checkout has helped you to clear your thoughts on whether or not to set up one for your store and successfully make use of it.


