
How To Get A Customer's Location And Redirect Them To Right Store On Shopify

Many people use Shopify to build multiple web storefronts. Each location will cater to a distinct consumer base. Unfortunately, because the consumer inputs their shipping address at the checkout, and while an app to drop a pin or something similar would be fantastic unless you are on the Shopify Plus account, no customizations may be made to the checkout at all. Anyone with access to the checkout code will not be able to change it. Security, responsiveness, and preserving PCI compliance are the key reasons for not altering the checkout CSS.
Today’s tutorial will show you how to get a customer’s location and redirect them to the right store on Shopify. As you may expect, this would take a long time! The client would also suffer if the checkout was glitchy or not updated appropriately. That is why we will divide this issue into two different parts (get the shipping address and redirect to a convenient store), so you can easily understand the full tutorial. So, let’s dive in!
Why do we need to get locations of customers and redirect them to the right store?
The benefit of getting locations of customers
These days, location intelligence is a prevalent issue—companies who are influential in incorporating this into their branding and advertising strategy profit extensively. The growing usage of mobile phones to access data has resulted in several advantages for businesses and website owners. User information, mainly obtained through geological services, has proven to be valuable for marketing teams. People typically believe that if you own a brick-and-mortar business, location is the most critical factor. However, this is not the case. If you run a website or a business, you may benefit significantly from this geographical data.
Here are some significant advantages:
- Improve the understanding of your customers: While many location-based offerings are intended to attract new consumers, location-based services may also be used to learn more about your current clients. User reviews will tell you exactly what your consumers are thinking, while take-up rates for specific offers will reveal client preferences.
- Attract new buyers: Location-based marketing is one of the most effective methods to convert foot traffic and web visitors into new customers. People who have never heard of you or considered using your goods before can be convinced to try your business for the first time. Some establishments make it a point to give ‘newbie’ promotions the first time a customer checks in. Your responsibility is to transform a new consumer into a return customer by providing high-quality service and products.
The benefit of redirecting customers to the right store based on their location
A URL redirect does precisely what it sounds like: when you type a URL into your browser or click on a link, it redirects you from your current location to another. The actual operation of redirects is a little more complicated. You’ve probably heard of the “404 not found” message. Similar codes, such as 404, notify your browser what the state of a redirected URL is — whether it’s gone forever or simply temporarily absent — and what to do next. The following are the most often used/recommended redirect codes:
- 301 - permanent redirect (the original URL will not be redirected)
- 303 - see other (you are being redirected to a new URL; please wait a moment)
- 307 - temporary redirection (the page you want has temporarily moved to this location)

So, when may your online business require a redirect? Assume you have a well-known product. Its page accumulates a large number of links from other websites over time. However, after a few years, you will need to replace this product with a newer one that suits separate locations. You don’t want to lose those connections or the prospective consumers they bring. However, you must construct a new page for the latest edition of this product, so utilizing the same URL is not an option. This is precisely the kind of circumstance for which a 301 redirect was designed! With a 301, or permanent, URL redirect, you may automatically redirect anybody who views the link for your old product page around the world to your new one. Any potential consumers who click the link will be directed to your new page almost immediately, with no 404 errors or delays of more than a second or two.
How to get the location of a customer on Shopify
There are three main methods to get the location of a customer on Shopify. Keep tracking our posts to see the full explanation of each technique.
Method 1: Allow customers to select their locations in the Checkout Page
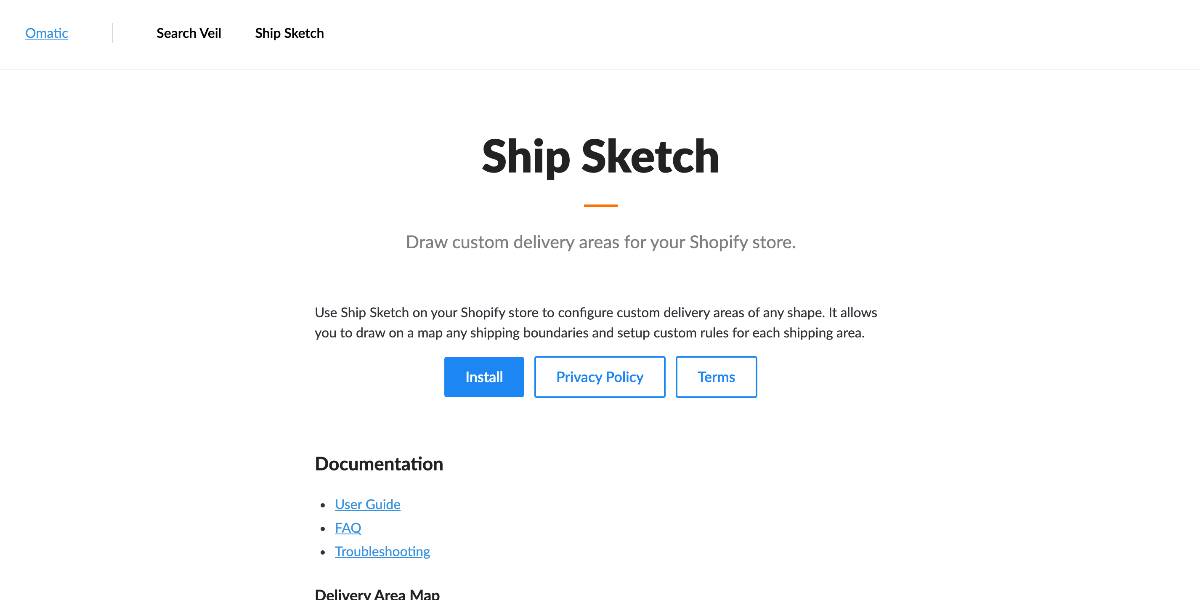
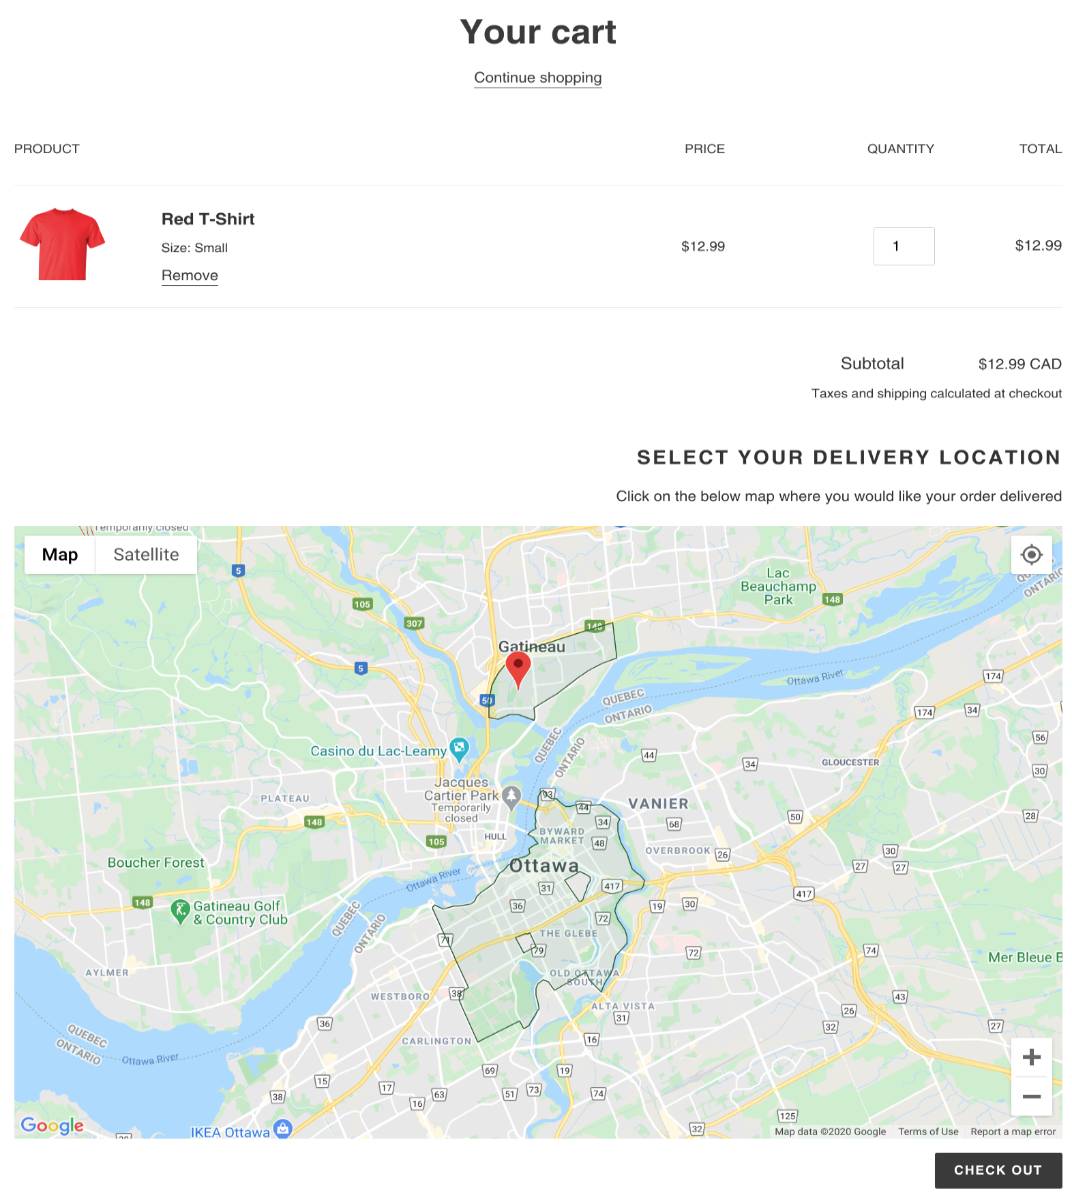
This is the most popular method to get customers’ location information. In this part, we will use the plugin Ship Sketch by Omatic to show you how to add a map site at the checkout page to get buyers’ location information. This is important in nations where addresses are not standardized. The default capability of Ship Sketch will use Google Maps to automatically convert a user’s address into latitude and longitude coordinates. Google Maps will not recognize many addresses in countries where addresses are not standardized—allowing consumers to pick their exact location on a map guarantees that you deliver to the proper place and charge the correct shipping price.
You may optionally display your preset delivery locations on a map so clients can readily determine if delivery is possible before proceeding with the checkout process. Once enabled, a map will show on your checkout page, prompting customers to choose their location before proceeding. The customer’s location will be compared to the delivery zones you have set up in your shop admin during the checkout process. If the address falls inside one of those delivery zones, the corresponding shipping alternatives will be presented. When a client with an account completes an order, their location is kept and pre-selected on their subsequent orders.
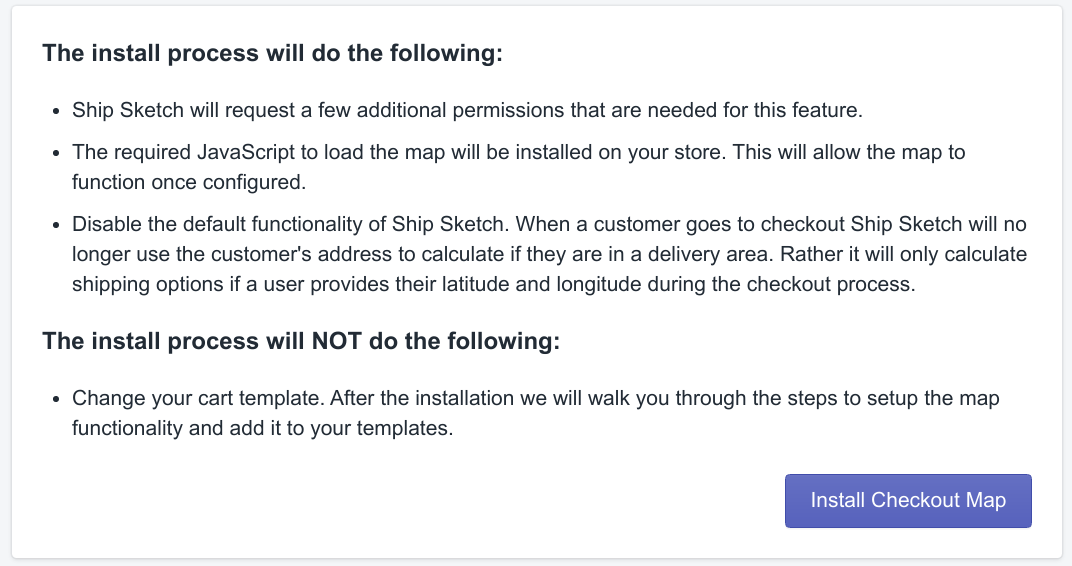
Step 1: Turn on the Checkout Map feature
Before we start, you will need to install the plugin and configure your delivery areas. This is a default setup, so we will not mention it in this post. Once finishing the installation, open the Ship Sketch app in your Shopify admin and then navigate to “Checkout Map.” Then choose “Install Checkout Map.” This will prompt you to confirm a few new permissions required for this feature before installing the necessary javascript on your website. At this time, the functionality of your store will not be altered.
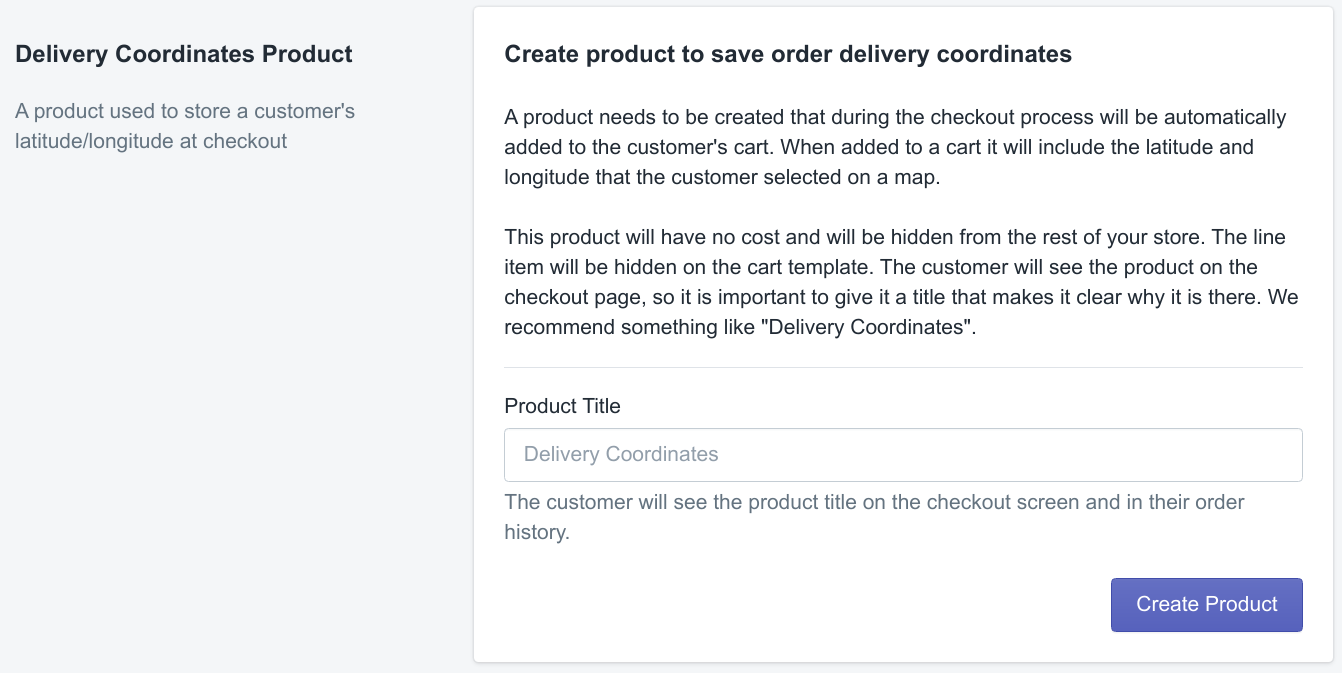
Step 2: Set up delivery coordinates product
This stage will generate the unique product required to store the customer’s delivery coordinates. Enter the product title and then press the “Create Product” button. This will accomplish the following:
- Create a product using the following options:
- Title: as provided
- Vendor: Ship Sketch
- Tags: shipsketch
- Price: 0
- Requires Shipping: true (this is necessary so that Shopify may submit the coordinates for calculating delivery costs.)
- Inventory: not tracked
- Hide the product from internal and external search results. It should be noted that if you are not using the default Shopify search, concealing from your internal search may not function. Check whether the product is covered if you have an app controlling your store’s investigation, and if not, look at the system’s features for limiting certain items.
- In your “All” collection, create a rule to remove any product from the seller “Ship Sketch.” This prevents the development from appearing on your site at “/collections/all.”
After you’ve created the product, you can either add a picture to it or leave it blank.
Step 3: Customize the map
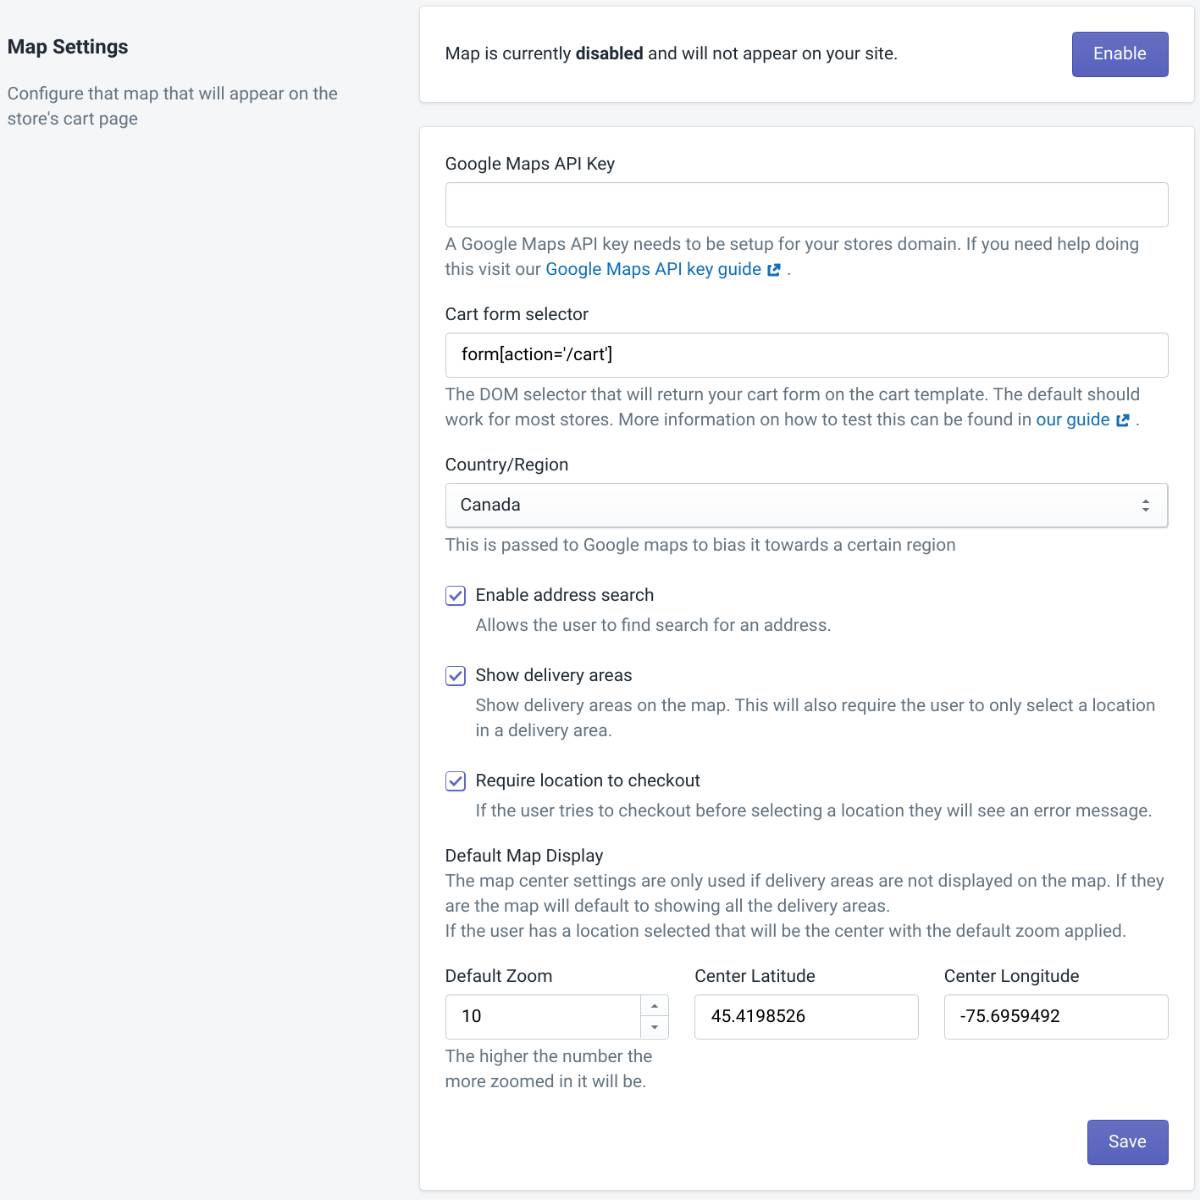
Next, you will have a chance to customize some information on the map. Here is the detailed explanation of the Map Settings:
- Enabled: Used to turn on or off-map functionality. It is deactivated by default and cannot be allowed unless your Google API key is configured.
- Google Maps API Key: You will need to register with Google Maps and generate an API key for your shop. Access to the following Google APIs is required for the key: Maps JavaScript API, Geocoding API, and Places API.
- Cart form selector: The DOM selector that returns your cart form from the cart template. Most stores should be able to get by with the basic settings.
- Country/Region: This is supplied to Google Maps to help it focus on a specific region.
- Enable address search: Adds a search bar to the map so that users may try to find their address.
- Show delivery areas: Display the delivery areas that you have selected on the map. This will also necessitate the user just choosing a place within a delivery region.
- Require a location to check out: An error notice will appear if the user attempts to check out without selecting a place.
- Default Zoom: The map zoom that will be used if no delivery regions are displayed. Higher numbers are closer together.
- Center Latitude: The default map is center latitude if no delivery regions are shown and the client has not chosen a location.
- Center Longitude: If no delivery regions are displayed, and the customer has not picked a location, this is Longitude’s default map.
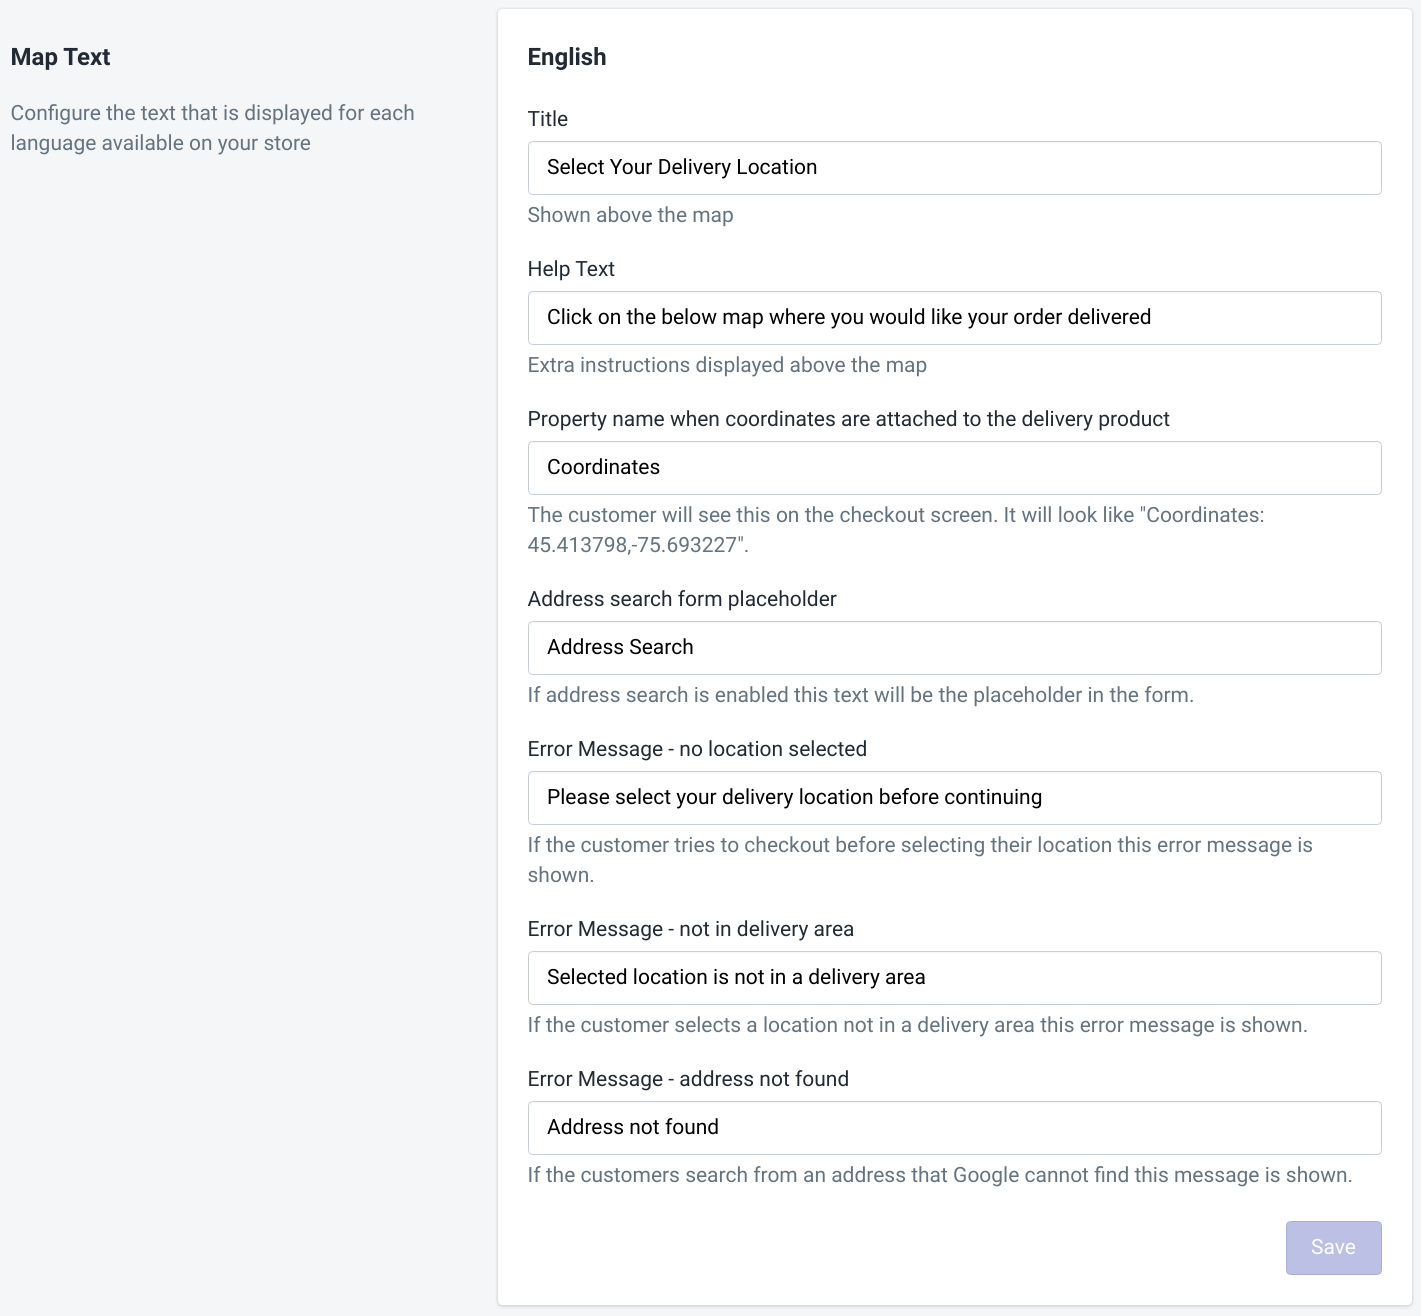
Step 4: Configure the text fields
There will be a section where you may customize the display text for each language accessible on your store:
- Title: The title appears above the map.
- Help Text: Additional instructions appear above the map.
- Property name when coordinates are attached to the delivery product: This will be visible to the consumer on the checkout screen.
- Address search form placeholder: If address search is enabled, this text will be used as the form’s placeholder.
- Error Message - No Location Selected: This error notice appears whenever the consumer attempts to checkout before specifying their location.
- Error Message - Not in Delivery Region: This error message appears if the customer picks a place, not in a delivery area.
- **Error Message - Address Could Not Be Found: If a consumer searches for an address that Google cannot locate, this message will pop up.
Step 5: Get the theme code
The majority of the necessary theme adjustments may be performed automatically here. In the end, one line of code must be manually added. The first step is to decide the theme you want to use for the code installation. We recommend first trying it on a non-live theme. This helps you to confirm that everything is functioning correctly before affecting your live store. To install a template snippet under ‘snippets/shipsketch-pin-drop-map.liquid’ on your theme, click “Install Now.” This snippet contains the majority of the code required to render the map and will be included in the final phase. Installing this snippet will not affect your website.
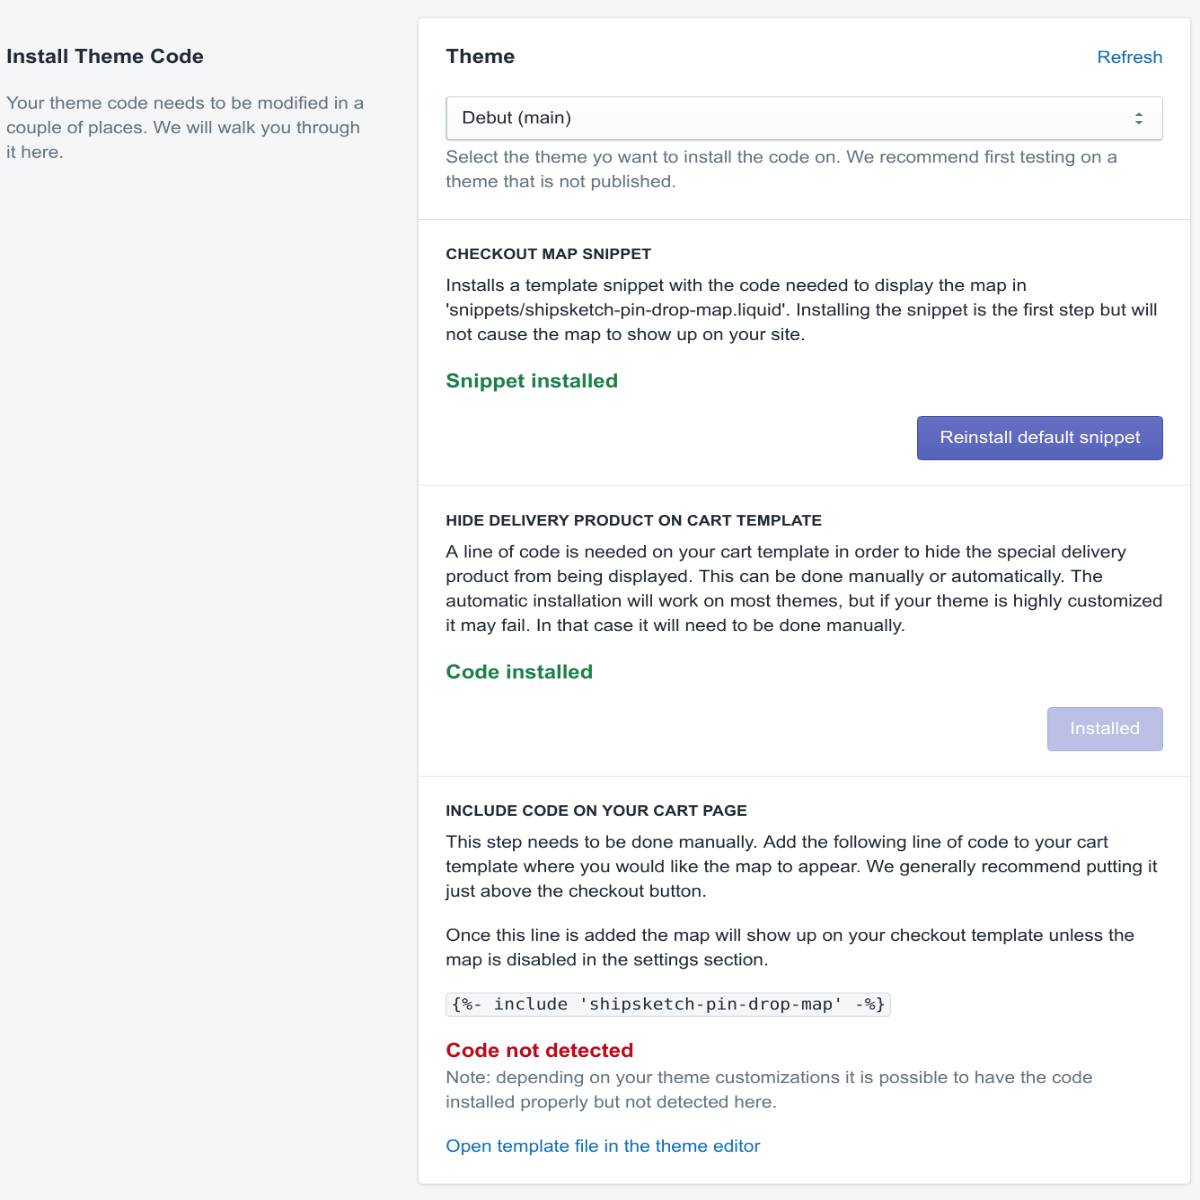
Step 6: Hide delivery product on cart template
To prevent the particular delivery product from being displayed, you must add a line of code to your cart template. This can be accomplished either manually or automatically. The automated installation will work on most themes; however, it may fail if your theme has been heavily altered. In that scenario, it must be done manually. If you need to install the code manually, locate the line that cycles over your cart goods in your cart template (typically in ‘templates/cart.liquid’ or ‘sections/cart-template.liquid’). This is what it should look like:
{% for item in cart.items %}
Add the following directly below that line:
{% if item.product.vendor == 'Ship Sketch' %}{% continue %}{% endif %}
The final result should look like this:
{% for item in cart.items %}
    {% if item.product.vendor == 'Ship Sketch' %}{% continue %}{% endif %}
Step 7: Include the map snippet on your cart page
This step must be completed manually. Add the following code to your cart template where you want the map to show (typically under ‘templates/cart.liquid’ or ‘sections/cart-template.liquid’). Generally, we recommend placing it directly above the checkout button.
{%- include 'shipsketch-pin-drop-map' -%}
If you add the map, it will appear on your checkout template until you disable it in the configuration area.
Method 2: Enable address autocompletion
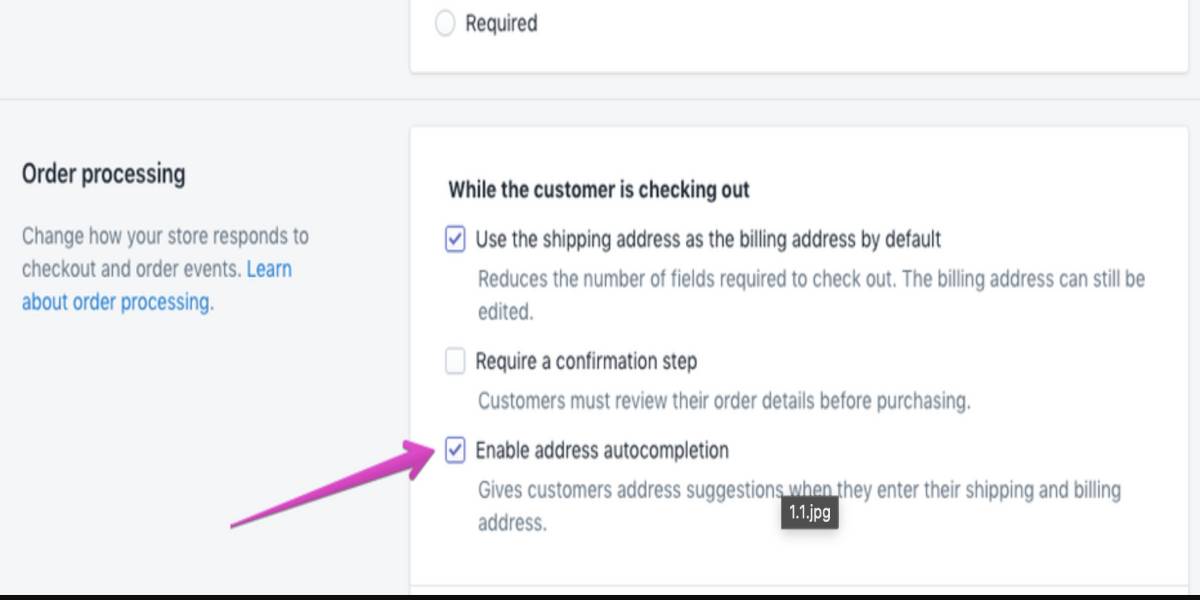
The first method seems complicated with newcomers. However, there is an option to autofill the shipping address, which may help consumers select the correct address at the checkout. When consumers enter their shipping and billing addresses, it suggests contact information. You may enable it by going to Settings > Checkout > “Enable address autocompletion.” This method will save your time, but you can not achieve a wide range of information as the first one.
Method 3: Get locations of customers through Customer Reports of Shopify
Lastly, you can also get customers’ locations through the Customer Reports from your Shopify Admin panel. To do so:
- Navigate to Analytics > Reports in your Shopify admin.
- Click the report you intend to see in the Customers section.
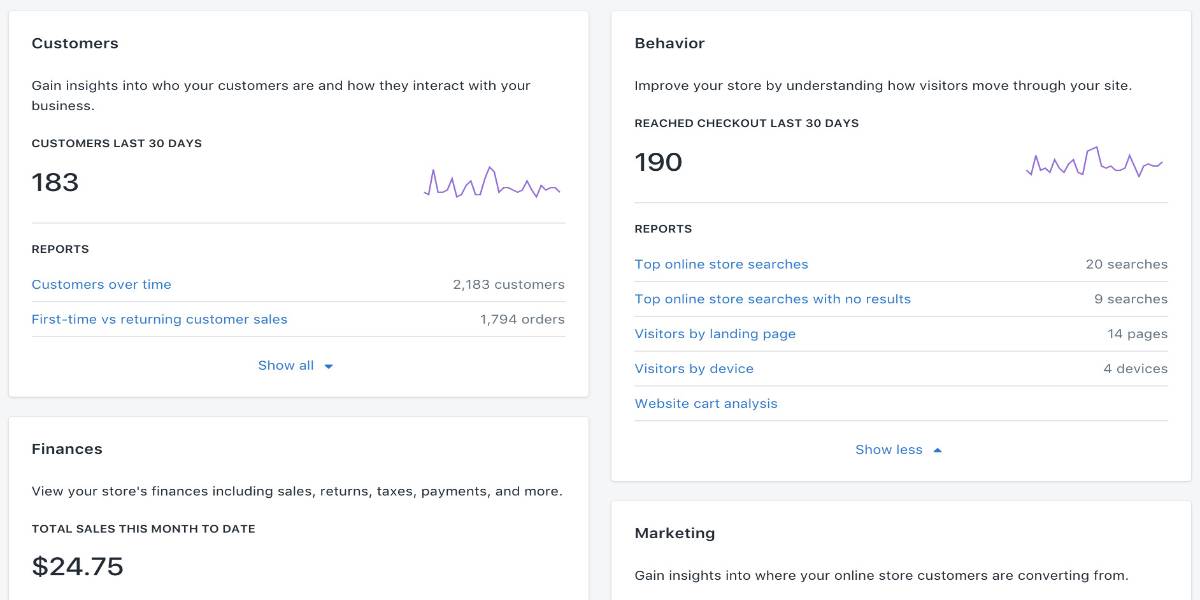
Customers by location is a report that organizes data for new customers by geographical location. In your Shopify admin, new customers are categorized geographically according to their default address. You may view the following information for each geographical region:
- The number of new consumers that made their first purchase during the chosen timeframe.
- The total number of orders placed by such consumers since their first order.
- The entire amount paid, including taxes, discounts, shipping costs, and any refunds.
- The Orders to date and Total spent to date totals are calculated using the whole order history of the new clients in the report, not just the orders placed within the specified timeframe.
How to redirect customers to the right Shopify store based on their location
Method 1: Coding
Redirect customer on the login
When customers enter your online business and log in, they will see a My Account page that displays their previous orders and the related shipping and billing addresses. You may change your theme so that they are brought to a new page when consumers log in. Navigate to Online Store > Themes in your Shopify admin. Find the theme you wish to change, then go to Actions > Edit code. Click customers/login.liquid in the Templates directory. After that, look for the following line of code:
{% form 'customer_login' %}
Copy and paste the following on a new line below it:
<input type="hidden" name="checkout_url" value="/collections/all">
Replace /collections/all with the relative URL of the page you want users to view when they log in for the value attribute in the line of code you just pasted. Finally, click Save to finish the procedure.
Redirect customer on logout
After logging out, Shopify defaults to redirecting clients to the home page. There is no built-in solution to redirect the consumer to a specific page. Here’s a little script to accomplish the same thing. This script will work for whatever logout links you have on your page. In the theme.liquid, paste the following code just above the closing body tag.
<!--   LOGOUT REDIRECT -->
  <script>
    (function() {
      var REDIRECT_PATH = "/collections/all";
      var logoutBtn = document.querySelector('a[href^="/account/logout"]');
      if(logoutBtn) {
        logoutBtn.addEventListener('click', function() {
          fetch(logoutBtn.href).then(() => window.location.href = REDIRECT_PATH)
        })
      }
    })()
  </script>...
Redirect customer on new account creation
After registering a new account, new clients are automatically brought to the account page. When a client registers for a new account, please follow the procedures below to send them to a specific page. In this example, we’ll develop some simple code that will send consumers to Shopify’s Cart page. Add the code below at the bottom of the layout/theme.liquid, right before the body part. Replace “/checkout” with your preferred redirect destination to divert to a different page.
<script>
   (function() {
     var REDIRECT_PATH = '/checkout';

     var selector = '#create_customer, form[action$="/account"][method="post"]',
         $form = document.querySelectorAll(selector)[0];

     if ($form) {
       $redirect = document.createElement('input');
       $redirect.setAttribute('name', 'return_to');
       $redirect.setAttribute('type', 'hidden');
       $redirect.value = REDIRECT_PATH;
       $form.appendChild($redirect);
     }
   })();
 </script> ...
If you wish to redirect your consumers to a welcome/congratulations page, you may do it using falling confetti. Scroll down to the templates directory using the navigation on the left. Add a new template by clicking the Add new button. Please choose a page from the drop-down menu and give it a name such as welcome or success page. At the bottom of the file, write the following code:
<canvas id="canvas"></canvas>
<style>canvas {display: block;position: relative;zindex: 1;pointer-events: none;position: fixed;top: 0;}</style>
<script>
var canvas1,ctx,W,H;if(screen.width>=988)var mp=50;else mp=50;var deactivationTimerHandler,reactivationTimerHandler,animationHandler,particles=[],angle=0,tiltAngle=0,confettiActive=!0,animationComplete=!0,particleColors={colorOptions:["DodgerBlue","OliveDrab","Gold","pink","SlateBlue","lightblue","Violet","PaleGreen","SteelBlue","SandyBrown","Chocolate","Crimson"],colorIndex:0,colorIncrementer:0,colorThreshold:10,getColor:function(){return this.colorIncrementer>=10&&(this.colorIncrementer=0,this.colorIndex++,this.colorIndex>=this.colorOptions.length&&(this.colorIndex=0)),this.colorIncrementer++,this.colorOptions[this.colorIndex]}};function confettiParticle(t){this.x=Math.random()*W,this.y=Math.random()*H-H,this.r=RandomFromTo(10,30),this.d=Math.random()*mp+10,this.color=t,this.tilt=Math.floor(10*Math.random())-10,this.tiltAngleIncremental=.07*Math.random()+.05,this.tiltAngle=0,this.draw=function(){return ctx.beginPath(),ctx.lineWidth=this.r/2,ctx.strokeStyle=this.color,ctx.moveTo(this.x+this.tilt+this.r/4,this.y),ctx.lineTo(this.x+this.tilt,this.y+this.tilt+this.r/4),ctx.stroke()}}function InitializeButton(){$("#stopButton").click(DeactivateConfetti),$("#startButton").click(RestartConfetti)}function SetGlobals(){canvas1=document.getElementById("canvas"),ctx=canvas1.getContext("2d"),W=window.innerWidth,H=window.innerHeight,canvas1.width=W,canvas1.height=H}function InitializeConfetti(){particles=[],animationComplete=!1;for(var t=0;t<mp;t++){var i=particleColors.getColor();particles.push(new confettiParticle(i))}StartConfetti()}function Draw(){ctx.clearRect(0,0,W,H);for(var t,i=[],n=0;n<mp;n++)t=n,i.push(particles[t].draw());return Update(),i}function RandomFromTo(t,i){return Math.floor(Math.random()*(i-t+1)+t)}function Update(){var t,i=0;angle+=.01,tiltAngle+=.1;for(var n=0;n<mp;n++){if(t=particles[n],animationComplete)return;!confettiActive&&t.y<-15?t.y=H+100:(stepParticle(t,n),t.y<=H&&i++,CheckForReposition(t,n))}0===i&&StopConfetti()}function CheckForReposition(t,i){(t.x>W+20||t.x<-20||t.y>H)&&confettiActive&&(i%5>0||i%2==0?repositionParticle(t,Math.random()*W,-10,Math.floor(10*Math.random())-10):Math.sin(angle)>0?repositionParticle(t,-5,Math.random()*H,Math.floor(10*Math.random())-10):repositionParticle(t,W+5,Math.random()*H,Math.floor(10*Math.random())-10))}function stepParticle(t,i){t.tiltAngle+=t.tiltAngleIncremental,t.y+=(Math.cos(angle+t.d)+3+t.r/2)/2,t.x+=Math.sin(angle),t.tilt=15*Math.sin(t.tiltAngle-i/3)}function repositionParticle(t,i,n,e){t.x=i,t.y=n,t.tilt=e}function StartConfetti(){W=window.innerWidth,H=window.innerHeight,canvas1.width=W,canvas1.height=H,function t(){return animationComplete?null:(animationHandler=requestAnimFrame(t),Draw())}()}function ClearTimers(){clearTimeout(reactivationTimerHandler),clearTimeout(animationHandler)}function DeactivateConfetti(){confettiActive=!1,ClearTimers()}function StopConfetti(){animationComplete=!0,null!=ctx&&ctx.clearRect(0,0,W,H)}function RestartConfetti(){ClearTimers(),StopConfetti(),reactivationTimerHandler=setTimeout(function(){confettiActive=!0,animationComplete=!1,InitializeConfetti()},100)}$(document).ready(function(){SetGlobals(),InitializeButton(),InitializeConfetti(),$(window).resize(function(){W=window.innerWidth,H=window.innerHeight,canvas1.width=W,canvas1.height=H})}),window.requestAnimFrame=window.requestAnimationFrame||window.webkitRequestAnimationFrame||window.mozRequestAnimationFrame||window.oRequestAnimationFrame||window.msRequestAnimationFrame||function(t){return window.setTimeout(t,1e3/60)};
</script>...
As usual, create a new page; then, you’ll see the templates box on the right side. Select the newly generated template from the drop-down menu and click Save.
Redirect customer base on location
As an example, we have three websites:
- www.domain.us – Customers in the United States
- www.domain.ca – Customers in Canada
- www.domain.com – Customers in the rest of the world
We utilize the GeoPlugin.Net (GeoPlugin) service to determine the visitor’s location. GeoPlugin offers software developers a public HTTP API for searching the geolocation of IP addresses. Here is the code.
<script language="JavaScript" src="http://www.geoplugin.net/javascript.gp" type="text/javascript"></script>
This code should be placed within the head> tag. The following information is returned: IP, country code, country name, region code, region name, city, latitude, Longitude, currency code… Now we’ll write the redirection code. On the website of the United States:
<script>
if(geoplugin_countryCode() != 'US'){
        if(geoplugin_countryCode() == 'CA'){
location.href = "//www.domain.ca";
}else{
location.href = "//www.domain.com";
}
}
</script>...
On the website for Canadian:
<script>
if(geoplugin_countryCode() != 'CA'){
        if (geoplugin_countryCode() == 'US'){
location.href = "//www.domain.us";
}else{
location.href = "//www.domain.com";
}
    }
</script>
In the website for the rest of the world:
<script>
if(geoplugin_countryCode() == 'US'){
location.href = "//www.domain.us";
} else if(geoplugin_countryCode() == 'CA'){
location.href = "//www.domain.ca";
}
</script>
Method 2: Using the third-party plugin
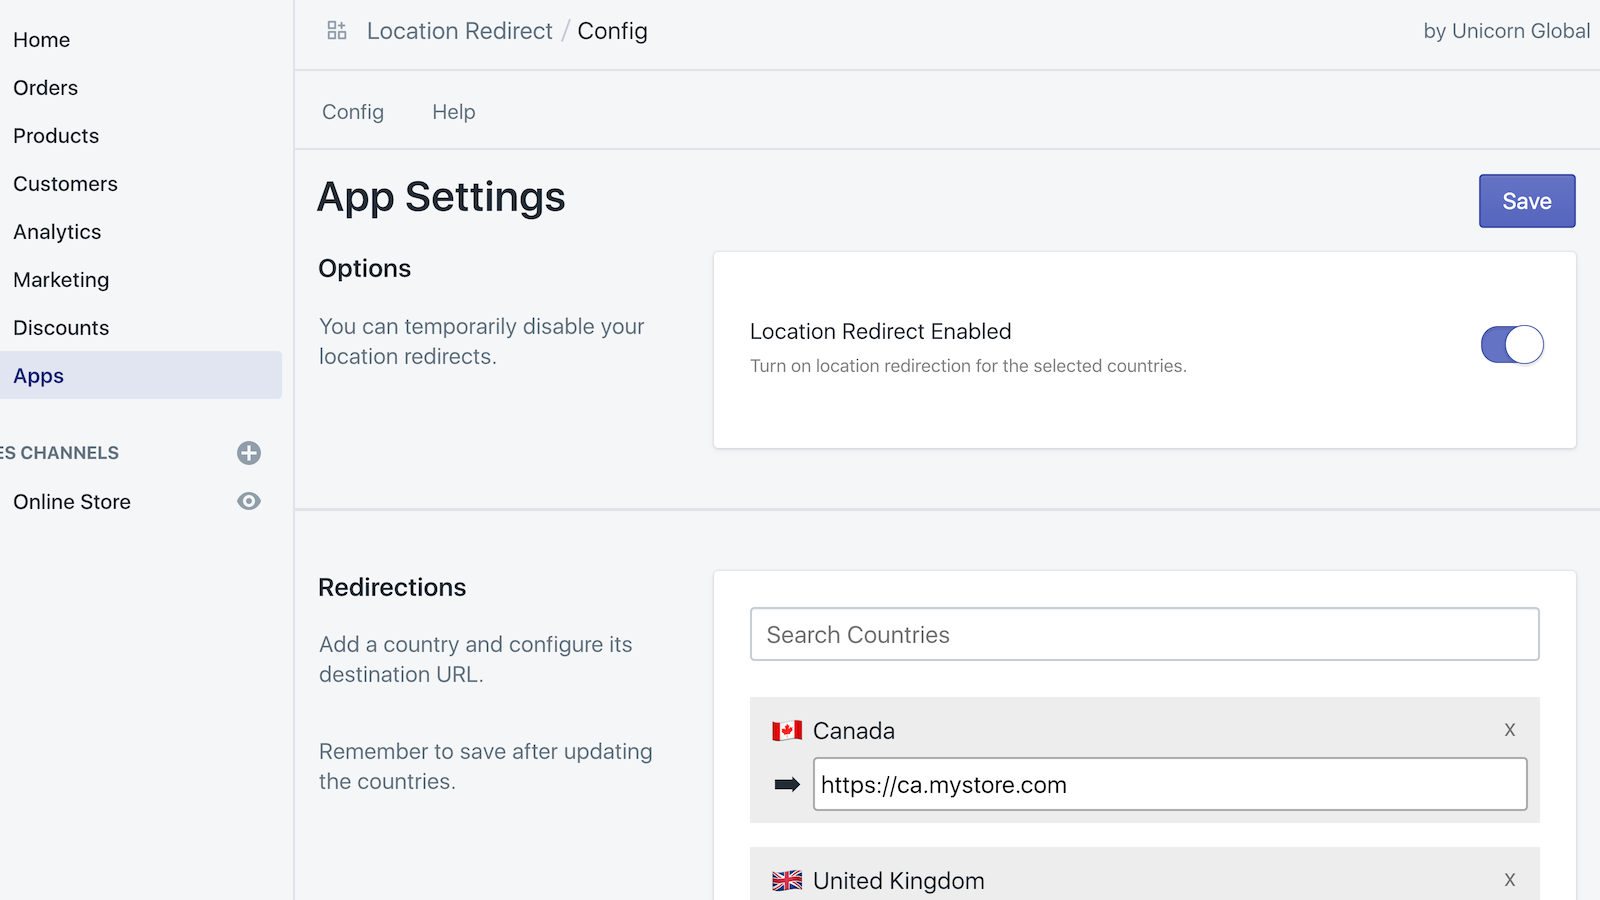
With the efficient and straightforward Location Redirect, you can route your clients to their nearest store. Get your customers to the appropriate website, reduce fraudulent purchases, minimize costly chargebacks, and save money on shipping and tax. We know that customers are more likely to buy from sites relevant to their nation; giving a localized experience boosts trust and gives your visitors the confidence they need to make their transaction with you. This software is for you if you have many locations in different countries and send your clients through the right door as quickly as possible.

Location Redirect does not rely on third-party code and will not cause your shop to slow down or require your visitors to confirm or wait for their redirection to occur. This program adds less than 250 bytes to your store, making it smaller and quicker than our rivals, allowing immediate redirections. Simply enter the nations to be redirected into the app’s user-friendly interface, configure the redirection URL, and you’re done. Regional rerouting has never been simpler. The unique location identification system adds extra security and ensures that visitors cannot impersonate their location by utilizing traditional evasion strategies such as HTTP Header spoofing or proxies.
Five best location and redirect plugins for Shopify
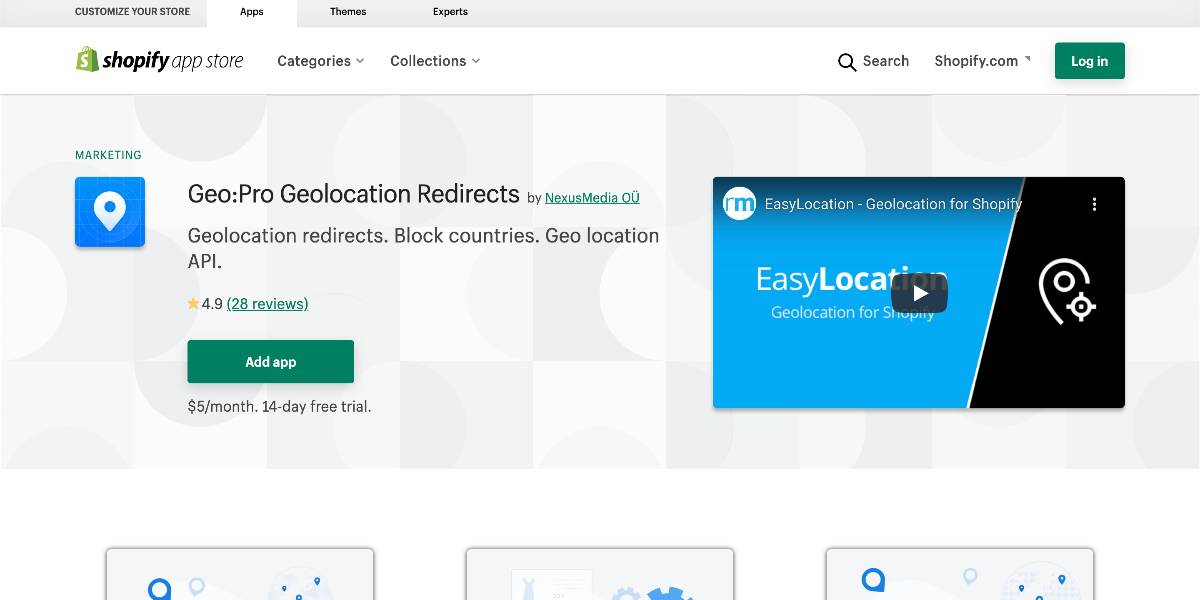
Geo: Pro Geolocation Redirects
NexusMedia’s Geo: Pro Geolocation Redirects redirection software reroutes consumers to your local shop or filters undesirable visitors based on their geolocation or IP address. This software has several exciting features that you may find helpful. For starters, it offers a variety of geographical redirect possibilities. It implies you may design an infinite number of customized geolocation redirect rules based on consumer location, such as area, nation, or IP address. Second, it protects your store against unwelcome visitors from specific countries or IP addresses. You may also select from various styles, such as a lightbox popup window, a top banner, or an immediate redirect.
Outstanding features:
- Visitors can be sent to local versions of your store based on their geolocation.
- Keep visitors from specific countries or IP addresses out of your business.
- Using the easy geo API, you can add geolocation capability to your own redirect/feature set.
- To match the color scheme of your website, use the visual layout editor to effortlessly apply relevant colors to your geolocation redirect banner or popup window.
- You can prevent nations or IP addresses from viewing your store.
- Using the easy Javascript API, you may enhance the functionality of your bespoke geolocation features.
Price: You can try the 14-day free trial then get the app at the cost of $5 per month.
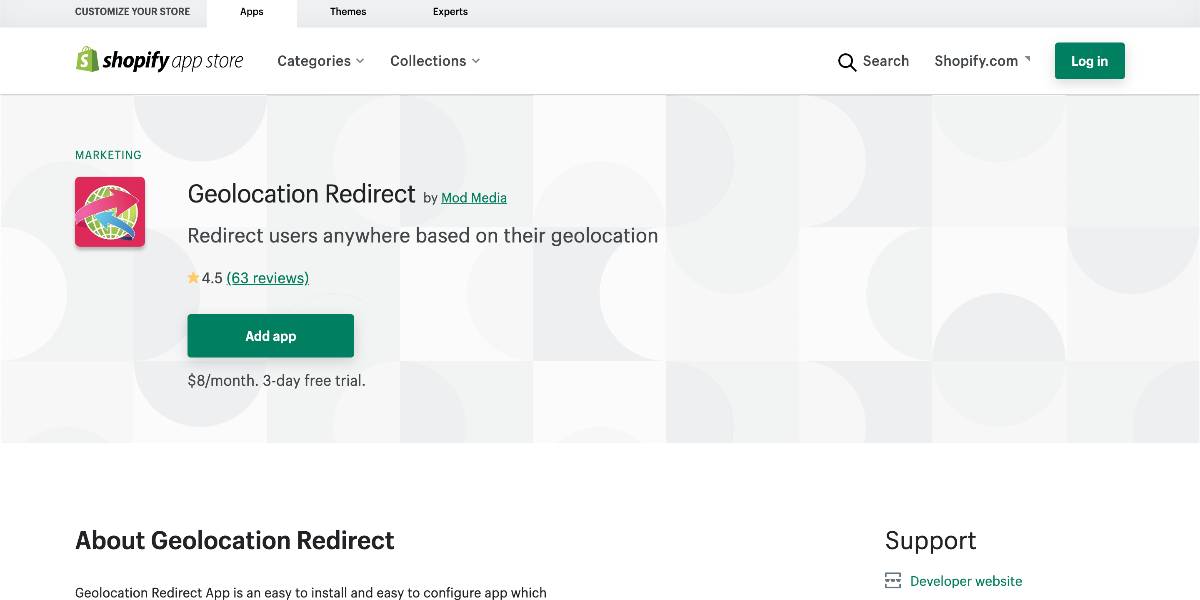
Geolocation Redirect
This software detects the user’s location and then redirects them to a URL based on your provided conditions. The Geolocation Redirect software may automatically determine your visitors’ nationality and take actions depending on that. If you run some local sites, you may refer them to the appropriate one to purchase. This will also be beneficial because the currency will be precise, and the delivery charges should be more accurate. You may select whether to send them to the local store’s home page or to the URL extension for this option (i.e., they go to the same page on the local store). The redirect may also be configured to act only if the visitor is on specific pages. You can also specify which countries are affected. This might be advantageous for individuals who offer things that are not available in other domains. A manual redirect can also be used. On a notification bar, the user is informed of prospective neighborhood stores to which they may go.
Outstanding features:
- Customers will be automatically sent to the appropriate country’s website to make a purchase.
- If a user accesses a particular page on your site based on their location, redirect them to another URL.
- Add a notice bar to the top of your website that allows consumers to choose the store that is most suited to their location.
- Redirect for all regions in the globe.
- There is no limit on the number of countries that can be redirected.
Price: You may sample the app for three days for free before purchasing it for $8 per month.
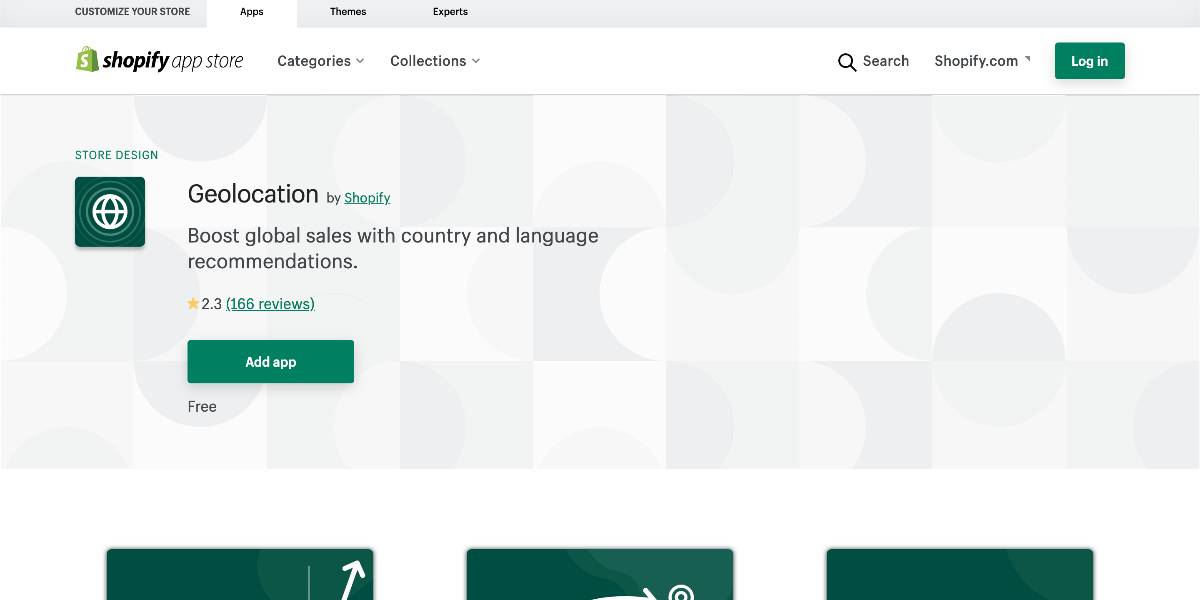
Geolocation
Shopify created this free geolocation tool for business owners that employ various languages or currencies. Geolocation is a basic plugin that does not affect the overall functionality of your website. It recognizes the user’s location and then proposes the optimal language or currency for them. The suggestions are shown on the store via a bar or popup feature that may be customized to match your branding. The user can next pick their desired language or currency. The application can automatically recognize and match the colors used in your store’s theme. This makes it feel much more like it belongs on your website. You may preview the design before publishing to ensure you’re satisfied with the bar/popup.
Outstanding features:
- Allow your visitors to choose their location and language.
- Provide customized suggestions to your visitors depending on the countries/regions they’ve enabled on their store.
- Detect and match your online store’s theme colors automatically.
- Proview detailed review before publishing.
- Increase the number of overseas visitors that make a purchase.
Price: You can get this plugin for free.
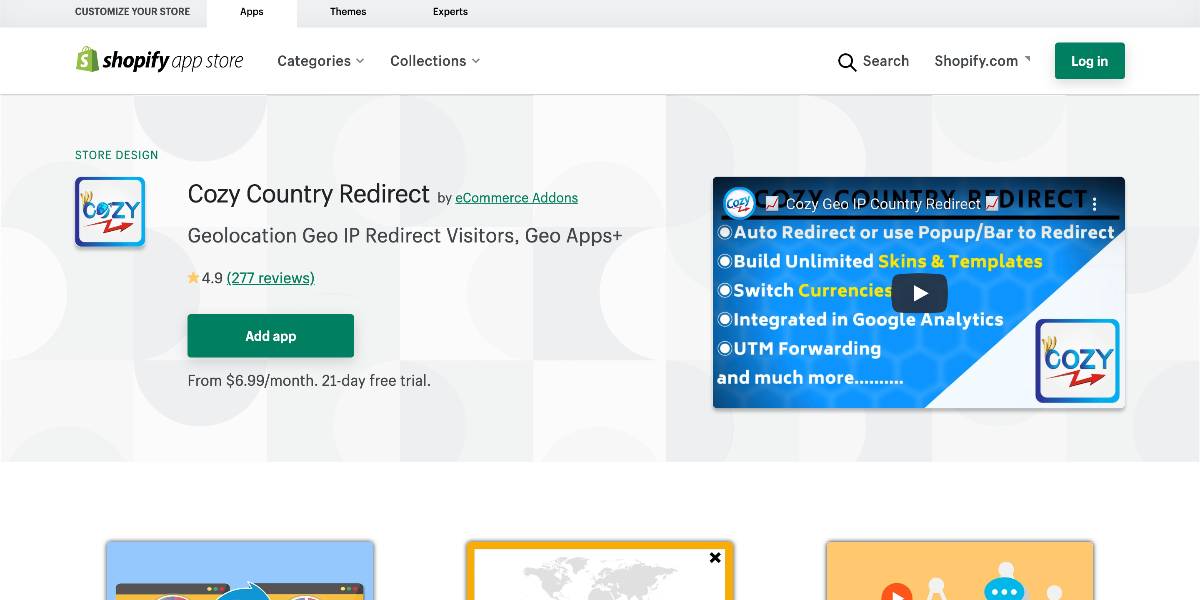
GeoIP Country Redirect
This plugin is ideal for individuals with numerous stores or one store with geographical features (currency, language, etc.). GeoIP Country Redirect will assist you in routing clients to the most suitable sites—the software functions in three different ways. The first is an immediate and automated redirection of clients. The second choice is to display a redirect popup box, and the last option is to show a redirect bar. The popup may be completely customized. There’s nothing you can’t modify about it, and the custom-CSS function allows you to use any font you choose. You may make the popup reflect the nation of the flag of the local business or your brand’s color scheme. You may see the modifications to your popup before they go live on your site by utilizing the unique preview button. The app is fully secure from Googlebot and Adwords, which will not reroute the search engine’s bots. This safeguards your SEO potential. Furthermore, the software can be connected with Google Analytics.
Outstanding features:
- With the app’s editor, you may change anything in our Popup or Bar. You do not need to wait for the support team to perform this. You may also use our custom-CSS functionality to add your font.
- You don’t need a VPN to see your store’s design every time you change; simply click the preview button.
- You may display a popup in a different language depending on the visitor’s country with various template support.
- Block locations by selecting the popup made specifically for restricting visitors from a specific country.
Price: You can get this plugin at the cost of $6.99 for a monthly subscription.
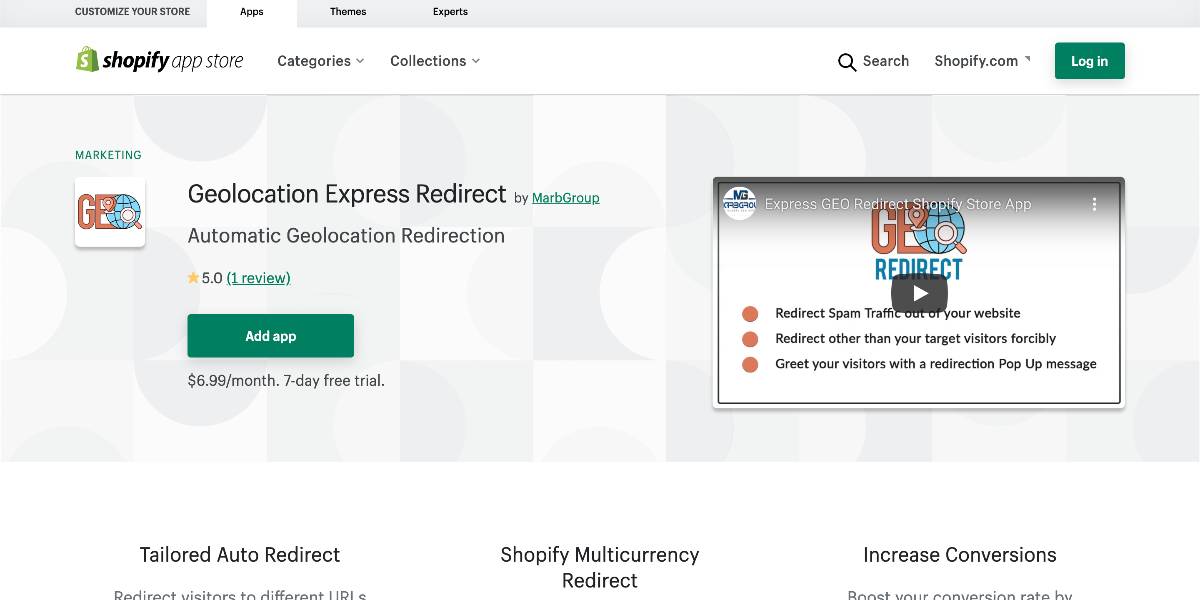
Geolocation Express Redirect
If you have operations in more than one country, this app can assist you in leading clients to the appropriate location. Geolocation Express Redirect offers an extended range of functions and can even identify and display the site best suited to the visitor’s currency to your website. Visitors will also be sent to the relevant local site. This might be a different domain or a different page on the same site. The application may also assist you in redirecting visits from countries where you do not wish to have users. For example, if you don’t sell to Europe, customers who arrive there might be removed from your site. It could be a good idea to direct them to a website explaining why you don’t sell in Europe. The software makes use of popups to present country-specific information. You may personalize these pop-ups by using different colors, fonts, inscriptions, and links. Furthermore, you may have one popup for each location but represent as many countries as you like.
Outstanding features:
- Users may be sent to the new Shopify payments multiple currency options with a single click of a button.
- Set up the site where consumers should go to buy your products based on their location.
- The app automatically sends them to the relevant site based on their location choices.
- This plugin also allows you to set up a redirection, which will enable you to pick one country from which you do not want your users to come.
- Use popups to display country-specific information, such as a link to another website available in the user’s location.
Price: You can get this plugin at the cost of $6.99 for a monthly subscription.
Conclusion
When you sell in more than one area or wish to ban people in regions where you don’t sell, you might consider utilizing one of the Shopify Geolocation applications. These might be handy tools for protecting your site against needless activity that slows it down. If feasible, we strongly advise you to give each of the apps listed above a try.
We hope that this tutorial will help you understand how to get a customer’s location and redirect them to the right store on Shopify. Customers should now register accounts, maintain personal information and order histories, and take advantage of any special coupons or discounts you may be offering. This is an excellent approach to entice clients to return to your business and make further purchases!


