
How to Add Products to Drop-down Menu in Shopify?

Drop-down menus are considered to be a valuable navigational tool for many eCommerce and other sites. People all agree that customers will navigate more quickly and effectively with a well-designed drop-down menu.
From the store owners’ perspective, we can make things easier and simpler for your customers to go through the store’s menu with all the links that appear in your online store Header, Footer, and the sidebar. As a consequence, they can reach lower levels of navigation quickly, just only with a smaller number of clicks with drop-down menu.
If you are figuring out what a drop-down menu is, how to create one, and how to Add Products to Drop-down Menu in Shopify, then this article here is for you. We will answer some of your common questions and instruct you to solve all these problems.
Related Post:
- What Programming Language Does Shopify use?
- How to Build a Shopify theme from scratch?
- How to Add Sliders in Shopify?
What is drop-down menu in Shopify?
A drop-down menu is a term used to describe a graphical control element that allows users to opt for one value from a list. A drop-down menu will display a single value when it is inactive. When it is activated, it will display a list of values. After when the user chooses a new value, the control will revert to its inactive state as well.
Drop-down menus are widely used to import group products, collections, or pages together to make things easier for customers to navigate your online store. For instance, a lot of products might confuse your customers. But when you insert them to collections and utilize a drop-down menu from the main menu to categorize the collections, they can find the type of products that they’re looking for in such an easy way.
How to create a drop-down menu in Shopify?
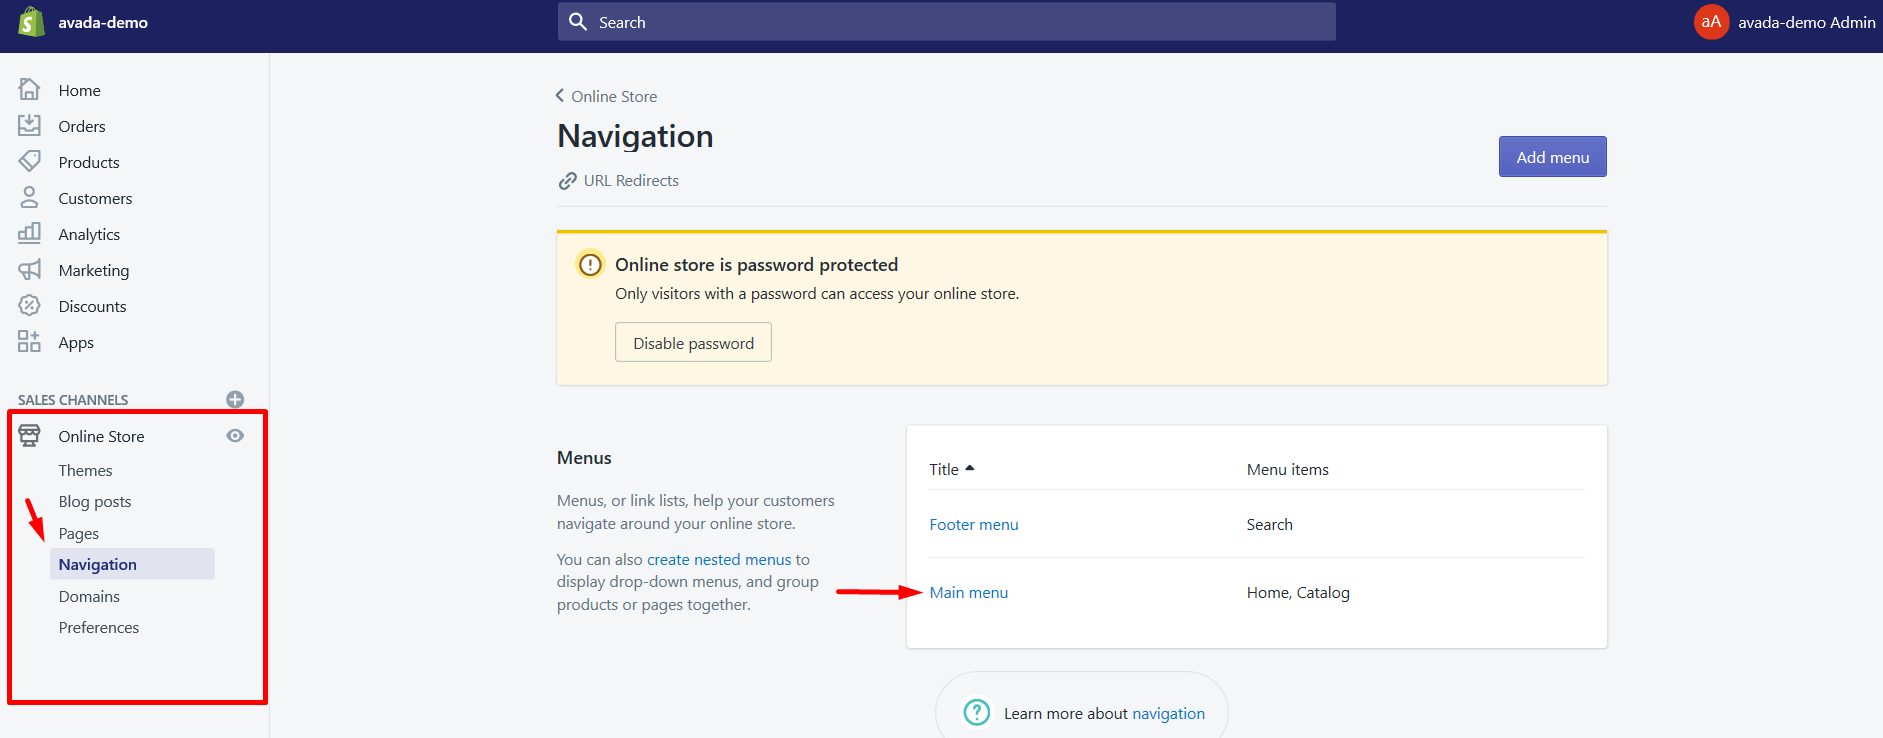
Step 1. Open Navigation
Log in your Shopify account and direct it to the Admin site. Click Online Store, and then choose Navigation.
Then you will see your available link lists to be chosen as the list item to add to your drop-down menu.
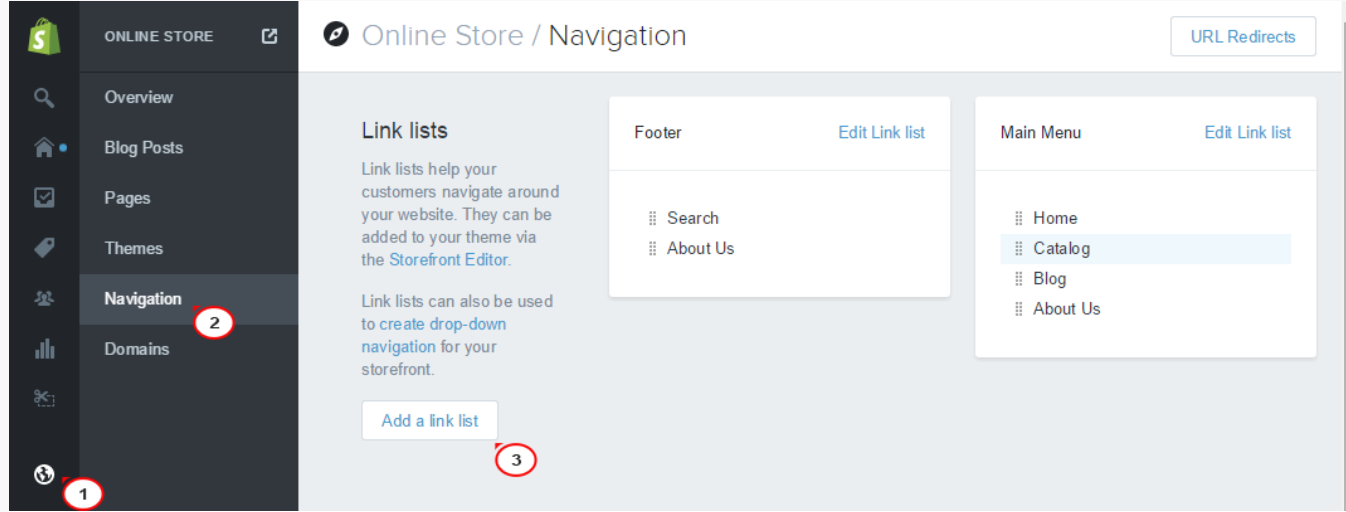
Step 2. Click on Add a link list
This example will take on your Catalog section. So, next, you need to add it to the Catalog when you are on the Main menu link list. Just hit a click on Add a link list button, which locates on the left side of the screen. From here, you need to name the list, set it the same as the list item you want to add the drop-down to.
Step 3. Type the Link name
In the appropriate field, just type the Link name down.
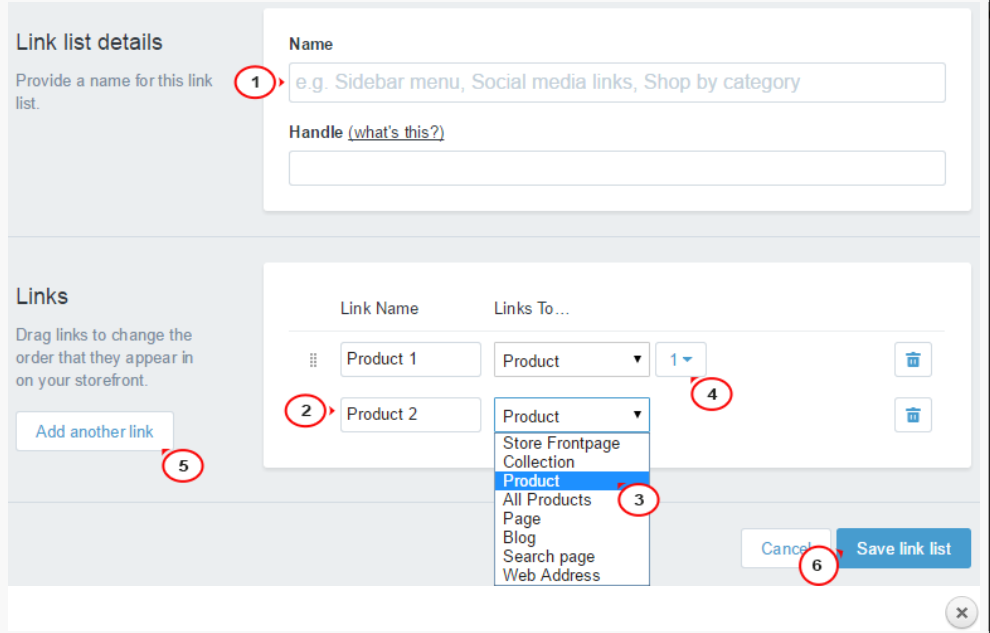
Step 4. Pick up the type of link
After that, pick up the type of link from the Link to… drop-down list. We can select the Collection or Product type here, as we take the drop-down for the Catalog as an example.
Step 5. Select the needed collection or product
Next, it’s your job to choose your needed collection or product.
Step 6. Click on Add another link
Look on the left, click on Add another link to add more drop-down menu, and then do the same steps for the next item.
Step 7. Click Save
Of course, don’t forget to click Save, or your changes will not be saved. Also, refresh the page to see your results immediately.
How to add products to drop-down menu?
Step 1. Open Navigation
Log in your Shopify account and direct it to the Admin site. Click Online Store, and then choose Navigation.
Step 2. Click the title of the menu
You are now on the Navigation page, then hit a click on the title of the menu that you want to edit.
Step 3. Choose Add menu item
After that, click Add menu item.
Step 4. Enter a title for the menu item
From here, you should type the title for the menu item down, which will be displayed in the menu. You are totally able to include special characters or emoji in.
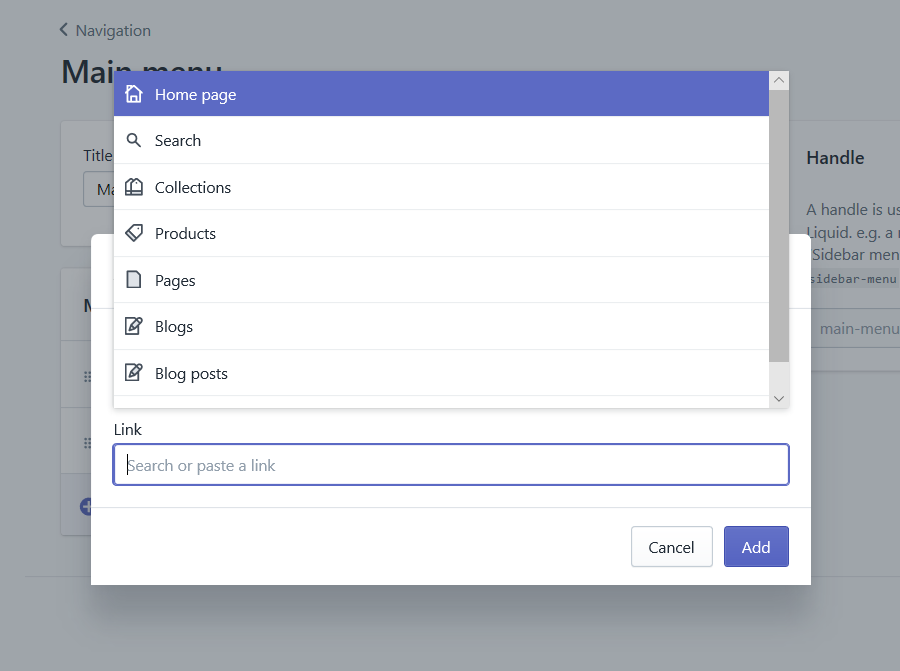
Step 5. Select a link type
Next, choose the Link field option to select your link type, or enter a website address for an external website. There are a few things that you might need to know:
- Home - it is your online store’s home page
- Collections** - it is specific collection or all collections
- Products - it is a specific product or all products
- Pages - it is a webpage on your online store
- Blogs - it is a blog on your online store
- Blog posts - it is a blog post on your online store
- Policies - it is one of your store policies
If you want to create an email link, follow the format mail to [email protected] to get your work done.
Step 6. Filter the collection with tags
In case you chose a collection or all collections, pay attention to filter the collection with tags to only show the products that match all of the tags that you put in.
Step 7. Select a specific destination
From here, when you have selected a link type, just choose your specific destination. For example, if you choose Home, then it will automatically set the destination to your online store’s home page.
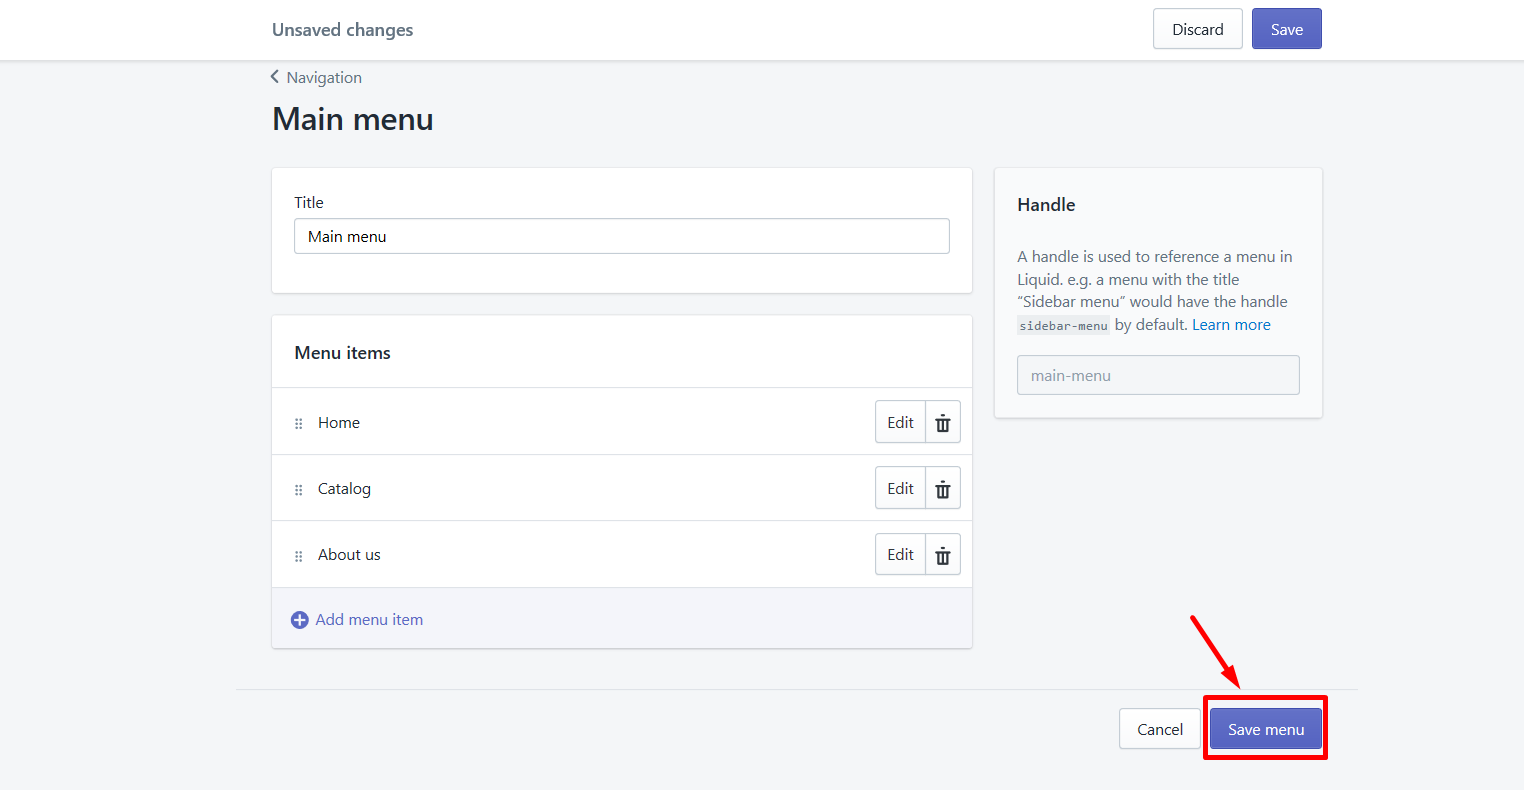
Step 8. Click Save menu
Of course, don’t forget to click Save menu in order not to lose your work.
Conclusion
That is the end of our writing today. Do you find it helpful? I really hope you do. Hopefully, after reading this post, you would be able to Add Products to Drop-down Menu in Shopify and categorize it well.
Moreover, in case you find any part of the article confusing, then feel free to let us know. We are always willing to help you to bring you the best experience on Shopify.


