
How to Add Color Swatches to Products on Shopify

If you manage an online store on the Shopify platform, and you have already published your items on your site, then you must want to know How to add color swatches to products on Shopify. It may be not easy as you imagine, but if you read our article carefully, you can do it effortlessly.
We will help you gain a better understanding of what color swatches are exactly, their importance, and five steps to add color swatches to products on Shopify. Let’s get started right now.
Related posts:
- Shopify Color swatches Apps
- How to Add Alt Text to Product Images on Shopify
- Shopify Custom Products Apps
What are color swatches?
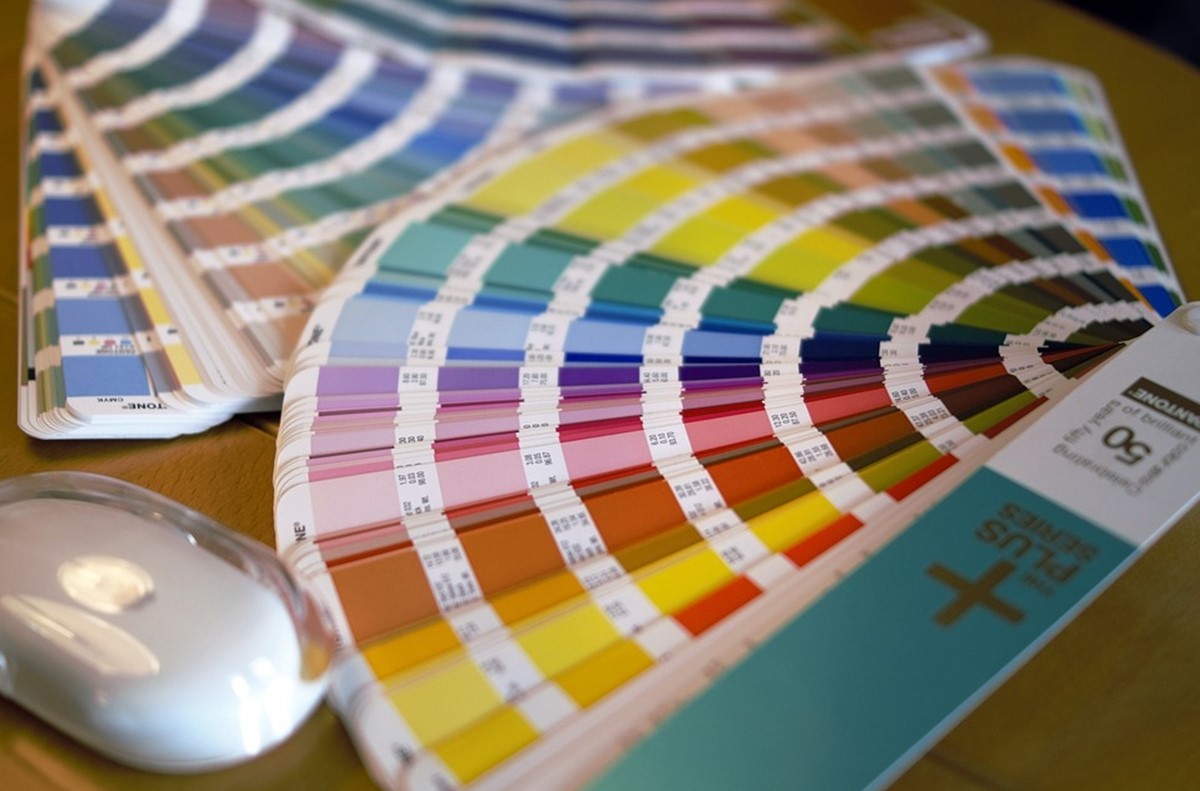
First thing first, what is a color swatch? Well, imagine an interior designer selecting paint for a room; swatches also display various options of colors, tints, gradients, and patterns. They enable you to make a comparison among the colors and try different combinations without affecting other functions.
Why do your products need color swatches?
Color swatches are crucial if you are an ambitious store owner whose goal is to impress others with your unique website. In both Adobe Illustrator and Photoshop, the Color Swatches panel helps organize your color palette and enables you to preserve new swatches for later use. Since swatches are not saved with any specific document, you can generate a color library and then make use of it for other projects.
5 Steps to add color swatches to your products:
Step 1: Create Liquid snippet
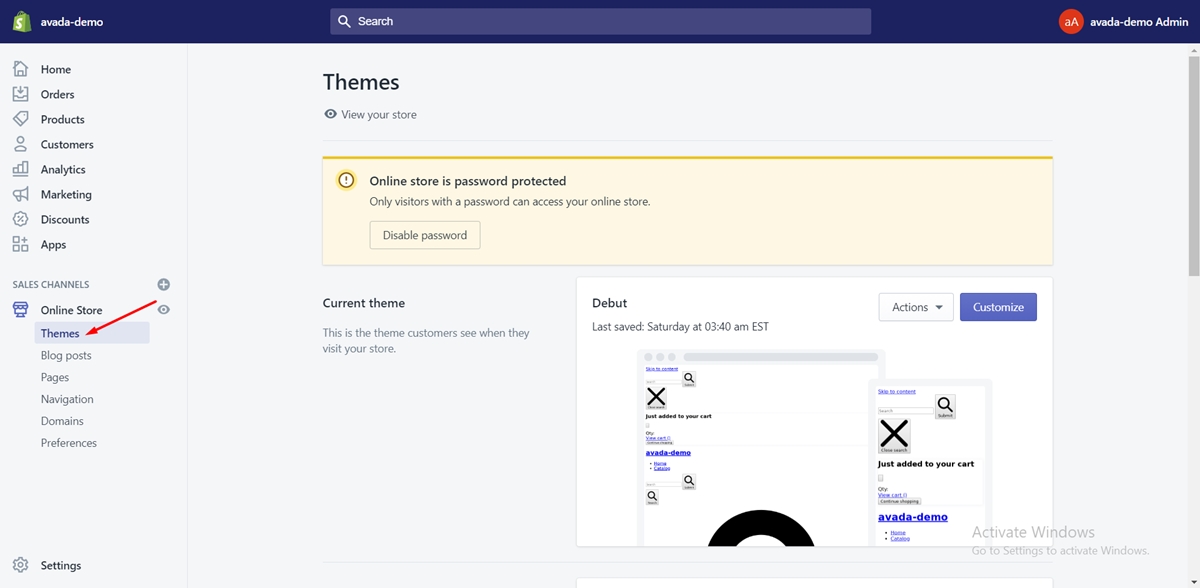
In your Shopify admin, head to the Online Store section, then click Themes.
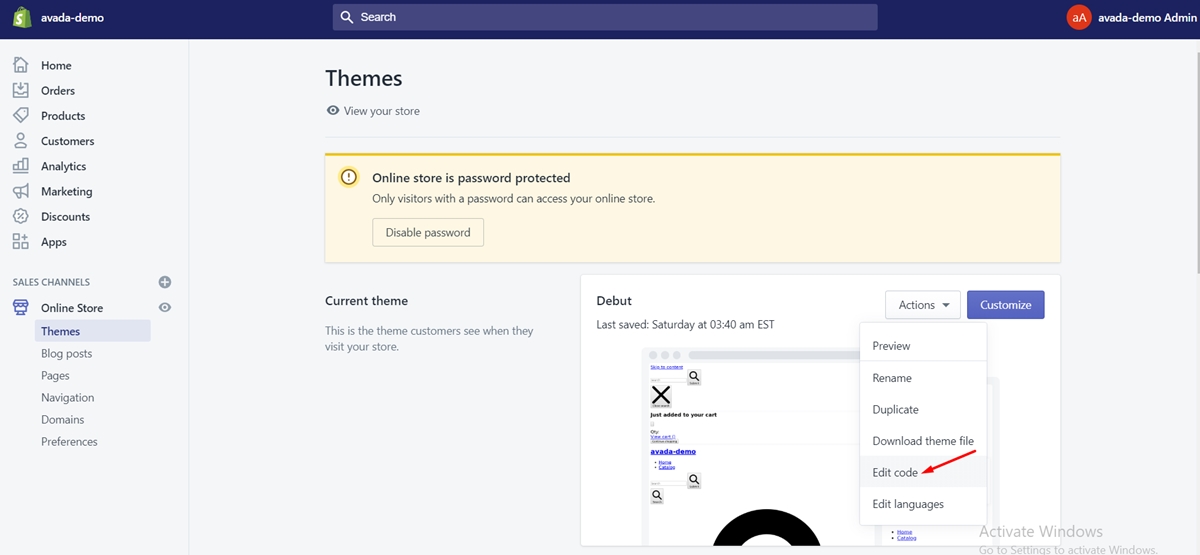
Once you have found the theme you intend to adjust, you can tap on Actions, then click Edit code.
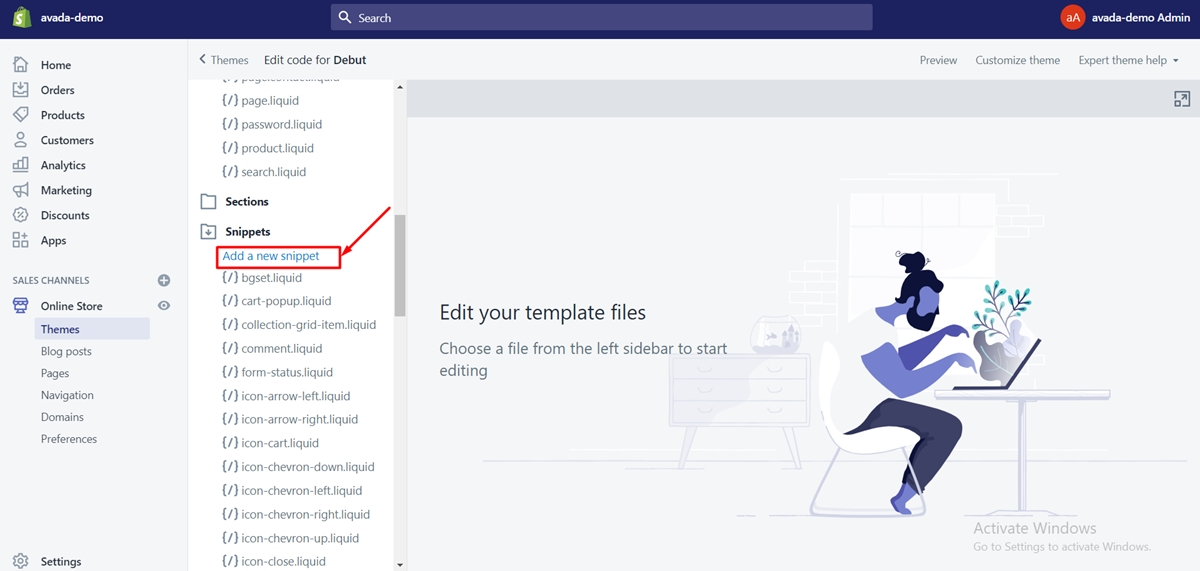
From the left side, click the Snippets heading to show your Snippets content.

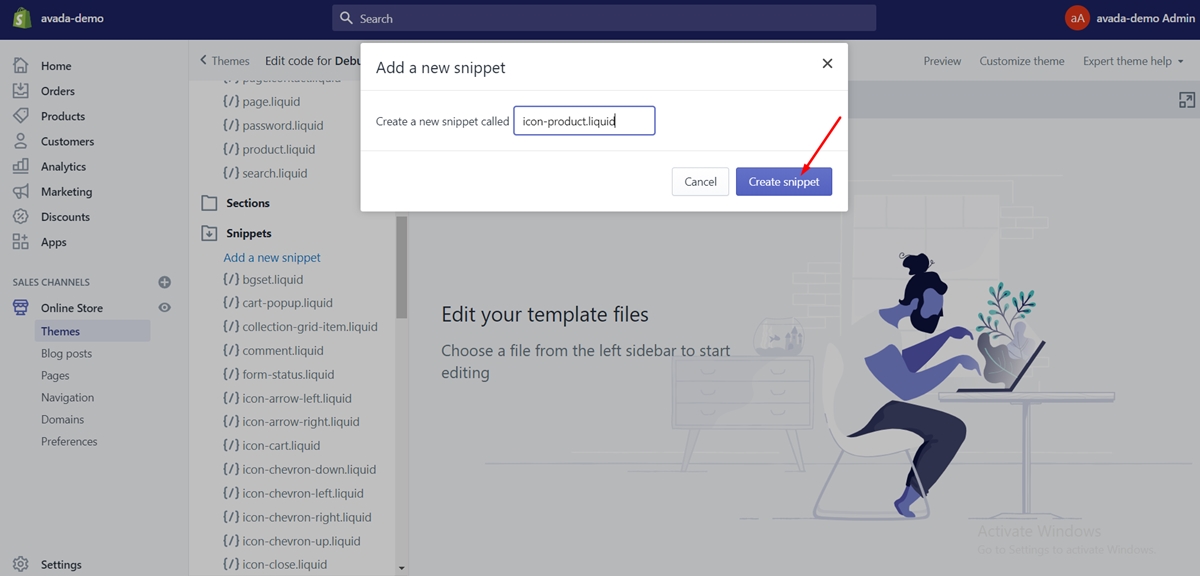
Below the Snippets heading, tap on the Add a new snippet link:
Name your new snippet swatch, then click Create snippet.
Next, copy and paste this file’s content into your new swatch.liquid snippet.
And save your modifications.
Step 2: Add swatch-lip.liquid to product.liquid
In this step, you should do like this:
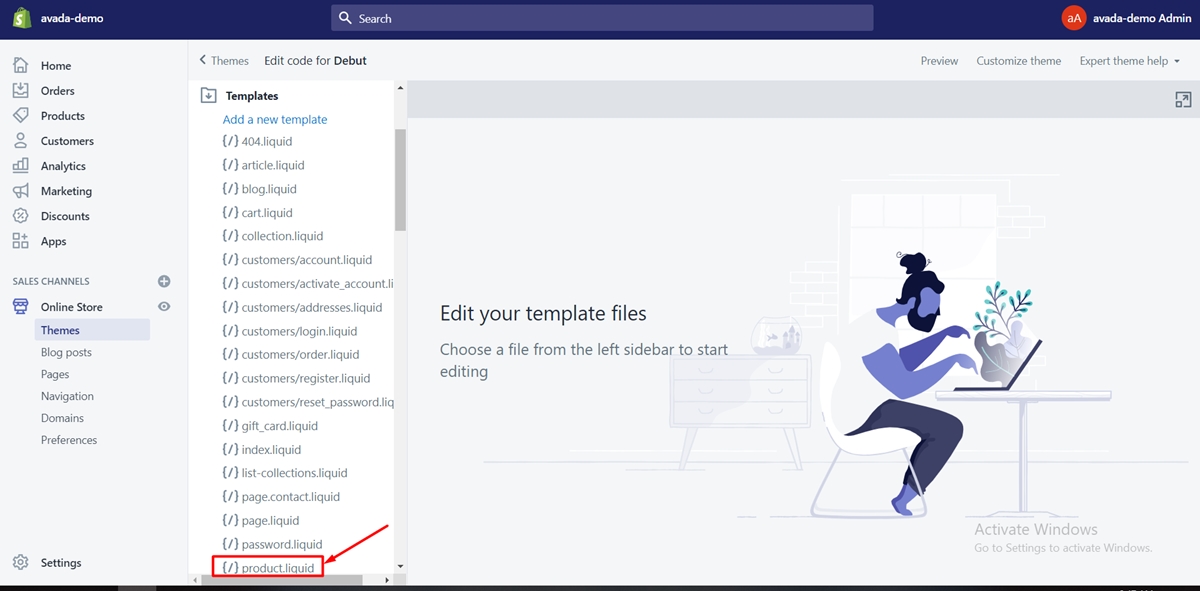
From the Edit HTML/CSS page, below the Templates heading on the left, find and tap on product.liquid to open your product template in the online code editor.
You can include it with the product name option you want so that you can change into a swatch. With the use of this last snippet, the swatch treatment will be applied automatically to any product option that includes the word color or color in it, meanwhile, the button treatment will be applied to all other options.
Getting a swatch treatment results in the elimination of your color drop-down from the product page, and a list of colorful buttons will substitute it. Not only that, it also leads to the removal of your options drop-down from the product page, and a list of labeled gray buttons will substitute it.
If you are not sure which code snippet to use, you can make use of the last one. If you are not sure where to insert your snippet, search for a select element with name id and insert your snippet right under that element.
Step 3: Config your theme
The next move is to upload a graphic to your theme assets that will be overlaid on top of our buttons when their related value is sold out for all of your item’s variations.
The CSS we are currently using will extend or reduce that graphic so that it fits perfectly onto the button or swatch box.
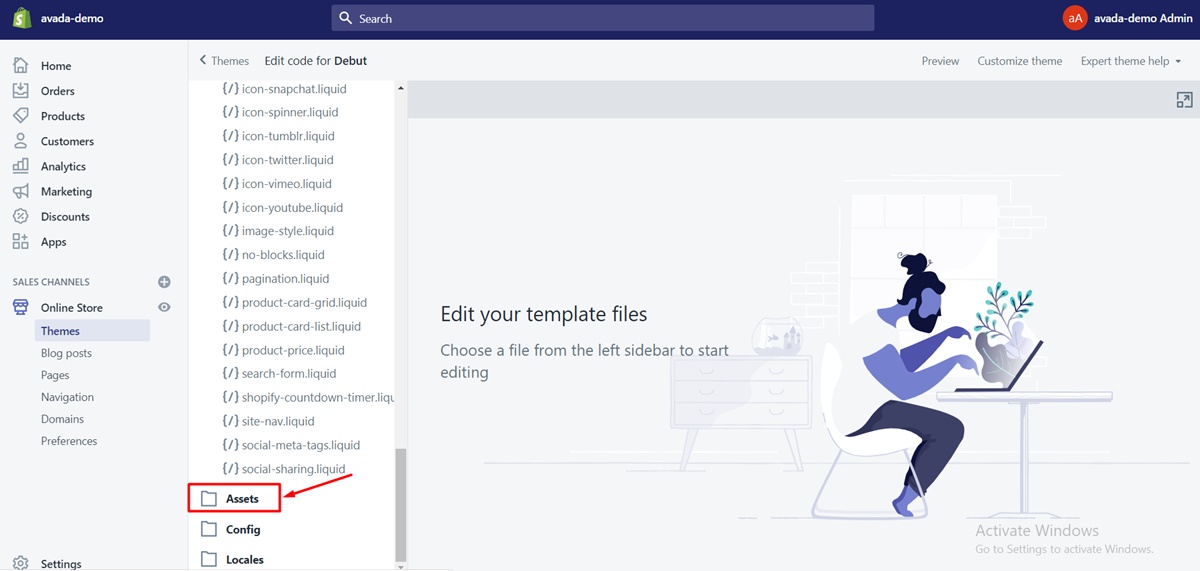
First, find and tap on the Assets folder to show its content from the Edit HTML/CSS page.
Next, below the Assets heading, tap on the Add a new asset link.

And then, you can upload your soldout overlay.
Step 4: Add CSS to theme’s stylesheet
The first thing you should do in this step is to find and tap on the Assets folder to show its content from the Edit HTML/CSS page.
Below the Assets folder, find a file with extension .css.liquid that is not checkout.css.liquid. The other file is normally named as styles.css.liquid, style.css.liquid, or shop.css.liquid.
Once you have found your file, open it on the online code editor. Then, copy and paste this file’s content at the bottom of your file. You must attach the CSS at the bottom of your stylesheet.
If you can not locate your theme’s stylesheet, you can copy and paste the CSS provided into a style element, and then suplement that style element at your product.liquid file’s bottom.
Step 5: Upload color swatches
With the color options you possess in your hands, you can either enable the script to provide a color for you, or you can upload an image that shows that color.
Before going through the steps, keep in mind that you must name the image the color option, but be handleized, and have a .png extension.
For instance:
If you have a color called Light Azure, then you can name your image light-azure.png
If your color is Mineral Red, then you can name your image mineral-red.png.
If your color is Dark Navy Blue, then you can name your image dark-navy-blue.png.
From the the Edit HTML/CSS page, find and tap on the Assets folder to show its content.
Then, below the Assets heading, tap on the Add a new asset link.
Next, upload your image.
You should repeat the two above moves until you have uploaded all your images successfully.
See our review: 12+ Best Shopify Color swatches Apps
Conclusion
So far, we have revealed to you five steps to add color swatches to your products. We hope you could easily follow our instructions and do it easily. Furthermore, if you find our guide helpful, do not hesitate to share it to your social network community. We will really appreciate that if you do that.
Also, if you have any questions, feel free to contact us. We always look forward to be hearing from you.


