
How To Add Color Swatches on Shopify Collection Page?

You are new to Shopify and start installing icon theme for your store. However, you don’t know how to add interactive color swatches on your icon theme’s collection page. In fact, the debut theme and display color swatches on the collection page of the store tend to be challenging for any Shopify merchants since it asks for a small part of code to add them to the theme for this issue.
By utilizing collection color swatches, you can show that your products come from different color variants. This feature works on every product listing ranging from collection page, featured products, and related products. Also, you will have a chance to upload pictures to be used as color swatches by doing it. Those images will display the correct color, texture, and design of each color variant.
That’s why we have this post today, which will show you more about how to Add Color Swatches to your Shopify Store’s Collection Page.
Let’s dive in!
What is a color swatch?
Color swatch is a larget set of colors, tints, gradients, and patterns. This color swatch is important and familiar with any designers or those who work with Adobe Illustrator and Photoshop. So why should you add a color swatch when designing or customizing something?
-
Color swatches enable you to compare colors and try different combinations between them without creating any risk.
-
When it comes to Adobe Illustrator and Photoshop, their color swatches bring order to your color palette and allow you to save new swatches for the later purpose.
-
A color swatch can be used in many different projects and cases since it is not saved with any particular document, which allows you to create a color library for later use.
There are four most common categories of color swatches that can be found in Illustrator. They include:
-
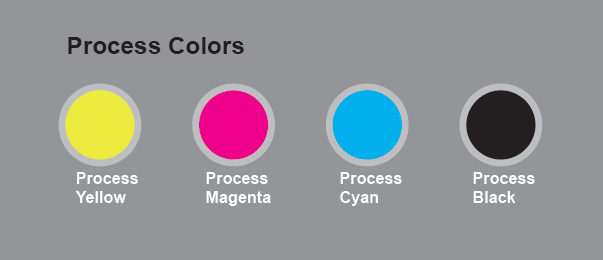
Process Color: This library is also known as the four standard process links since it only includes colors derived from cyan, yellow, black, and magenta. Designers tend to call it CMYK library, which stands for four main colors.
-
Gradient Color: This library brings about more shades for one color since it contains blends between two or more colors or tints. They can include process colors, spot colors, or RGB colors (Red-Green-Blue).
-
Spot Color: This library can either contain CMYK process colors or premixed links that are not in that category.
-
Pattern Color This library is used for specialized use of filling shapes, which asks for repetition. Therefore, Pattern Color looks at tiled paths and texts.
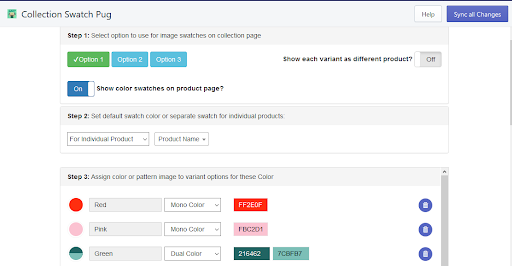
How to activate & customize color swatches on Shopify?
Step 1: Showing custom swatch images
When it comes to activating and customizing color swatches on Shopify, remember to sign in your account first.
Then, go to Shopify Admin, which is followed by Online Store. Scroll down to the theme you want to edit and click in the Customize button.
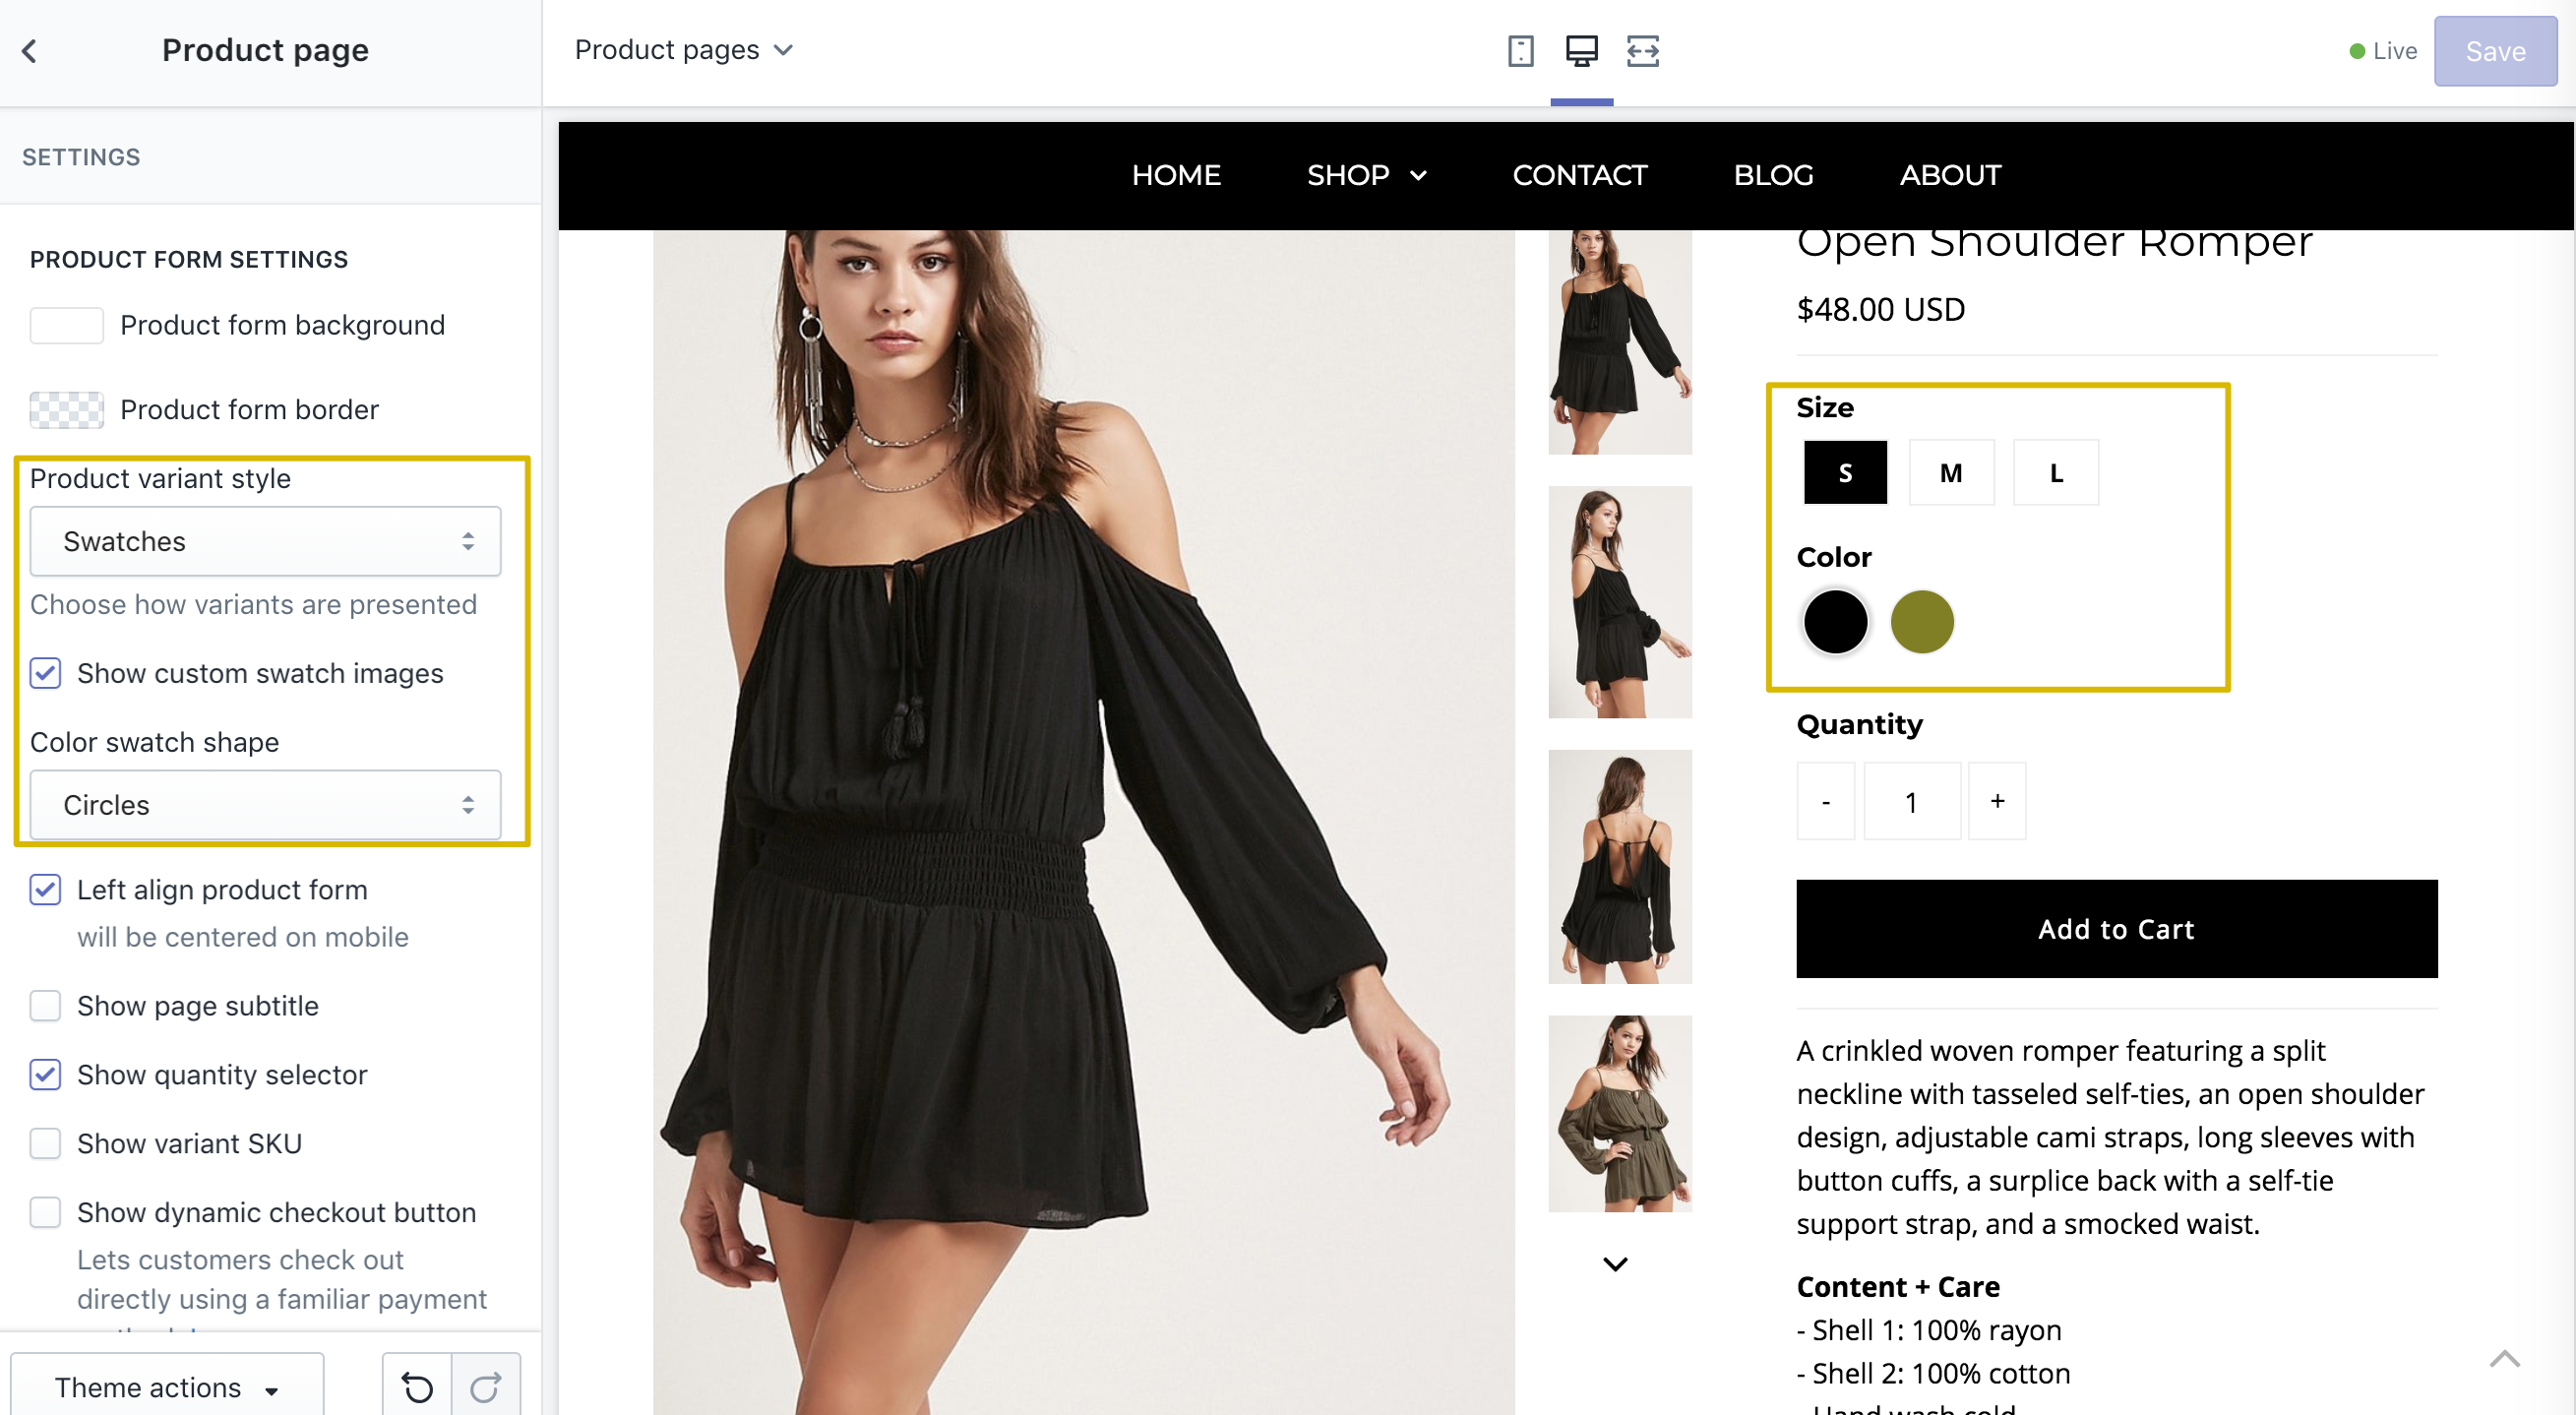
From the top-bar, you should choose Product Pages. Next, find the section Settings and choose Swatches. Finally, check off Show custom swatch images.
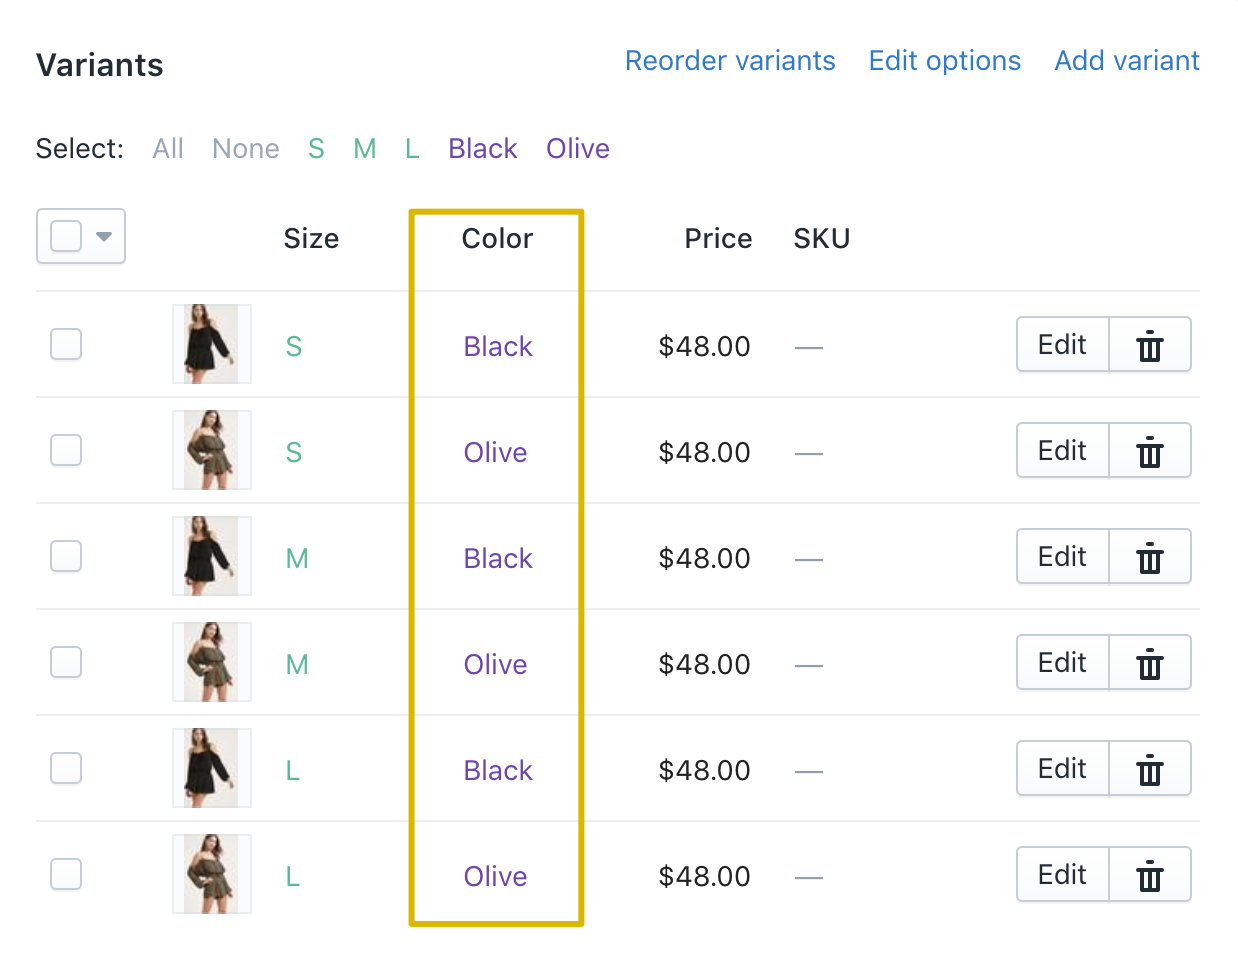
Step 2: Naming the Product Options
Only when you name one of the Product Options as either Color or Colour can you show color swatches. The default mode is that the color swatches tend to use the HTML (Hypertext Markup Language) color spectrum. For example, if your variant color option is named Red, it is likely to show the HTML color Red.
For more knowledge about more lists of HTML colors, you can research here!
However, there is the case when your color name does not appear on the list of HTML colors. If you face this issue, the color swatch will automatically turn into white, enabling us to custom color swatches to create our color swatches. Also, if the color is not accurate as expected, you can use customized color swatches.
Step 3: Taking a screenshot of your products
Now, it’s high time we take a screenshot of the product. The screenshot should not be as large as possible but remain at the size of 50px x 50px. What’s more, it should be of good quality to let you see a good proportion of the color. After taking the picture, let’s save this image by the following setup:
- If the image’s color is named with just one word like Gold or Silver, save it as gold.png or silver.png(all in lowercase also).
- If the image’s color is named with two or more words like Light Brown, save it as light-brown.png (all in lowercase and every space are replaced by a hyphen “-”).
- If the image’s color is named White/Black, save it as white-black.png (all in lowercase and every space are replaced by a hyphen “-”).
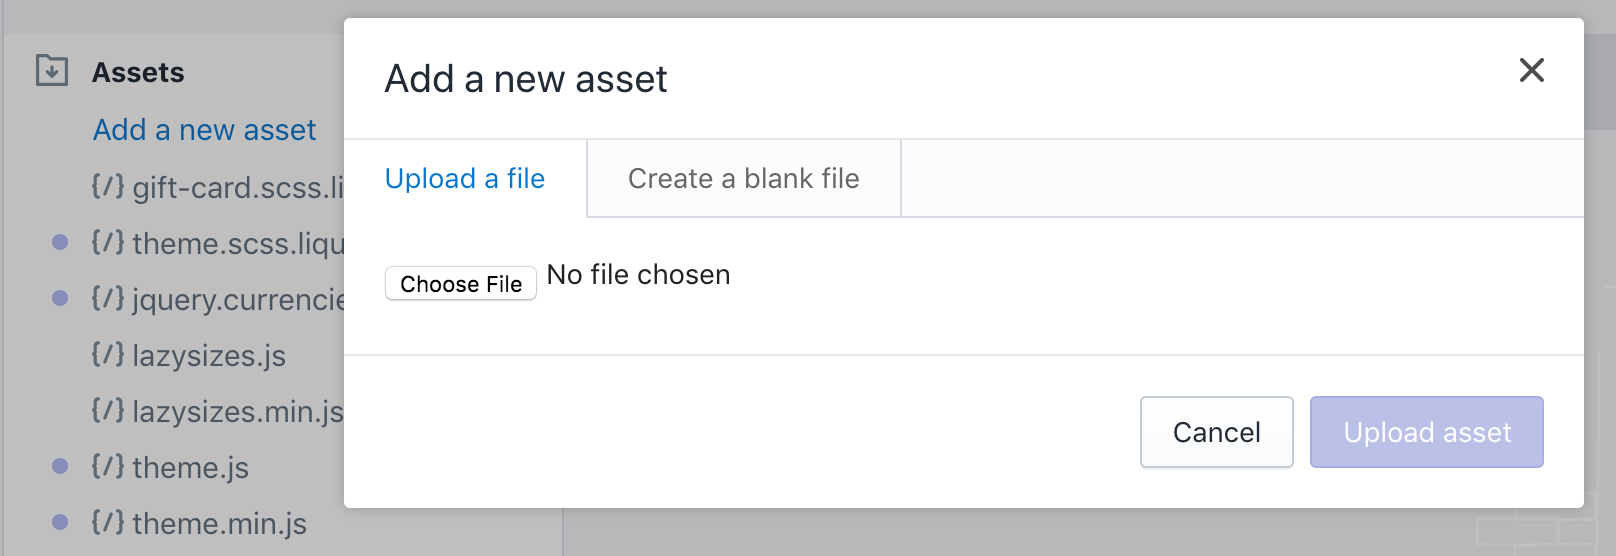
Step 4: Uploading each png swatch one by one
After having saved all your images, go to the Online Store and click on the Themes button. Then, find the actions dropdown which stays next to the theme, and click to edit code. You are now led to the next page. In the left sidebar, click on the Assets folder and continue with Add a new asset. Here you can upload each png swatch one by one.
If you use the themes of Mr. Parker V6.5+, Icon 7+, and Vantage 7+, let’s take a look at the method we suggest below, which seems to be much easier. You are enabled to upload the swatches to the Shopify Admin Files. Moreover, you can upload more than one swatch at one time.
- Go to your Shopify Admin
- Click on the Settings section
- Click on the Files button
- Upload and select all your swatches
Now, let’s refresh your product page; what do you see? The generic color is already replaced by your swatch image, right?
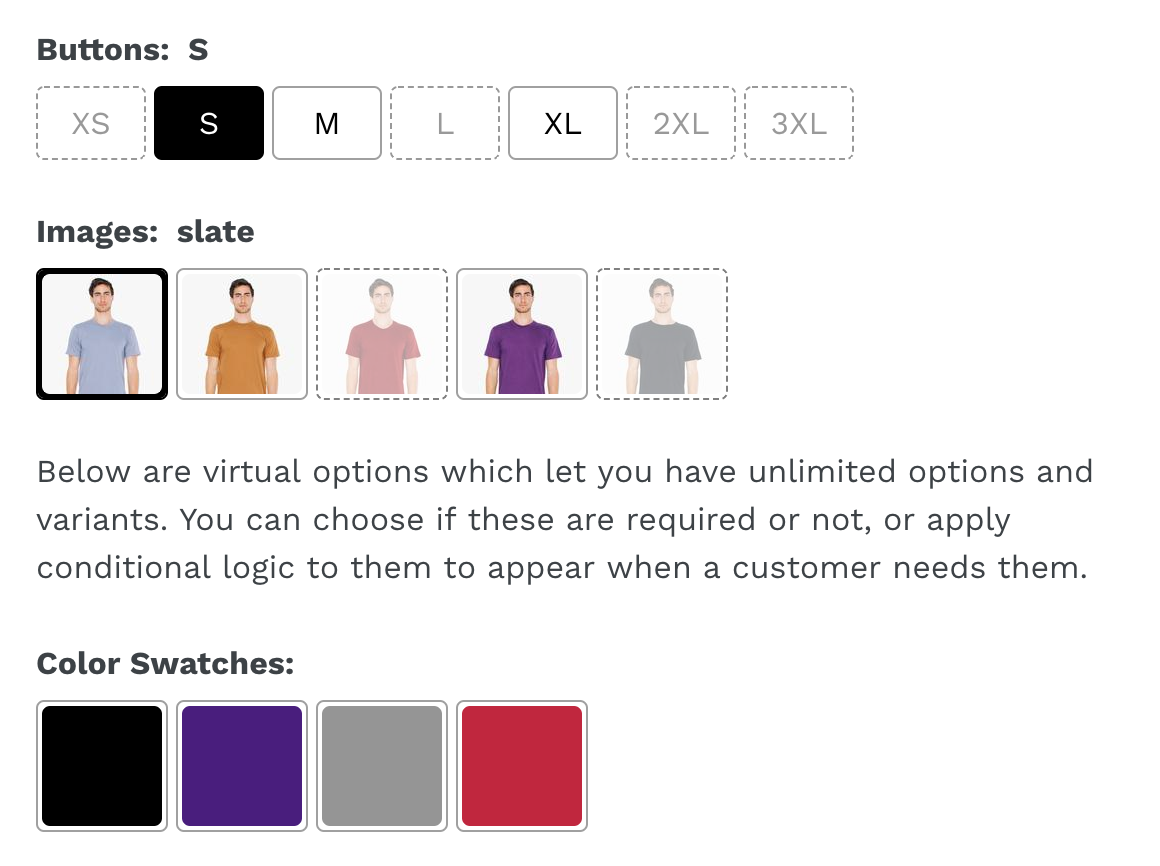
How to display color swatches on the collection page on Shopify?
To display color watches on the collection page on Shopify, you should follow the steps below:
- Go to the Customize section, which is your theme editor
- Click on the Theme Settings button
- Click on the Product Grid button
- Check off the Show color swatches setting, which is included under the Collections and Search Results
After completing the above instruction, the color swatches will surely be presented below product thumbnail images on collections and search results.
What to do if the swatches are not appearing?
It is normal when there are errors during the process of displaying the color swatch on the collections page on Shopify. In this case, the color swatches tend not to appear as expected. However, if they do so, you can follow the following guide to fix this, which is a quick troubleshooting list:
- Check out to see if you are saving your image files with the correct rule or not which means the images are saved with .png extension, all letters are in lowercase, and not .jpg or other formats.
- Check out to see whether you are uploading the image files to the Assets folder in the Theme editor or not. Remember that is is not under the Settings section followed by Files.
- Check out and correct all letters that are not used in lowercase format when it comes to your file names.
- Check out to see if you have replaces all accented characters with the standard letters and replace all spaces or special characters with hyphens.
- Be sure your image is at the correct size which is at least 50x50 pixels.
- Make sure you have had your watch setting enabled. If it is not available, the color swatches will never appear.
One of the most common reasons is that your site is not in English but any other language. Therefore, your product option is not titled as Color or Colour and the color swatches will not appear. You then need to make a small adjustment at the product-swatch.liquid file.
Go to the Online store, click on the Themes section which is continued by Actions. Then, click on the Edit code button and snippets. Here, you will see the code located stays as:
{% if downcased_option contains ‘color’ or downcased_option contains ‘colour’ %}
You should now change it to be:
{% if downcased_option contains ‘your-option-title’ %}
Your-option-title is where you can use other words to replace color and colour. Such as, you can use ‘couleur’ or ‘farbe’ instead.
Conclusion
As you can see, the small liquid code above will effectively help you represent a color swatch on your Shopify web store Collection page for each color available for that product.
Adding in one or more color swatches on your Collection page on Shopify will allow you to show the user that this product had many different colors and they have a large variety of color options besides the one from featured images.
Hopefully, this article helps you successfully activate, customize color swatches on Shopify, display color swatches on the collection page, and even solve the error if the swatches do not appear. If you want to ask any questions, don’t hesitate to leave us a comment in the section below. Share this post with your friends and visit our site for more if you found this post interesting.
Good luck for your Shopify store!


