
How to modify the code for your product images in Shopify
Drive 20-40% of your revenue with Avada
As an online store administrator, you are allowed to insert a hover effect to all images of products on either your collection pages or on your home page. The image will be automatically switched to the next one of the same collection to show custom text, product image, or a mix of the two just like this:
However, please keep reading our instructional writing on How to modify the code for your product images to know more about this topic.
How to modify the code for your product images
Modify the code for your product images
Please follow these steps below to modify the code:
Step 1:
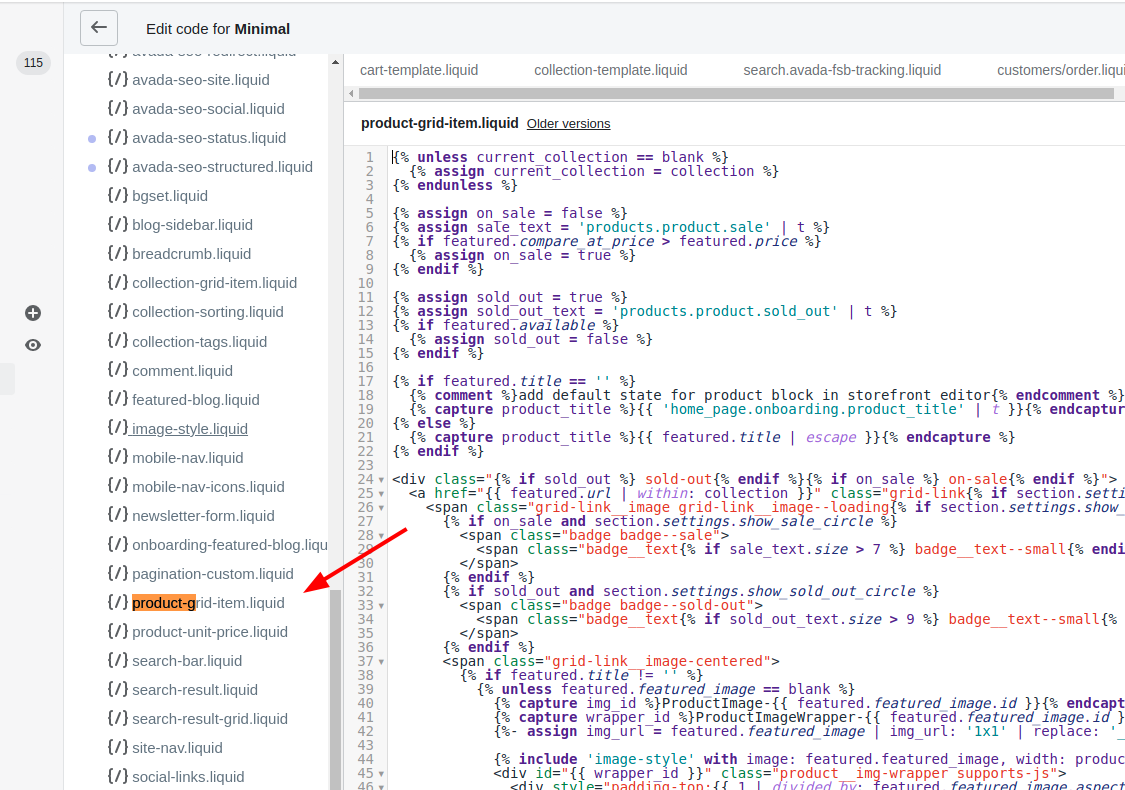
In the Snippets directory, tap product-grid-item.liquid.
In case your theme does not have a product-grid-item.liquid file, then find one of those files:
product-card.liquidproduct-card-grid.liquidproduct-loop.liquid
Step 2:
Search for the code below to look for the HTML img tag:
<img
The code for the tag does vary theme to theme but usually begins with <img, and ends with either /> or >. It should look like this:
<img src="{{ featured.featured_image.src | img_url: '450x450' }}" alt="{{ featured.featured_image.alt | escape }}">
Step 3:
Paste the code below on a new line right above the img tag:
<div class="reveal">
Paste the code below on a new line right above the img tag:
</div>
You should get the result just like this:
<div class="reveal">
  <img src="{{ featured.featured_image.src | img_url: '450x450' }}" alt="{{ featured.featured_image.alt | escape }}">
</div>
Step 4:
Insert the code that changes what is displayed on hover on a new line right below the img tag and above the closing </div> tag. The code that you insert will vary, it depends on if you want to show an alternate custom text, product image, or a mix of the two. Please follow all the steps listed below.
Display an alternate product photo on hover_
Step 1:
Paste the code below on a new line right above the img tag and above the closing </div> tag:
<img class="hidden" src="{{ product.images.last | img_url: '450x450' }}" alt="{{ product.images.last.alt | escape }}" />
The result should look similar to this:
<div class="reveal">
  <img src="{{ featured.featured_image.src | img_url: '450x450' }}" alt="{{ featured.featured_image.alt | escape }}"><!-- this is your original image tag -->
  <img class="hidden" src="{{ product.images.last | img_url: '450x450' }}" alt="{{ product.images.last.alt | escape }}" />
</div>
Step 2:
Tap Save.
Display custom text on hover
Step 1:
Paste the code below on a new line right above the img tag and above the closing </div> tag:
<div class="hidden">
  <div class="caption">
    <div class="centered">
    YOUR TEXT
    </div><!-- end of .centered -->
  </div><!-- end of .caption -->
</div><!-- end of .hidden -->
Let YOUR TEXT replaced with the content that you want to display. You are allowed to use Liquid tags and HTML, for instance:
<div class="hidden">
  <div class="caption">
    <div class="centered">
      <p>{{ product.title }}</p>
      <p>{{ product.price | money }}</p>
    </div><!-- end of .centered -->
  </div><!-- end of .caption -->
</div><!-- end of .hidden -->
The example code mentioned above displays the price and the title of an item when you hover over the image.
The code should look similar to this:
<div class="reveal">
  <img src="{{ featured.featured_image.src | img_url: '450x450' }}" alt="{{ featured.featured_image.alt | escape }}"><!-- this is your original image tag -->
  <div class="hidden">
    <div class="caption">
      <div class="centered">
        YOUR TEXT
      </div><!-- end of .centered -->
    </div><!-- end of .caption -->
  </div><!-- end of .hidden -->
</div><!-- end of .reveal -->
Step 2:
Tap Save.
Display an alternate product image with custom text on hover
Step 1:
Paste the code below on a new line right above the img tag and above the closing </div> tag:
  <div class="hidden">
    <img src="{{ product.images.last | img_url: '450x450' }}" alt="{{ product.images.last.alt | escape }}" />
    <div class="caption">
      <div class="centered">
        YOUR TEXT
      </div><!-- end of .centered -->
    </div><!-- end of .caption -->
  </div><!-- end of .hidden -->
The code should look similar to this:
<div class="reveal">
  <img src="{{ featured.featured_image.src | img_url: '450x450' }}" alt="{{ featured.featured_image.alt | escape }}"><!-- this is your original image tag -->
  <div class="hidden">
    <img src="{{ product.images.last | img_url: '450x450' }}" alt="{{ product.images.last.alt | escape }}" />
    <div class="caption">
      <div class="centered">
        YOUR TEXT
      </div><!-- end of .centered -->
    </div><!-- end of .caption -->
  </div><!-- end of .hidden -->
</div><!-- end of .reveal -->
Step 2:
Tap Save.
Conclusion
We hope that modify the code for your product images guide has got you through some necessary information you are in need, thank you for reading!


