
Web Push Notifications for WordPress: The A-Z Guide

Drive 20-40% of your revenue with Avada
Catching the interest of visitors is a tricky endeavor, but nowhere near as challenging as keeping them on board for the long term. One of the newer ways to succeed in doing so is to reach users outside your website, hence considering using web push notifications for WordPress.
WordPress push notifications allow you to set up a direct line of communication with your subscribers. They are far more straightforward than emails and even more engaging than regular campaigns. If you learn how to master them, they can be a huge boon to your site.
In this blog post, we’ll explain everything you need to know about web push notifications for WordPress. Let’s get cracking!
What is a web push notification?
Web push notifications are messages that pop up on your screen, letting you know when something happens on your device.
For instance, when you get an email, you probably see push notifications on both your desktop computer and smartphone. They are actually not as intrusive as popups, but you can configure them when you want to show them (so they don’t annoy your subscribers).

In the past, push notifications were limited to apps and system updates. But it’s become more and more common for websites to also implement this feature. Below are just a few of the reasons why.
-
They allow you to alert your visitors about new content. With web push notifications, visitors don’t have to visit your website to find out if you have published a new article. Instead, they can just get a notification when new content is available.
-
Users can opt-in and opt-out of them. Unlike pop-ups, users can choose whether they want to receive web push notifications in the first place. That means only interested parties will see them.
-
They require less attention than an email. You can send email blasts to let people know about offers and updates, but web push notifications don’t require them to open a full message.
-
They are effective. Web push notifications have high CTR (click-through rates), especially when compared to other marketing methods.
There are lots of upsides to using web push notifications in WordPress. Nevertheless, it is worth noting that some people are not big fans of this feature. If you overuse web push notifications, it can annoy your subscribers, leading to them not wanting anything from your website.
So, to maintain a good balance, think about how you might react in your subscriber’s place. If a website sends you too many push notifications for no good reason, you will probably end up uninstalling it. The same will apply to websites, so you should use notifications sparingly. That way, when your subscribers see one, they will know that it’s something worth checking out.
Why adding web push notifications to your WordPress site?
Do you know that up to 70% of people who leave your website will never come back? That’s why you need to convert these people into subscribers or customers.
You can achieve this by using multiple channels at once, including email marketing, social media, SMS or mobile marketing, and web push notifications. Email lists are still the most powerful tool available. However, we’re finding that web push notifications are also very effective.
Popular sites like Facebook, Pinterest, LinkedIn, and many others understand the importance of web push notifications and are already using them.
According to a study, push notifications can have a 50% higher open rate than email and twice as much click rate. They’re more engaging than email marketing, SMS, and social media platforms. Having that said, let’s have a look at how to add web push notifications to your WordPress website.
How to add web push notifications to your WordPress website
The easiest way to add web push notifications to your WordPress website is by using a push notification plugin.
Most plugins work by connecting WordPress with a third-party service that can manage messaging. This approach works well, as it means your web server won’t need to handle the strain of sending hundreds or even thousands of push notifications.
Although there are multiple WordPress push notification plugins out there, you should start with OneSignal. The platform enables your visitors to easily opt-in and receive push notifications from you.
With OneSignal, you’re able to send notifications for new content, or touch base with visitors who haven’t been around for a while. This WordPress plugin helps segment your audience and provides you with in-depth analytics as well as A/B testing functionality.
So, below we’ll walk you through how to set up web push notifications using OneSignal.
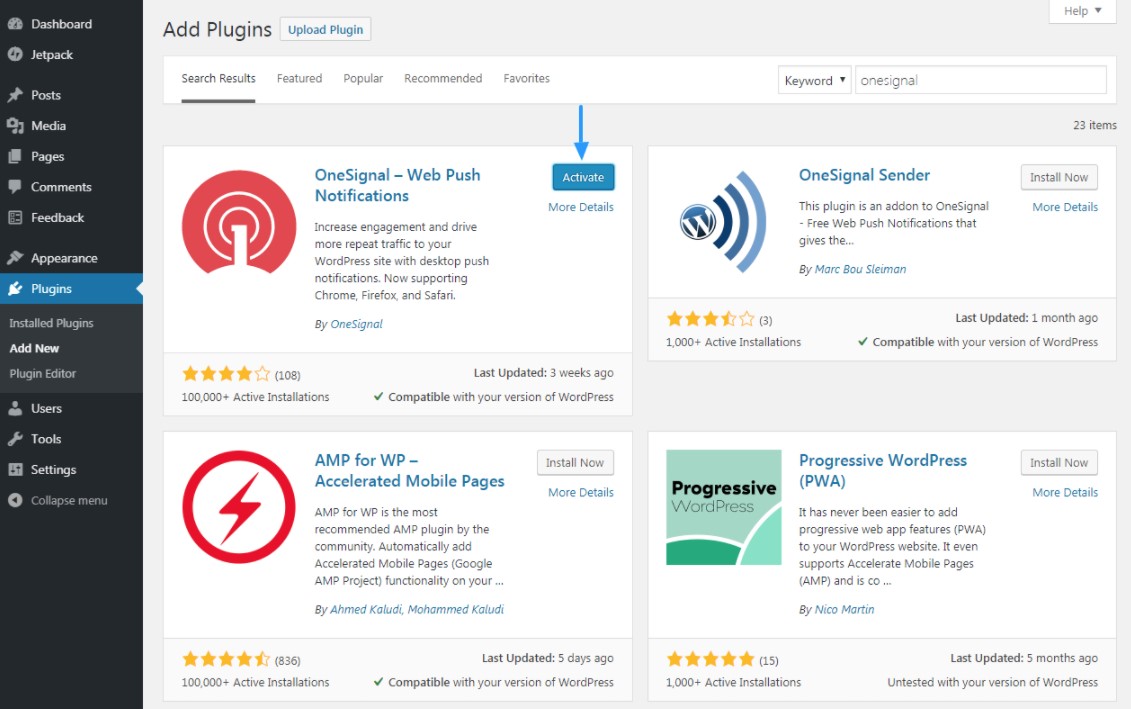
#Step 1. Install the OneSignal plugin
Installing the OneSignal plugin is simply like any other WordPress plugin.
You can either download from the WordPress plugin directory and install it, or directly install it by searching on your WordPress website’s plugins dashboard.
#Step 2. Create an account
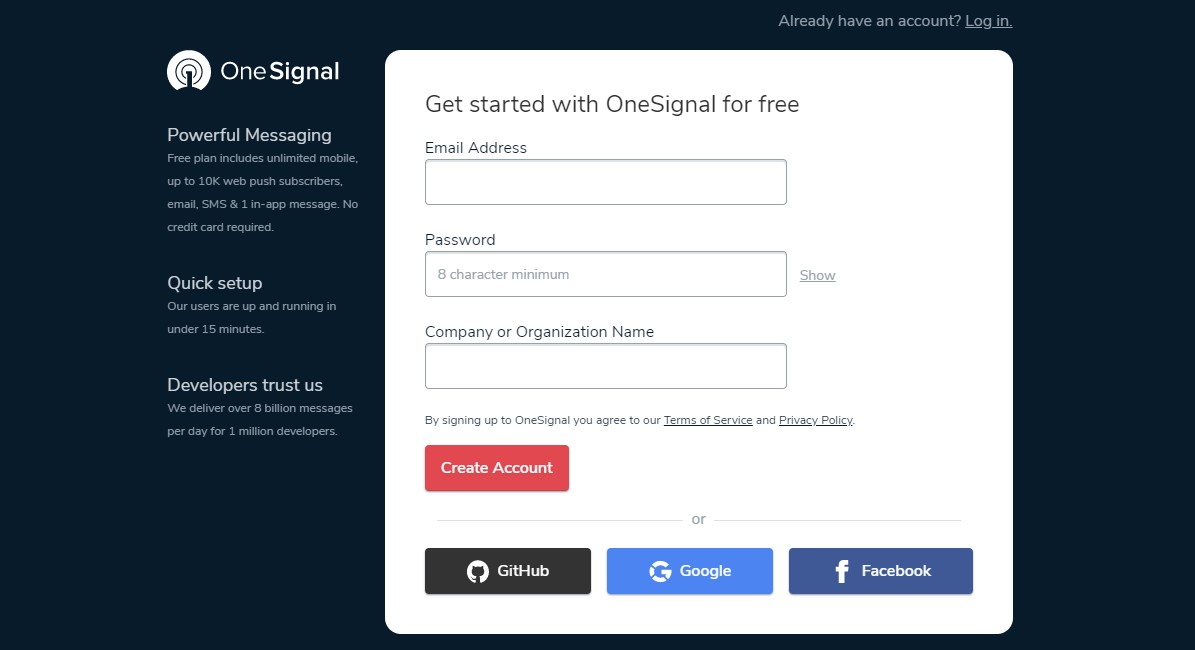
You can create an OneSignal account by using your GitHub, Google, Facebook account, or email address. Choose the one that suits you best.
#Step 3. Add an app
Once you’re done with the signup process, create an app by hitting the “ADD APP” button on your OneSignal dashboard.
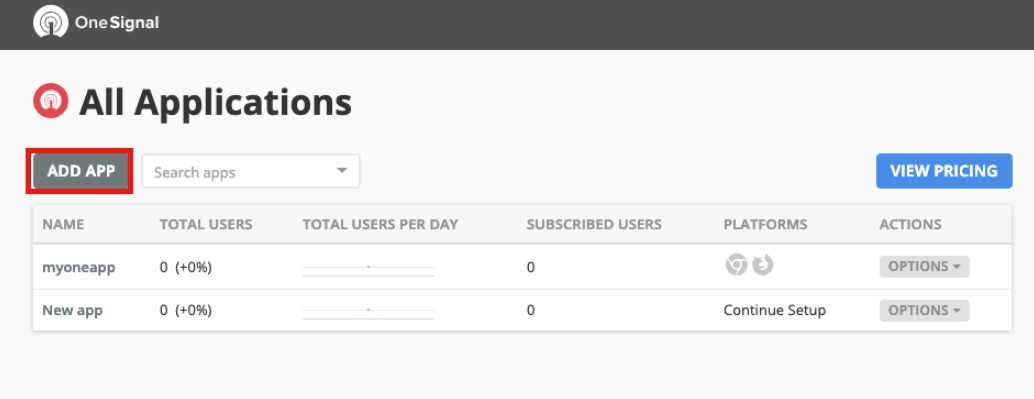
Remember to give your app a name and click on the “ADD APP” button.
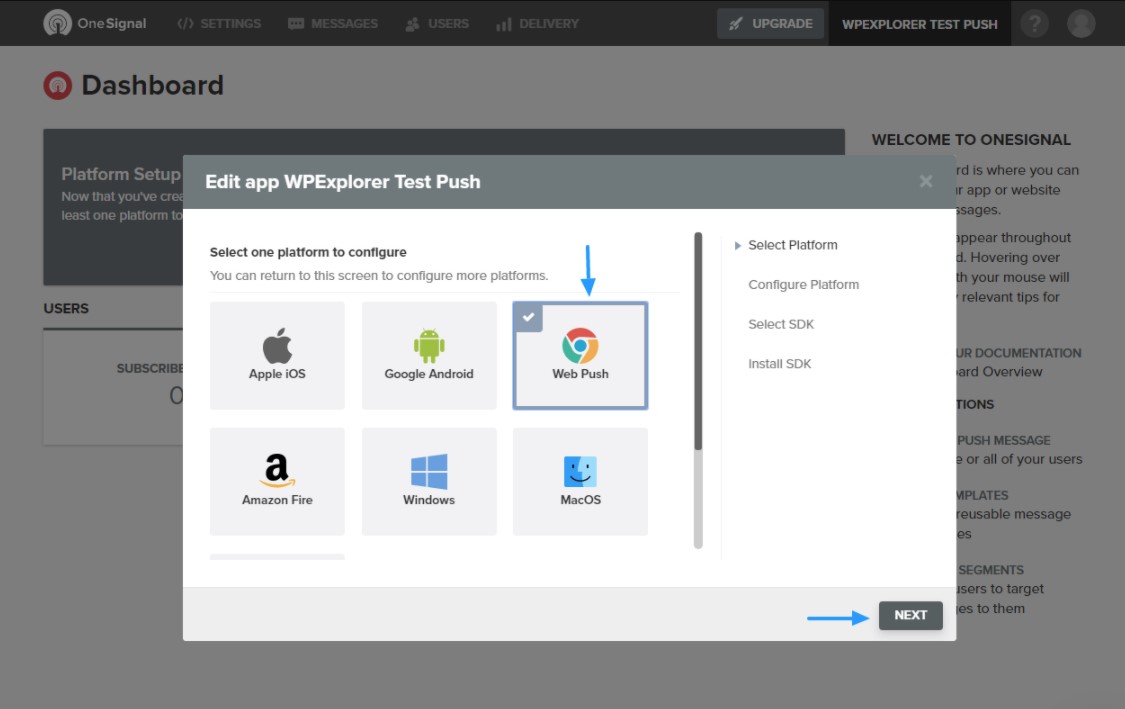
#Step 4. Edit your app
Edit your OneSignal app by choosing a platform to configure. You can return to this screen in order to configure more platforms. Choose Web Push as a platform and click on next.
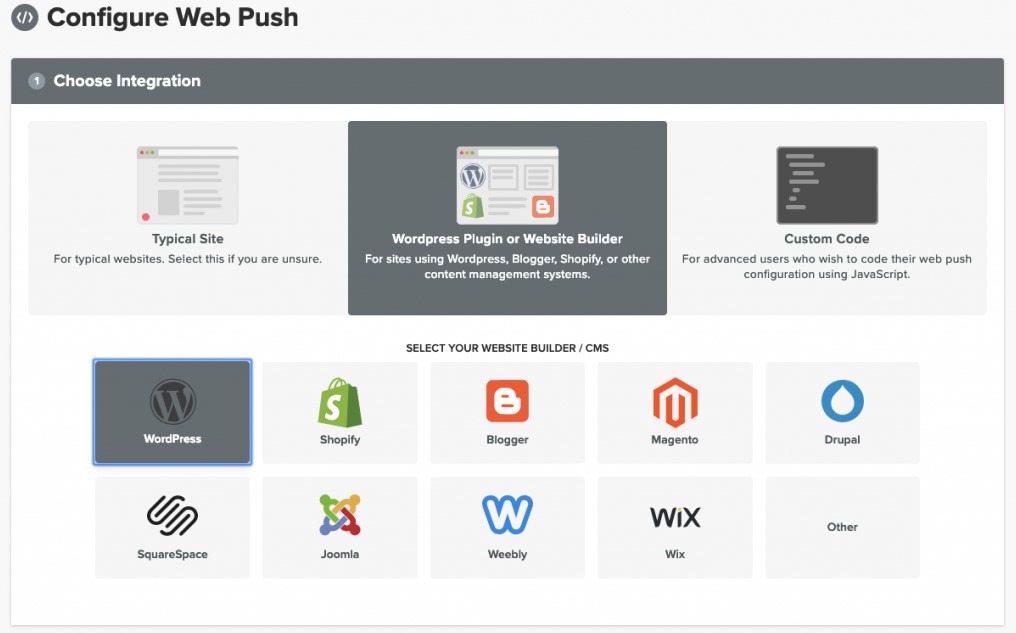
#Step 5. Configure web push
Now it’s time to configure your own web push notification system. Choose a WordPress plugin or website builder out of the 3 options. Then, choose WordPress as your website builder or CMS.
#Step 6. Enter your WordPress site information
Enter your site name, website URL, then upload an icon and decide whether your site is fully on HTTPS.
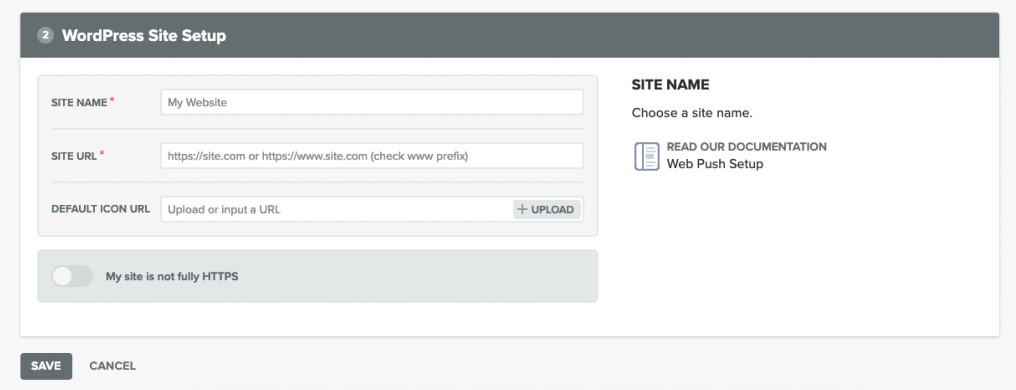
Click “Save” and get the APP ID together with API Key on the next screen.
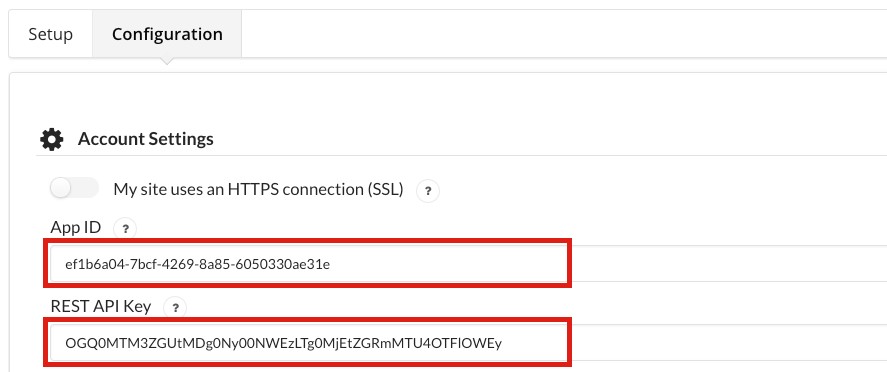
#Step 7. Configure the OneSignal plugin on your dashboard
With every step above, you’re done with your part on the OneSignal website. Now, in your WordPress Dashboard, choose OneSignal Push. Put App ID together with Rest API Key at the respective places in the Configuration.
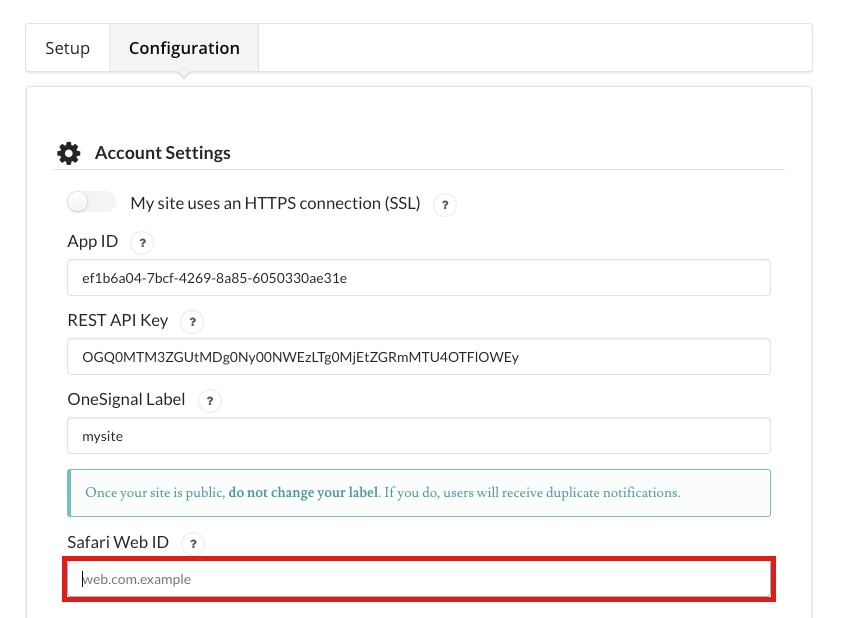
The system above covers almost all browsers except for Safari. To enable web push notification for Safari, go to your OneSignal account, choose App dashboard > Settings > Apple Safari, and get Web ID from there.
Now get back to your website and choose Dashboard > OneSignal Push. Look for the Safari Web ID field and place the ID.
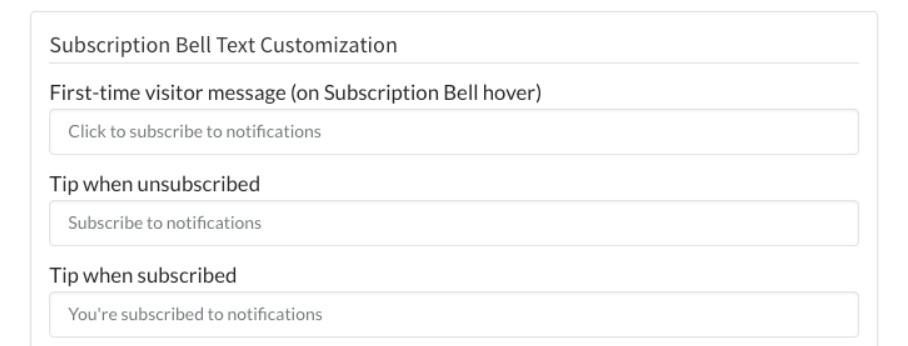
Tweak your own web push notification messages as there are some options to take care of.
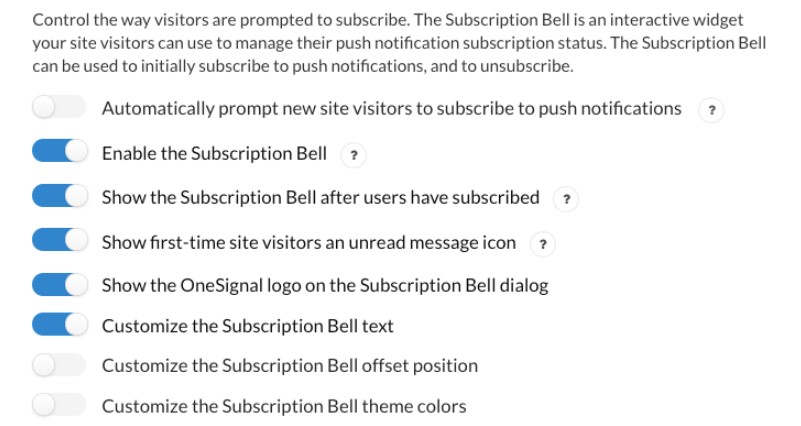
You’re also able to write the messages that will be shown in different cases.
Click the “Save” option at the bottom, and you’re done.
BONUS PART: How to send web push notifications with OneSignal
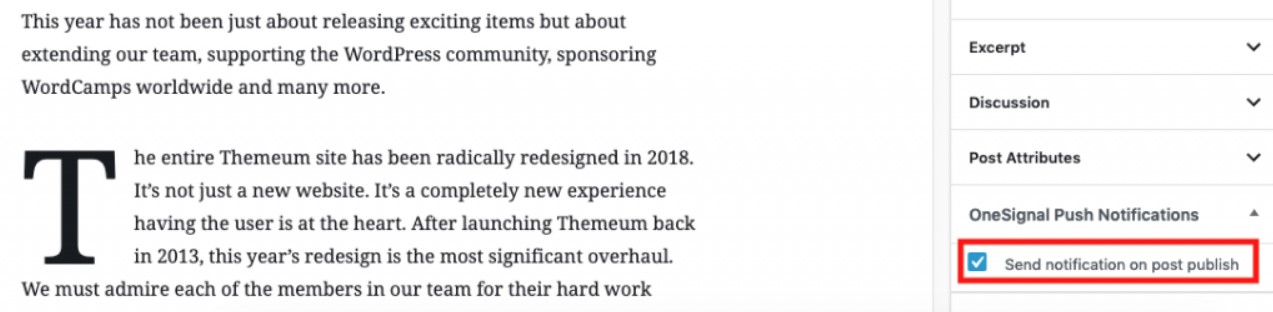
Sending push notifications with OneSignal is easy. While publishing/ updating a page or post, there is a “Send notification on post publish” checkbox at the bottom right. Checkmark that box to send web push notifications.
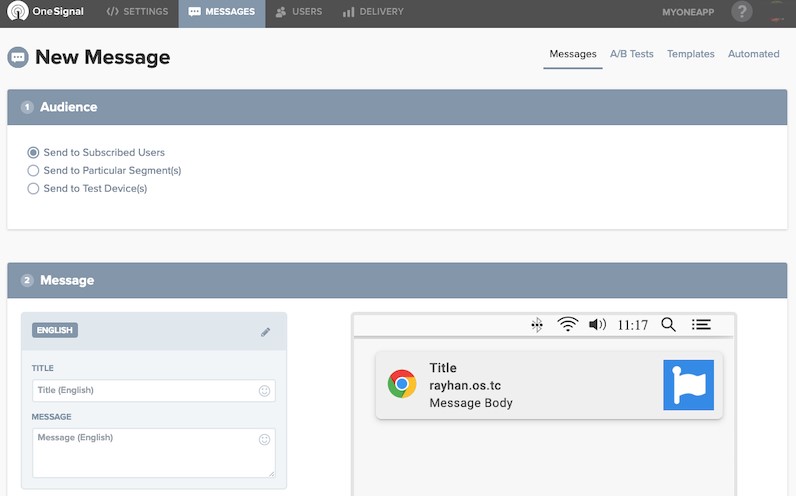
Also, there is a system to send push notifications manually from your OneSignal account dashboard. In your OneSignal account, choose Messages > New Push, then set up your message and send that to your subscribers
You can also get analytics for your notification messages on the OneSignal dashboard.
8 alternative push notification tools for your WordPress website
If you are not a fan of the way OneSignal works, you can have several other options to choose from. Let’s talk about 8 alternative web push notification services, and the features they each offer.
1. PushEngage
PushEngage is one of the best options to add web push notifications to your WordPress site. The platform enables you to add Chrome and Firefox push notifications to your site. It is quite similar to OneSignal in that you need to create an account with the PushEngage service for the plugin to work.
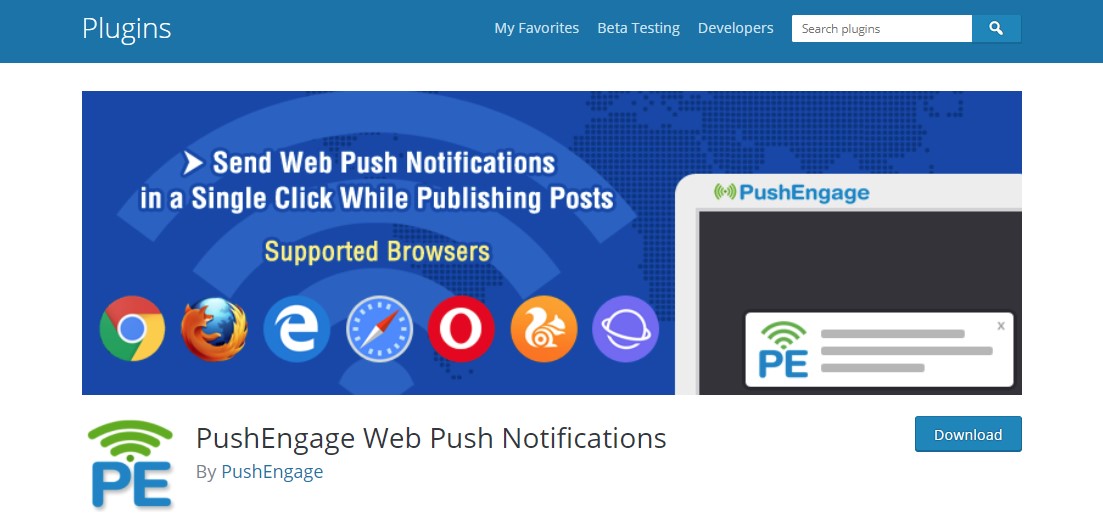
Along with basic push notification functionality, PushEngage allows you to target specific segments of your subscribers. It is also possible to schedule push notifications in advance, which can come in handy as a reminder for scheduled events.
Pricing plans:
- Free Plan
- Business Plan: starts at $29/ month
- Premium Plan: starts at $59/ month
- Enterprise Plan: custom pricing
2. Push Monkey Pro
Push Monkey Pro is particularly designed to help you send web push notifications to earn abandoned cart revenue. With this platform, you can remind customers to complete their purchases. There is also the option to segment notifications based on subscribers’ geolocation and behaviors to send more messages.
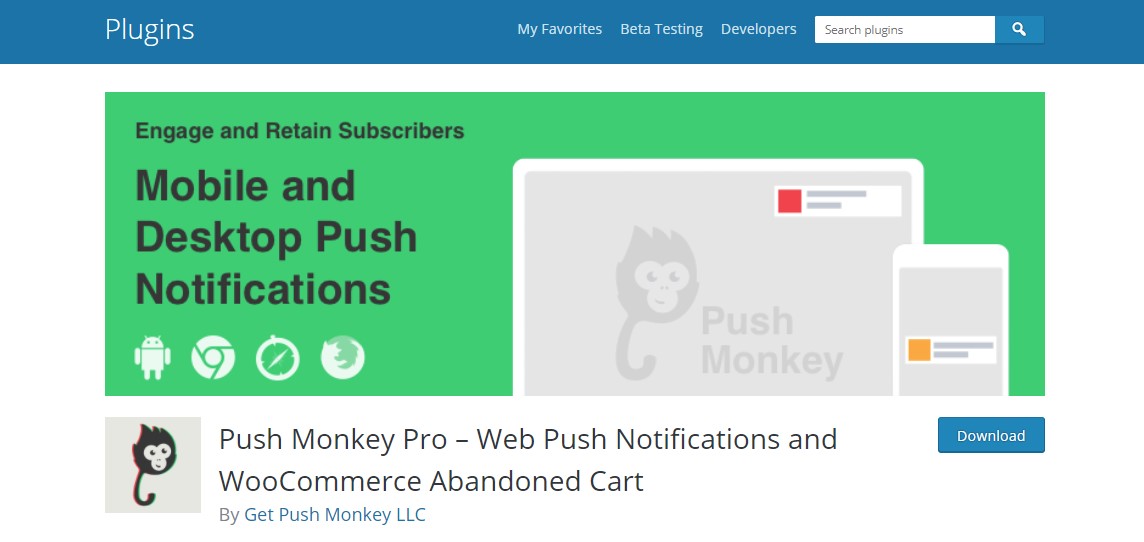
Plus, we are big fans of its stats screen, which shows you a lot of useful information at a glance. The only downside is that Push Monkey Pro is still relatively new, so we can’t fully endorse it. Nevertheless, it does look very promising, so it might be worth trying out for smaller websites.
Pricing plans:
- Free Plan
- Paid Plan: starts from $19/ month
3. Push Notifications for WordPress by PushAssist
The plugin allows you to set up push notifications for most major browsers. It’s also easy to configure the actions that trigger these notifications, and even send fully custom messages if you want.

Overall, Push Notifications for WordPress by PushAssist stands out due to its polished interface and easy setup process. It is an excellent option if you are looking for a straightforward WordPress push notification plugin. But keep in mind that its free plan caps your list of subscribers at 3000, which can be a weak point if you are not willing to pay for the upgrade.
Pricing plans:
- Free Plan
- Starter Plan: starts from $9/ month
- Business Plan: starts from $25/ month
- Elite Plan: starts from $299/ month
4. Smart Notification WordPress Plugin
Smart Notification WordPress Plugin is an all-in-one plugin that lets you send push notifications via more platforms than just browsers. Along with the basics like Firefox, Chrome, and Safari, it also supports Facebook Messenger notifications and mobile operating systems.
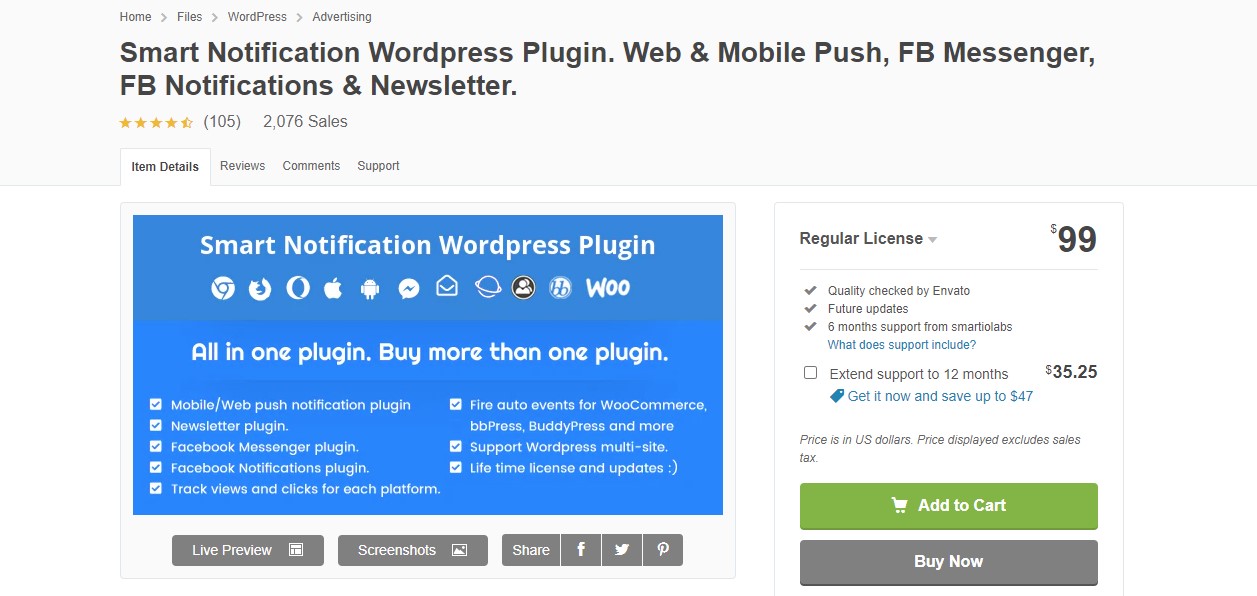
The downside is that you need to do a lot of setups work to get all those types of notifications working. This is even more true if you’d like to integrate the plugin with WooCommerce or bbPress, which are two other add-ons the platform offers.
Pricing plans:
- Regular License: $99
- Extended License: $999
5. iZooto
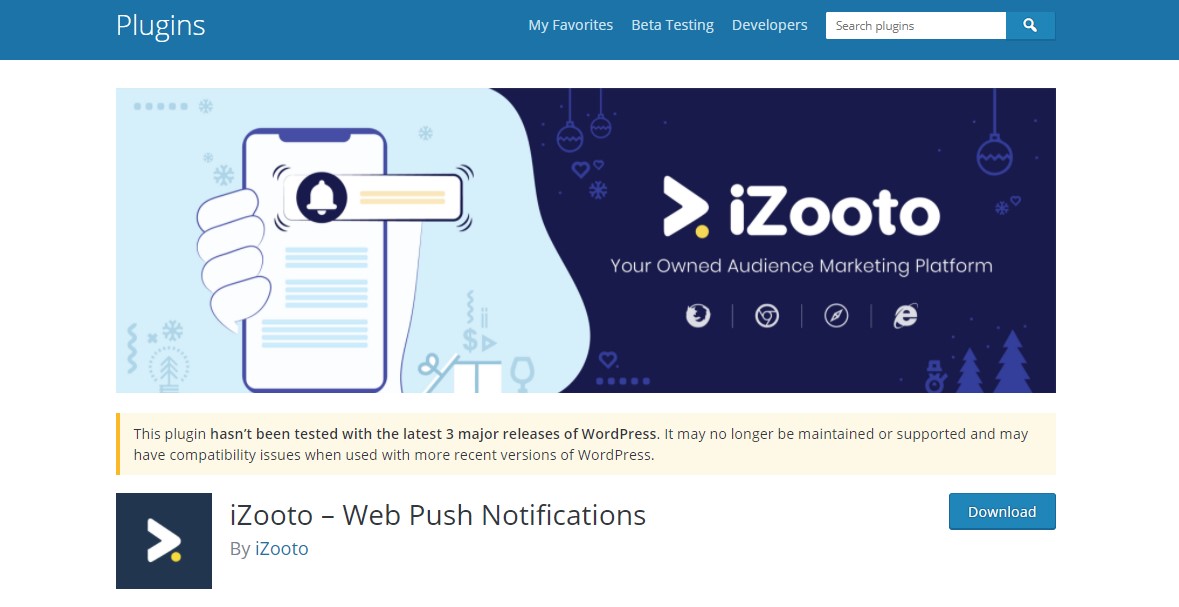
iZooto is different from other plugins we’ve covered so far. It doesn’t enable you to set up WordPress push notifications for updates or new posts. Instead, it is built to help you create and deliver campaigns via web push notifications.
This can come in handy if you are running an online store instead of a blog. iZooto isn’t the only plugin that supports campaigns, but it’s the only one that offers the feature for free. Additionally, it provides a decent number of styling options for your WordPress notifications. With this platform, you can make your push notifications more appealing by adding rich media, such as icons, emojis, images, and CTA buttons.
The only downside is that iZooto is rather new, so it may still have some kinks to work out.
Pricing plans:
- Rise Plan: $85/ month
- Grow Plan: $250/ month
- Enterprise Plan: custom pricing
6. PushAlert
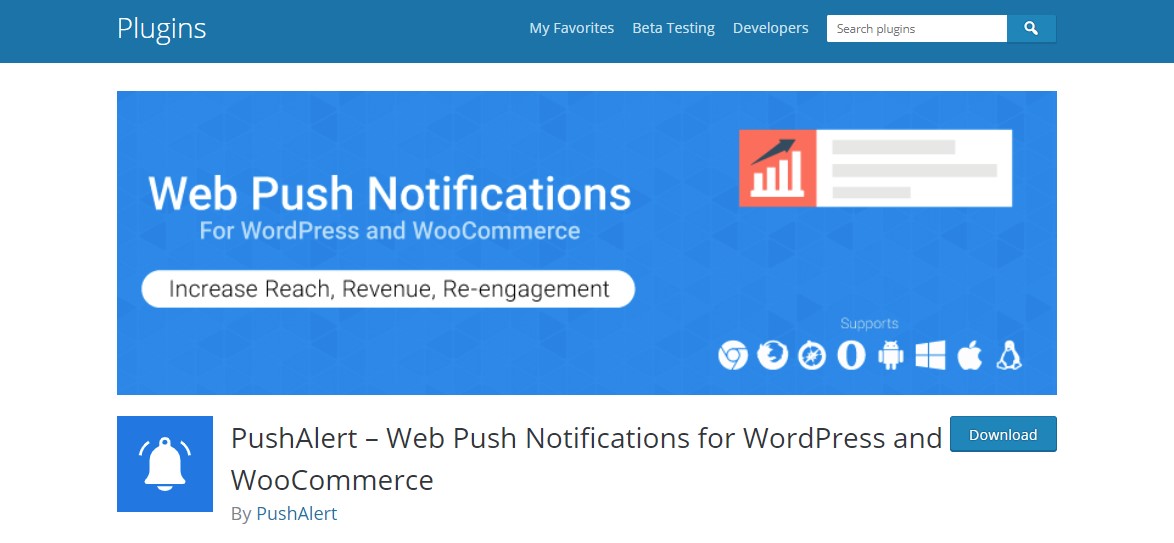
With an intuitive interface, PushAlert lets you edit your web push notifications within the WordPress editor.
You can craft your push notification and then automatically send it when you publish a post. The platform also offers multilingual support where a single push notification can be sent in multiple languages and automatically delivered in the subscriber’s language.
Pricing plans:
- Free Plan
- Basic Plan: starts from $12/ month
7. Beamer
Beamer is a free newsfeed and WordPress push notification plugin that can be used to manage your site announcements all from one place.
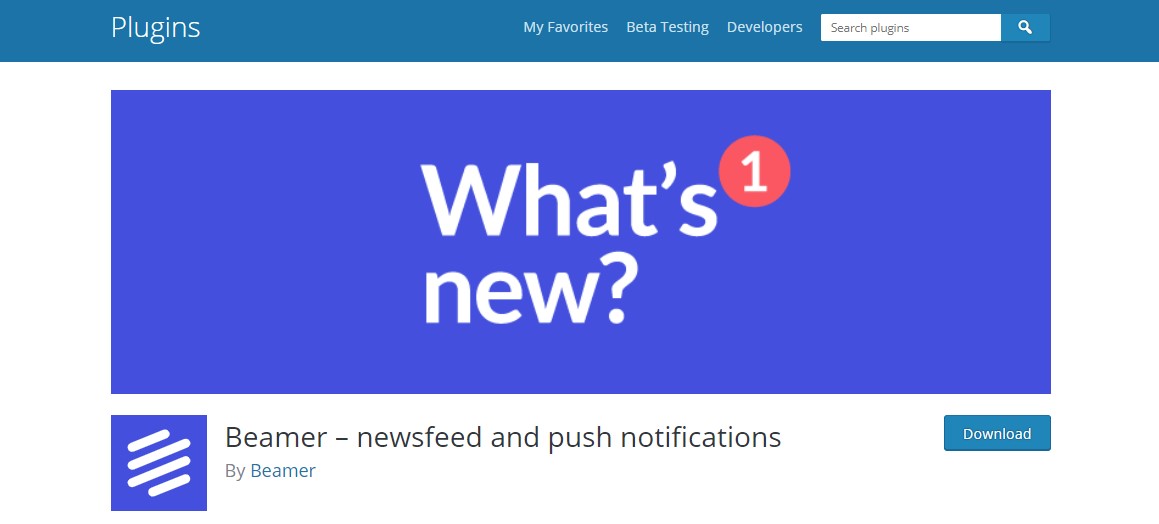
With the platform, you can coordinate scheduled posts and notifications, activate automatic announcements for new posts, add segmentation (based on location, demographics, or behavior), and even create a Beamer Newsfeed for your website (complete with location, custom color, and notice types). Noticeably, it only takes about 5 minutes to get Beamer set up on your site.
Pricing plans:
- Free Plan
- Startup Plan: $49/ month
- Pro Plan: $99/ month
- Enterprise Plan: $249/ month
8. WonderPush
Last but not least, WonderPush is an excellent option for your WordPress site. With the plugin installed, subscribers who have opted in can know as soon as you publish a new post. As the plugin is well compatible with Chrome, Opera, Firefox, and Edge, you shouldn’t have any problem reaching most of your audience with just a click of a button.
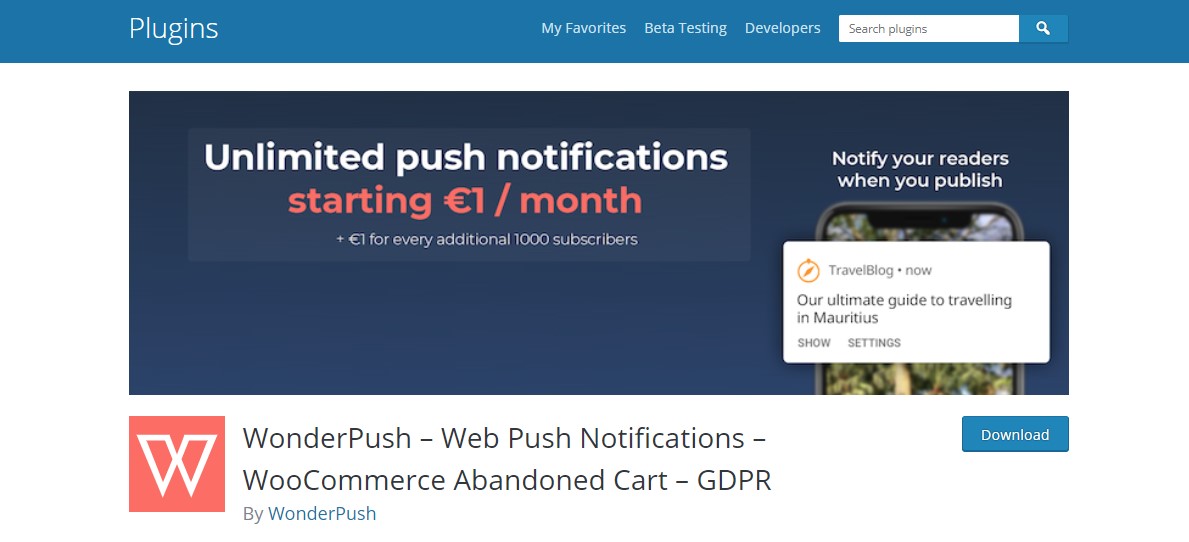
What makes WonderPush outstanding is its awesome built-in features. With the plugin, you have the option to restrict a push notification based on language, tags, or events. You can also utilize the plugin to recover abandoned carts. Just send out a notification to remind subscribers that they left something awesome in their carts. Plus, you can manage all of your campaigns, segments, staff with access, as well as real-time analytics for your notifications.
Best of all, the platform is fully compliant with the EU General Data Protection Regulation (GDPR). So, you can be sure that your data and customers’ information is safely and appropriately managed to comply with these regulations.
Pricing plans: starts from €1/ month, +€1 for every additional 1000 subscribers
The final verdict
By now, you should get a deep understanding of what web push notifications are, and why you need to enable them on your WordPress site. At the very least, it is something worth testing to see if it helps bring your website more traffic.
We hope our guide has helped you a lot! Before ending, we’d like to remind you of one thing: Just like other marketing approaches, not every method will work for every kind of website. The best approach is to test various notification and delivery methods to see which one resonates most with your audience and stick to that method.
Thank you for reading, and have a nice day!


New Posts

How To Set Up Google Analytics 4 For Your BigCommerce Store

