
Opt-in Push Notification: An Essential Guide for Your Brand
By Sam Nguyen

Drive 20-40% of your revenue with Avada
No matter if you’re trying to foster leads, connect with your most loyal customers, or win back old customers, push notification marketing is an excellent channel for customer engagement.
Do you know that, on average, more than 5% of users who receive push notifications engage with it?
However, here’s the thing: A user cannot receive a push notification if they don’t opt-in to receive it.
To start sending push notifications to customers, you first need to obtain their permission. You don’t know where to start? Don’t worry; we will show you everything you need to know about push notification opt-in in this article!
After reading this guide, you’ll know how to effectively create a push notification opt-in campaign. So, let’s get started!
Why is push notification opt-in essential?
When it comes to accomplishing your mobile marketing mission, getting visitors to opt in to push messaging needs to be one of your very first goals. It’s vital that you gain the ability to engage with customers outside of your app via push notifications.
Push notifications are essential for communicating with customers, allowing you to offer value through targeted messaging, driving engagement to your app, and building your relationship with them. You cannot do any of that if users don’t opt-in.
For that reason, getting visitors to say “yes” to the push has to be your new magnum opus.
Who needs to get visitors to opt-in?
To win over users for push notification opt-ins, you will want to focus energy on iOS users.
Android mobile users are automatically opted into receiving push messages. This feature can be shut off in the Settings section. However, it is a different story for iOS users - you need to actually ask users for permission before sending push messages. They can accept or reject your request, so it is your job to convince them that you can provide value via push notifications.
To raise the stakes even higher, you have only one chance to ask users to opt into push notifications! We don’t want to scare you, but that’s right, you only get one shot, and if users deny you, then it is a done deal, and the curtains close.
Of course, users can reverse their rejection by accessing the Settings screen to manually change permissions. However, it is a painful multi-step process they will likely never bother with.
What are common types of push notification opt-ins?
While the opt-in popup for push notification subscription always looks the same, there are two common approaches to display them:
Hard opt-in
This type happens when we’re displaying a subscription popup to the user right after they enter the website without any additional context.
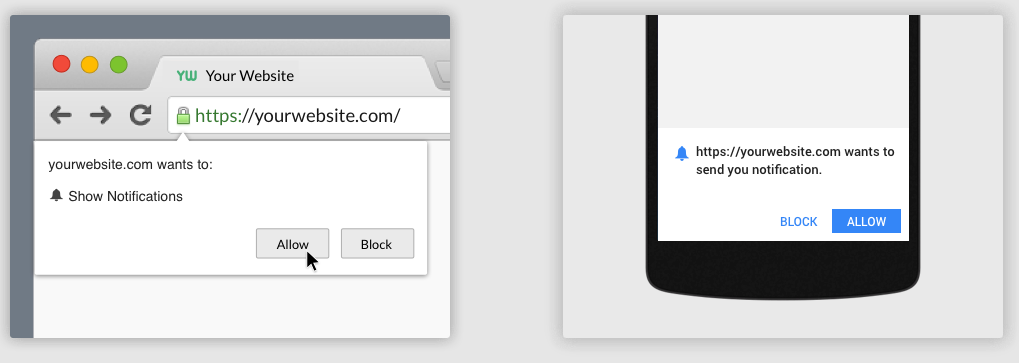
Soft opt-in
This type happens when the subscription popup is triggered by visitor action. You can often see this type being used by showing another popup describing why visitors should subscribe. And in most cases, you should go with this type. We’ll explain in detail right below!
When a subscription popup appears to visitors, there are three possible scenarios:
- Visitors accept the proposed subscription (of course, this is the desired state!)
- Visitors ignore the popup, then it will be shown again on their next visit
- Visitors decline the subscription. This is the worst possible scenario, and at this point, it is almost impossible to ask them again.
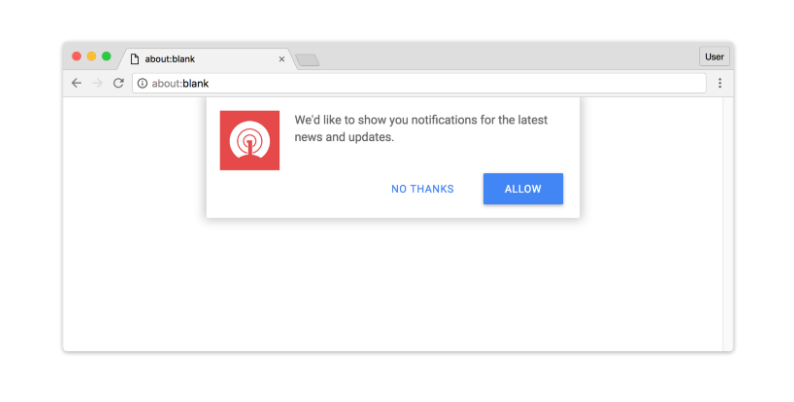
By showing the subscription popup without any context, we’re expecting that visitors will trust us enough to subscribe. But why should they trust a web/app they just entered?
Asking people to blindly subscribe to your push notifications seems like taking candy from a stranger - it is risky, and people tend to avoid it. With hard opt-ins, we’re literally asking people if they’re brave enough to subscribe, instead of telling them why it is beneficial for them.
On the other hand, with soft opt-in, we’re gently informing people about the possibility of opt-in exactly in the way we want, rather than just showing the popup without a specific context. You should tell visitors why it is beneficial to subscribe and try to convince them.
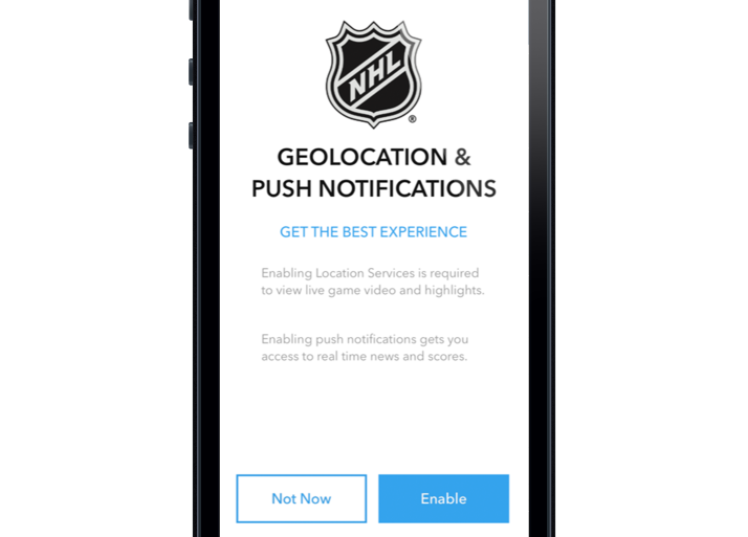
For instance, the NHL saw a 10% increase in its opt-in rate since adding a customized screen before the default one. What’s more important is if someone declines on such opt-ins, we can show it again after some time.
When should you ask visitors to subscribe for push notifications?
The common method is to promise your visitors a certain amount of value and ask them to subscribe. However, the problem with that method is that your subscribers take all the risks.
How does anyone visiting your website for the first time know if your content is worth trading their private information?
That is actually a huge leap of faith that your visitors have to take first.
So, we advise you to offer value upfront.
That means before asking visitors to subscribe for your push notifications, you should offer something of value to your audience first, and then promise them MORE good stuff if they subscribe.
You don’t need to create a ton of content to offer value. That could be something as simple as an article on something that your visitors deeply care about. That piece of content can become reason enough to subscribe to your push notifications.
Where should you ask visitors to subscribe for push notifications?
So, where should you place the subscription opt-in?
On your homepage?
On your sales pages?
In your article?
Using a popup?
Using a sidebar widget?
Using a button?
Using a floating bar at the bottom of your page?
Actually, there is no right answer.
It heavily depends on your target audience and what they value.
Let’s say, if you are running a vegan food recipe blog, you may want to set up popup opt-ins with segments in your article.
Or, if you are running an e-commerce store, your audience may want to receive price drop alerts on your products. In this situation, you can set up a button on product pages.
So, it’s recommended that you constantly check the analytics of your push notification opt-ins. This is the only way to figure out where to ask visitors to subscribe to your push notifications.
How should you ask visitors to subscribe for push notifications?
Improving the opt-in rate is essential to integrating push notifications into your marketing strategy. Let’s explore some best practices that increase your push notification opt-in rate.
1. Cover your back with pre-permission notifications
Remember what we said above that you only get one chance at earning a user’s permission for push notification?
That’s true - but only when you rely solely on the iOS dialogue.
A clever method is to use your own permission screen to gauge users before really launching the iOS permission screen. Quite similar to the way the NHL did above.
That means using your own custom in-app messaging or screens to test a user’s interest. This way provides the perfect safety net if users are not quite ready to opt in. If your users say yes, you can go ahead and then launch the iOS permission dialogue and have them opt-in for real.
In case users deny your request, no harm done - you just don’t launch the official iOS permission dialogue. Rather, you can work on providing value and attempt the opt-in request again at a later point.
These pre-permission in-app messages are actually lifesavers for mobile marketers. But it is still necessary to be strategic about the style, messaging, and timing behind your in-app notifications. Irritating users by repeatedly asking for opt-in permissions won’t gain you loyal legions of fans.
2. Avoid asking visitors to opt-in immediately
One of the biggest mistakes is asking users to opt-in to push messages when launching your app for the first time. It is almost a guaranteed fail - users don’t want to receive push messages from an app they knew nothing about and haven’t even had a chance to use yet!
Remember that you are just starting your relationship with users, and they don’t trust you - not yet anyway. Asking for permission to message them at any time on their most coveted personal device is actually a tremendous favor.
Your focus on users’ early days of app/website usage should deliver value. Users need to see why your app/website is fantastic and why they should come back and spend their time (and even money!) on your company and not a competitor’s.
Build a relationship and deliver value first. Then, users may be more open to opting into your push messages.
Note: When it comes to larger, well-known brands, there’s an exception. If users have already spent lots of time on your app/website, and have an established connection with your business, they might be open to opting into push messages on their first session launch.
However, it is better to wait a while before asking. Even if you use pre-permission messages, you don’t want users to feel annoyed and irritated in their initial interaction with you.
You only have one first impression - use these first moments of interactions to impress and wow app users, instead of bombarding them with off-putting permission requests that make them tired.
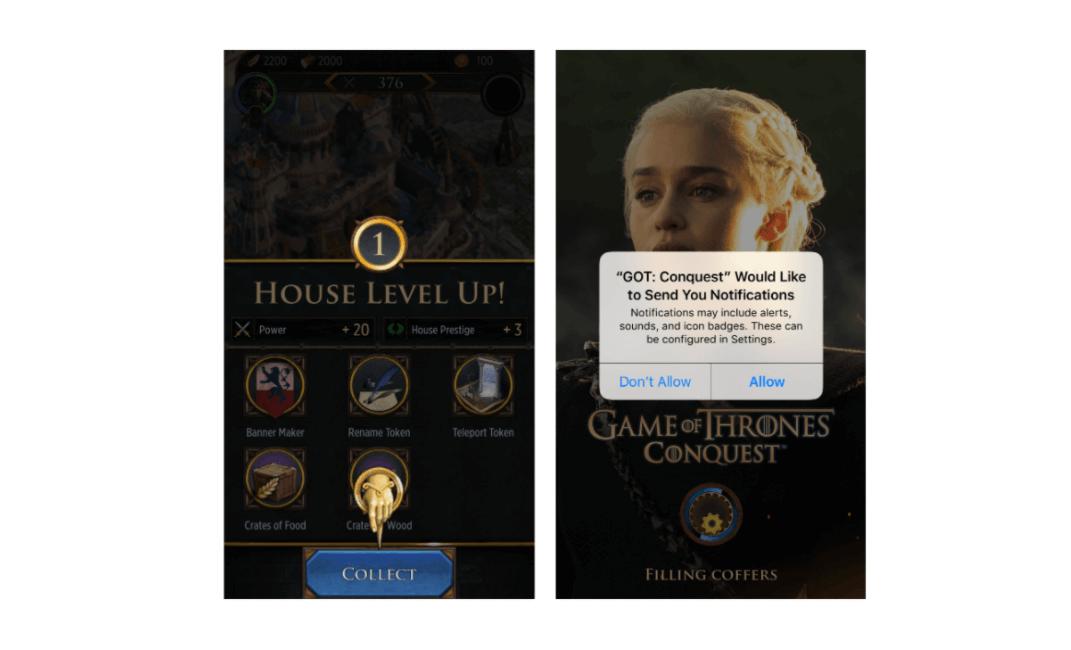
For instance, the Conquest mobile game lets players experience its app before asking them to enable push notifications. The app asks them to enable notifications only after players have already leveled up for the first time.
3. Wait until visitors complete an action
Another strategy for driving push notification opt-ins is to set specific event criteria before launching permission requests.
Context is everything when it comes to winning the push notification opt-in. Emphasizing your push message value connected with users’ recent activities will be sure to sway them.
Some examples might include:
-
Users view an item. An E-commerce brand might set an opt-in request message to launch after someone has viewed an item. They are viewing your app/website and finding value with it, so now they may be more interested in receiving push messages from you. For example, you can send a push message like this “Seeing items you love? Get notifications for news about flash sales and limited-time specials!”
-
Users read an article. A content app/website might use an activating event involving articles read - for example, after someone reads one article in your app/website, they’d get an in-app message saying, “Activate push notifications to receive the latest news and most popular stories!”
-
Users scroll X% of the page. Using Google Tag Manager, you’re able to set triggers and show the push notification opt-in once someone has scrolled through 50% of your page.
4. Pay attention to opt-in prompt styles & position
The position of your opt-in push notification also plays a vital role. You cannot annoy visitors with the inappropriate placement of the opt-in prompts on the website/app. You can adopt different styles, such as browser default, bell, opt-in bar, and box available in your push notification tool.
Visitors come to your app/website to check products, blogs, and other information but not solely to subscribe to push notifications. Thus, you cannot misplace the opt-in messages on the website/app and annoy users. An effective push notification tool lets you set up the position of opt-in prompts according to your website design.
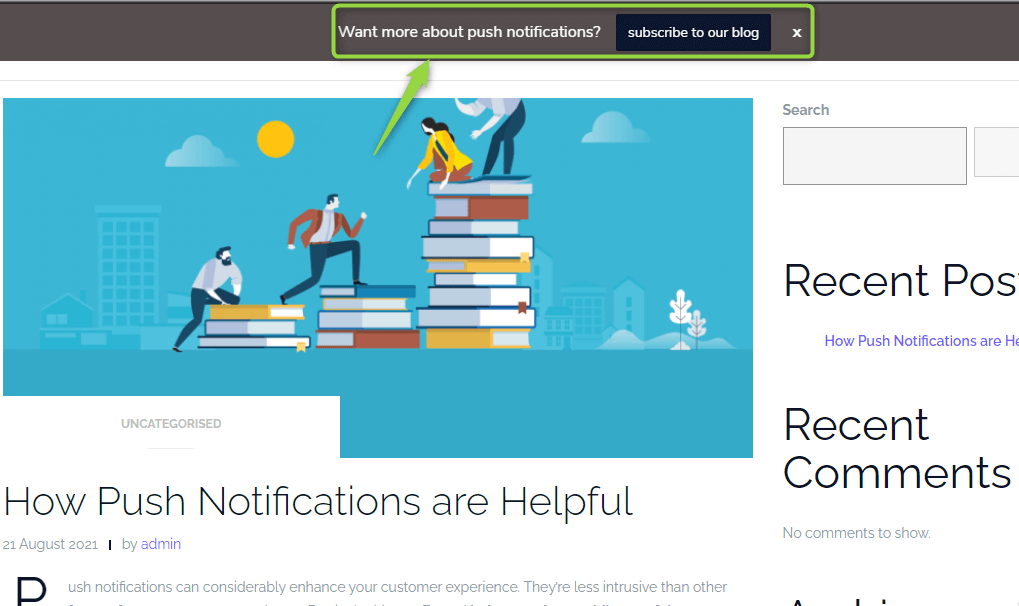
In the below example, you’ll see an opt-in message at the bottom of an article. Actually, it disturbs readers and can be a reason for closing the opt-in popup immediately.
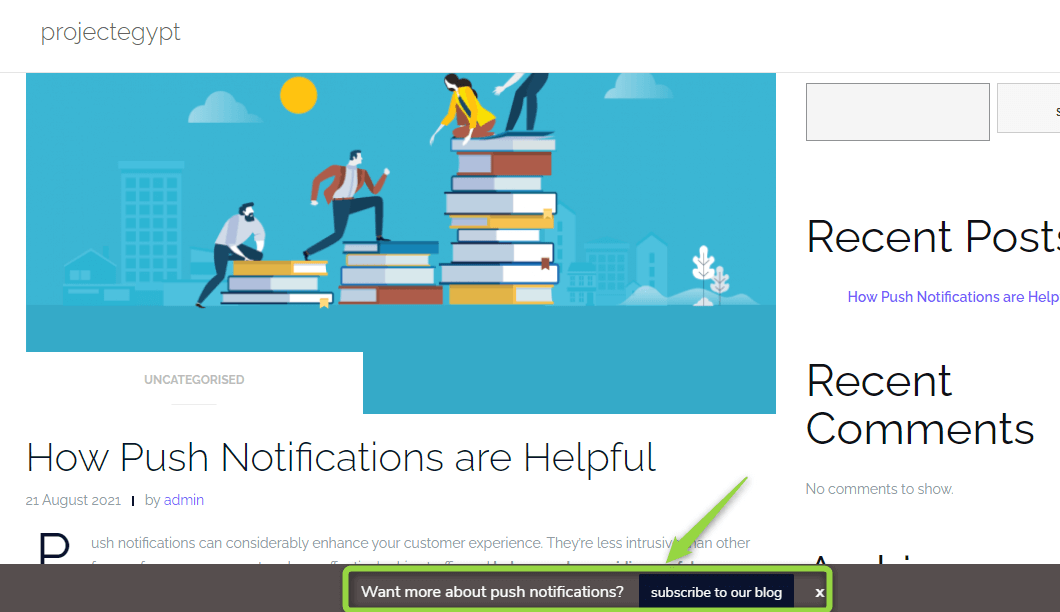
But if you place the opt-in push message in the uphold of the website, it won’t disturb the content while boosting the chances of subscription.
So, depending on your website design, you should check opt-in message positions and choose the best one.
5. Add value to your opt-in copy
A compelling message can increase the push notification opt-in rate. You need to give a reason for users to allow notifications, which is possible by adding value to the opt-in messages. You should make sure to maintain transparency by conveying the value of push notifications for a better user experience in that one-line message.
Below are some examples of opt-in messages for different industries:
- Want to get notified about the latest fashion trends?
- Get the latest updates about the discounts on flights and discounts
- Get notified about the latest shows, movies, and new episodes
- Want extra discount updates on your desired products?
- Would you like to get notified about your favorite sports scores?
You can customize your text lines of the topbar and button with relevant information that increases the chances of push notification opt-in rates. Also, you can change the text colors that are best suited for your app/website.
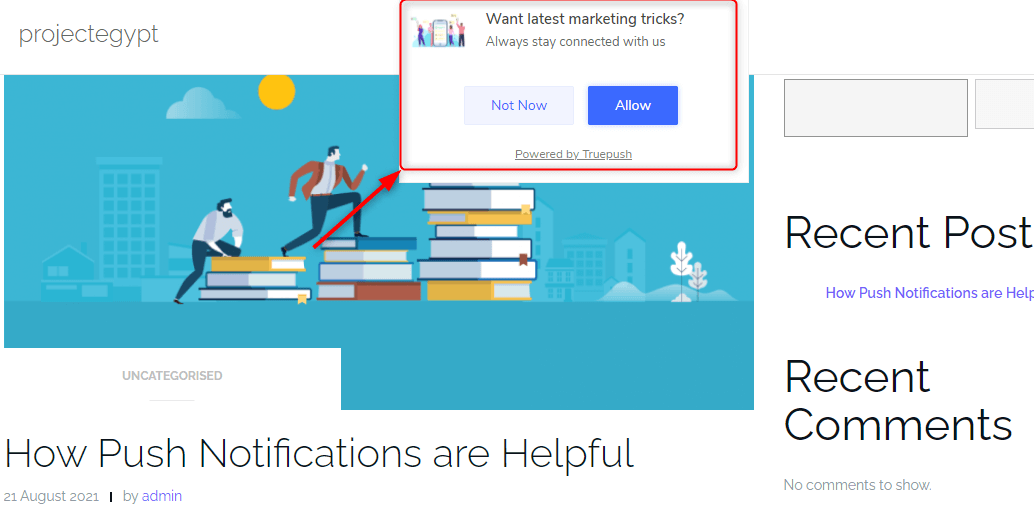
In the below example, you can realize an interactive main and subtext with the logo. This opt-in copy has the ability to create an impact on the audience and boost your opt-in rate.
6. Test for best conversion rates
Even once you have done everything above, your job is far from over.
Ensure that you take the time to tweak and test different variables. A/B testing helps boost your opt-in rate until nearly all your users are reaping the benefits of your push messages.
Test some variables like:
-
Design. Play around with your text styles, button colors, as well as other styling elements.
-
Images. Try testing your push messages with vs. without images. Plus, don’t forget to test various images, cropping dimensions, etc.
-
Messaging. Fine-tune your push message with different wording and text length to see what can resonate best.
-
Timing. Test some of the different activation events mentioned above, such as time in website/app, articles read, etc. You may find that some qualifying events can work more effectively than others.
7. Maintain the relationship
Once users have opted in to receive your push notifications, it’s critical that you respect the highly personal nature of this communication channel. Focus on delivering hyper-targeted, personalized push messages that add value to make sure users don’t opt-out at a later stage, or even worse, delete your app.
Final thoughts
To recap, push messages are essential for strategic marketing - you need to reach out and re-engage with users when they are outside of your app, and push messages are the most excellent avenue of activity.
Getting users to give push message permissions can be tricky, but you can increase your chance of success by our 7 best practices above.
Once you have gotten users to opt in to push messages, you will be able to interact and engage users in a personalized, intimate way - right on their home screens. But getting that push permission requires patience, delicacy, and trust.
Put your best foot forwards by showing users that they can trust you and that you will only message them with real, valuable information. Earn and keep that trust, and you will be well on your way to becoming one of your users’ most beloved brands.


New Posts


How To Set Up Google Analytics 4 For Your BigCommerce Store
