
How to Set up BigCommerce Product Filtering?

In this guide, we’ll show you how to use BigCommerce product filtering, unlocking the keys to enhancing user experience and driving conversions in your online store.
BigCommerce Product Filtering Overview
BigCommerce product filtering empowers your customers to refine their product searches on your online store, leading to a more efficient and enjoyable shopping experience. It acts like a digital sieve, allowing customers to narrow product selections based on specific criteria. This translates to increased customer satisfaction and potentially higher conversion rates.
BigCommerce product filtering is only available on Pro and Enterprise plans. While there are no specific technical requirements for using it, having a well-organized product catalog with detailed information is crucial for the filters to function effectively.
To use product filtering on BigCommerce, ensure your store is operating on a theme that supports this feature. Additionally, familiarity with the BigCommerce backend and administrative settings is beneficial for seamless setup and customization.
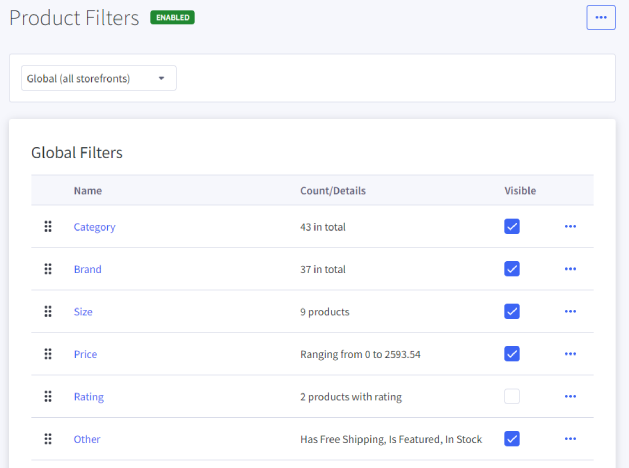
BigCommerce offers a variety of pre-built filter options to categorize your products:
- Category: Filters products based on the categories you’ve assigned to them in your store.
- Brand: Allows customers to search for products by specific brands you carry.
- Price: Enables filtering products within a chosen price range.
- Rating: Lets customers filter products based on average customer ratings.
- In Stock: Shows only products currently available for purchase.
- Free Shipping: Filters products that qualify for free shipping.
- Featured Products: Highlights specific products you’ve designated as featured.
- Product Options: Filters based on product options you’ve created, such as size, color, material, etc. (Note: This requires assigning these options to your products).
BigCommerce allows you to display up to 12 filters on your storefront. You can customize the order in which filters appear for optimal user experience. However, please note that filters are only visible on category, brand, and search pages, not individual product pages.
How To Set Up Product Filtering in BigCommerce
We will walk you through the steps to enable and customize product filters on your BigCommerce store.
Step 1: Enable Product Filtering
- Log in to your BigCommerce admin panel.
- Navigate to Products from the left-hand menu.
- Select Product Filtering.
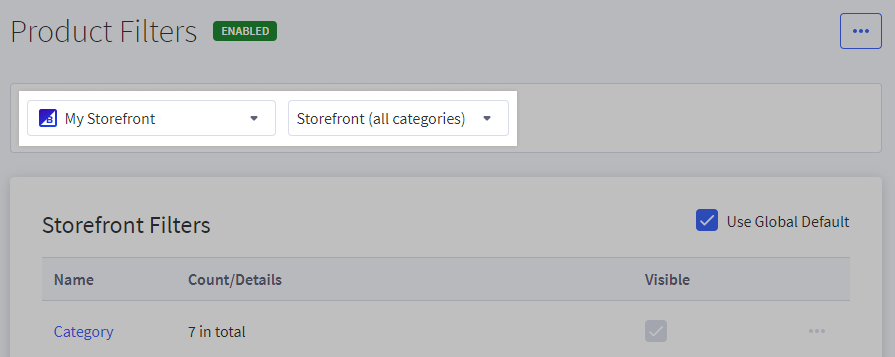
Step 2: Selecting Your Storefront
- Use the channel selector at the top of the page to choose the specific storefront (channel) where you want to manage filters. This allows you to configure filters differently for various sales channels if applicable.
Step 3: Editing Categories and Filters
The category selector lets you switch between:
- All Categories: Edit filters globally for your entire store.
- Individual Category: Manage filters specific to a particular product category. This allows for more granular control over filtering options within each category. Under the Storefront section, you’ll see a list of available filters with checkboxes next to them. Click the checkbox to enable or disable a filter’s visibility on your storefront. This allows you to choose which filters are most relevant for your products.
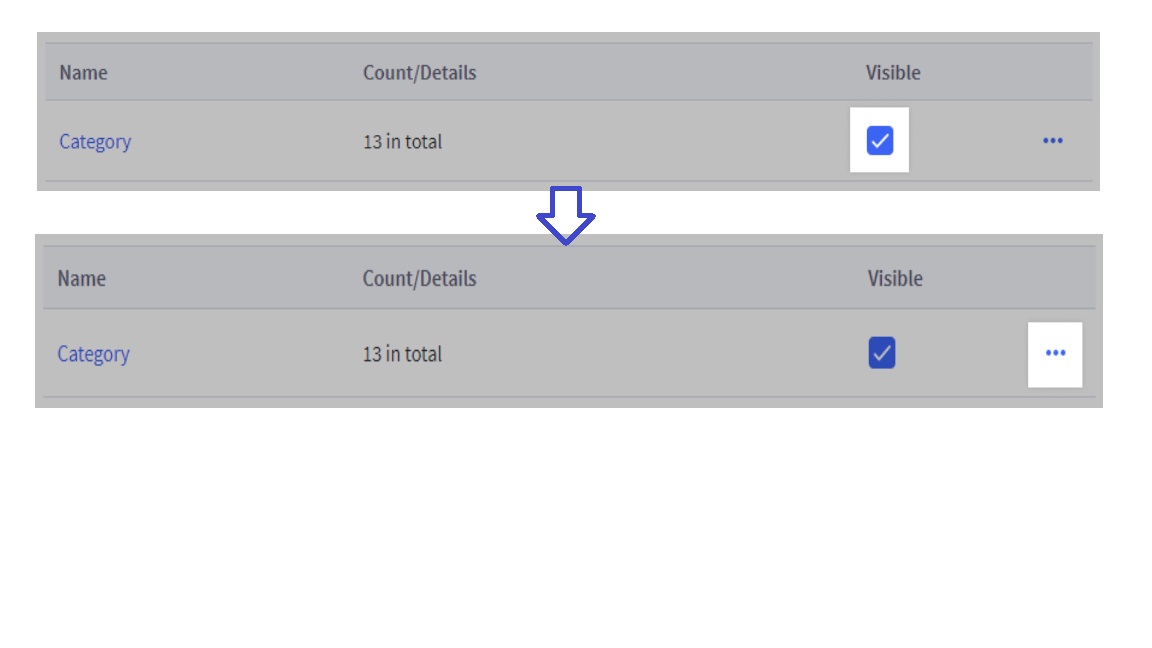
Step 4: Customizing Filter Settings:
Click the three-dot menu (ellipsis) to the right of a specific filter name to access its settings.
A pop-up window will appear with various options depending on the filter type. Here are some common settings you can adjust:
- Display Name: Change the label displayed on your storefront for the filter (e.g., “Price” could be renamed “Price Range”).
- Sort: Choose the order for filter options
- Alphabetically: Values displayed in alphabetical order (A-Z).
- By Option Value Order: Values appear in the order defined when creating or editing the option.
- By Item Count: Values are sorted by the number of products with that option (highest to lowest).
- Show: Set the number of filter option values displayed before requiring a “See More” button (options**: 5, 10, or 15).
- Display Product Count: Enable or disable displaying the number of matching products for each filter option.
- Collapsed by Default: Choose whether the filter is initially collapsed (closed) on your storefront, requiring customers to click on it to see the options.
Filter Order and Drag-and-Drop
- The order in which filters appear on your storefront reflects their order in the control panel.
- You can easily rearrange filters by dragging and dropping them to create a user-friendly layout that aligns with your product categories and customer needs.
Product Listing Limits:
- With product filtering enabled, product listings in the control panel and on your storefront are limited to displaying a maximum of 10,000 products.
By following these steps and customizing the available settings, you can create an effective product filtering system that enhances your customer’s shopping experience and helps them find the products they’re looking for more easily.
Advanced BigCommerce Product Filtering Options With Apps
While BigCommerce offers built-in product filtering functionalities, these can be limited to complex product catalogs or stores requiring highly specific filtering options. The BigCommerce App Store offers a variety of solutions to enhance your product filtering capabilities. Let’s explore some popular options:
1. Search & Filters by FreshClick
Search & Filters stands out for its extensive pre-built filter options, surpassing the limitations of native BigCommerce product filtering.
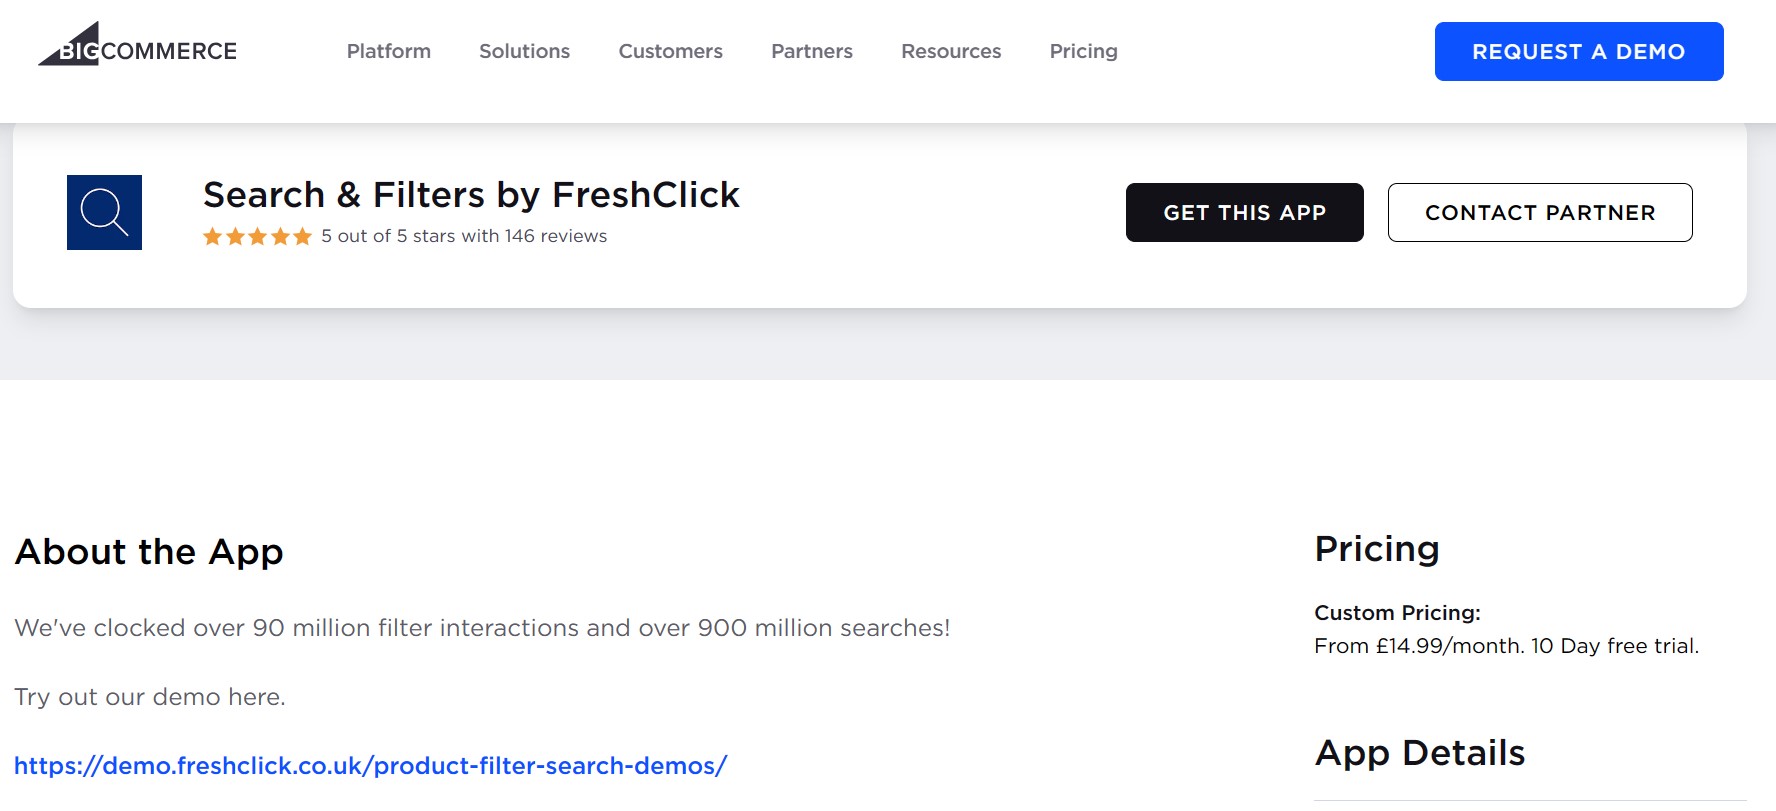
Key features:
- Unlimited filters
- Display filters on your category, brand, and blog pages
- One-click install
- Works on any BigCommerce theme & package.
- 22 prebuilt filters
- Custom field importer
Pricing: From £14.99/month. 10-day free trial. Rating: 5/5
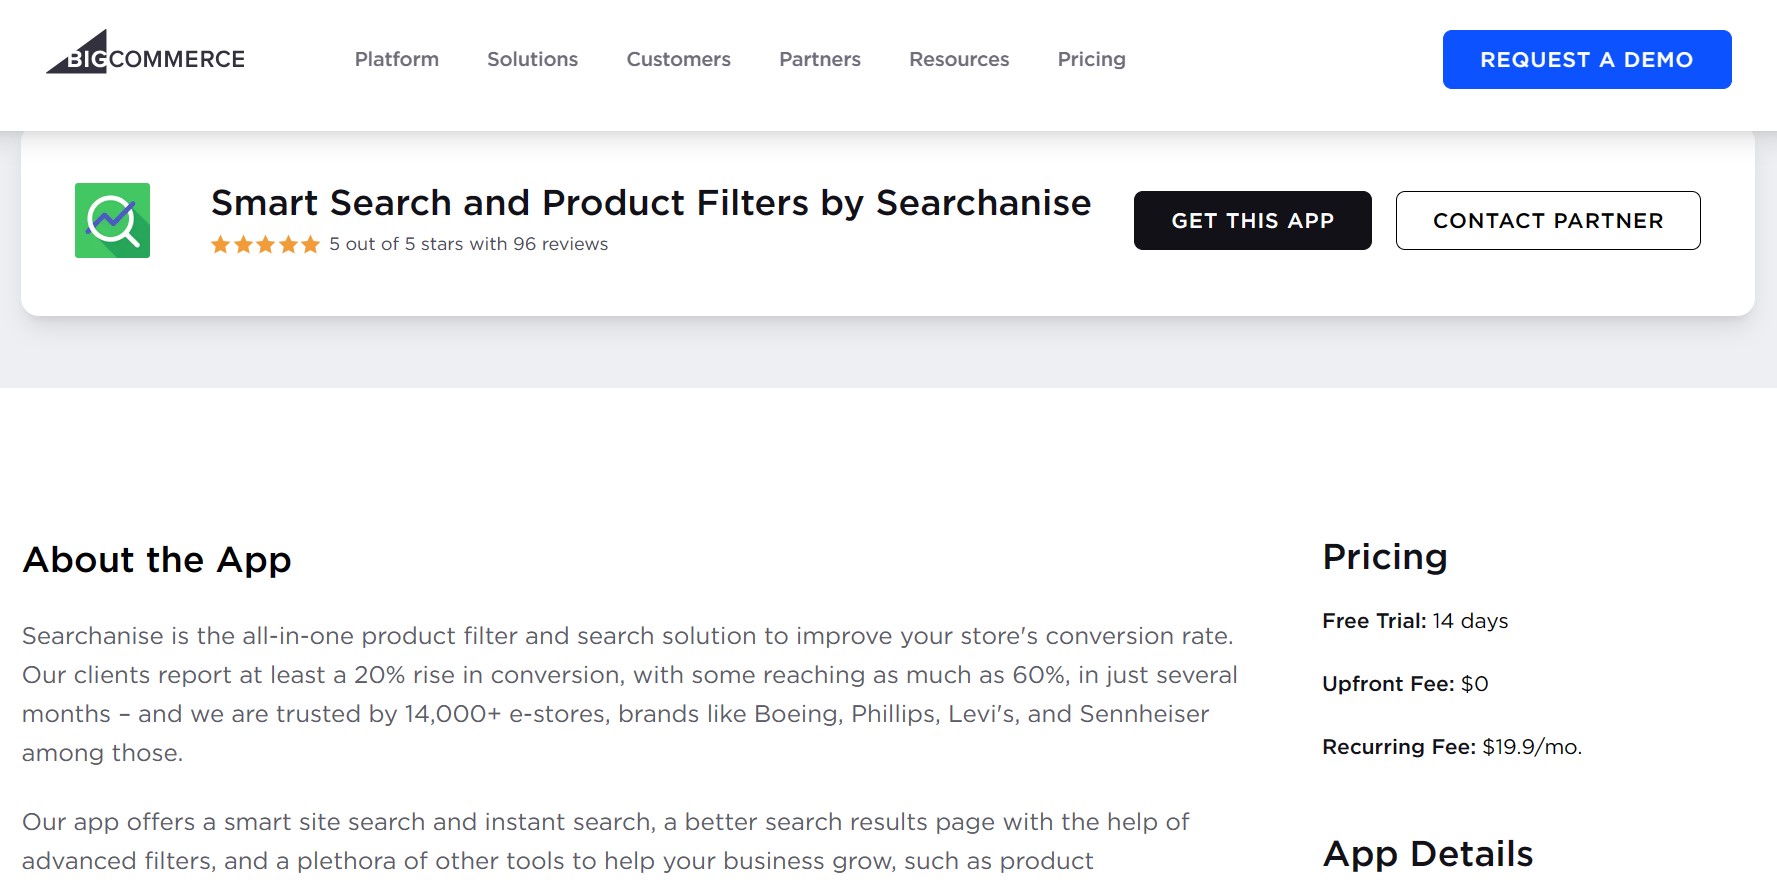
2. Smart Search and Product Filters by Searchanise
Searchanise’s Smart Search and Product Filters app is a comprehensive product filtering and search solution designed to boost your store’s conversion rate.
Key features:
- Smart search
- Product filters
- Merchandising mechanisms
Pricing:
- Free Trial: 14 days
- Upfront Fee: $0
- Recurring Fee: $19.9/month.
Rating: 5/5
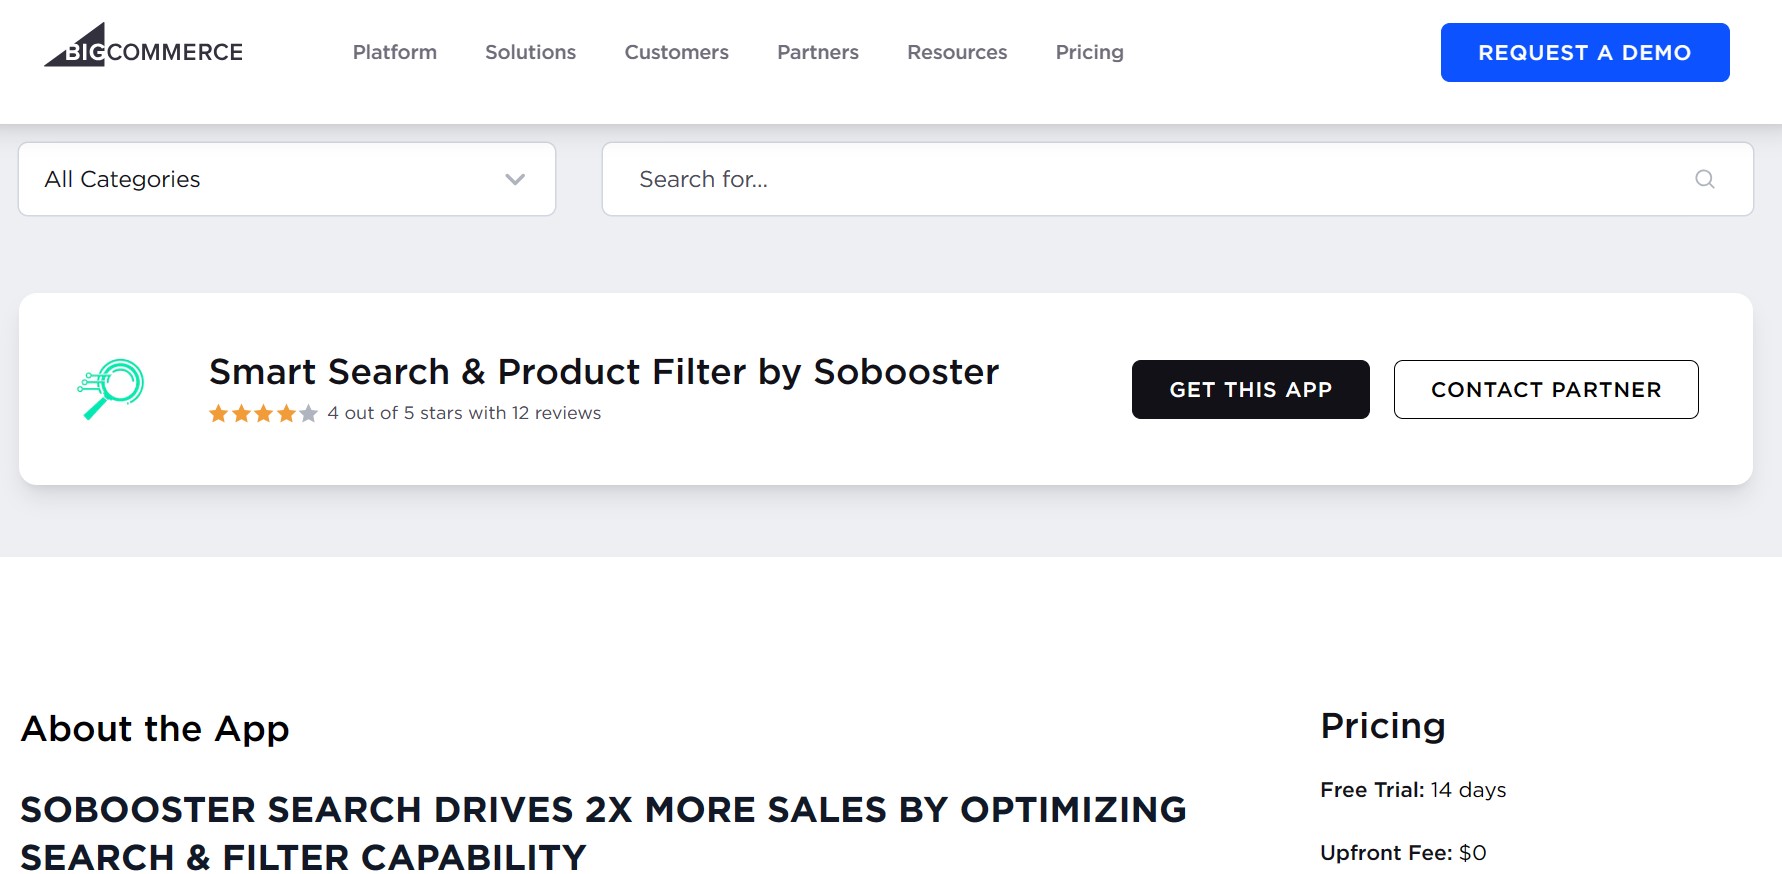
3. Smart Search & Product Filter by Sobooster
Smart Search & Product Filter by Sobooster is one of the most potent, comprehensive solutions that integrates search, filtering, and merchandising capabilities. It assists your shoppers in finding the exact products and variants they’re looking for, enhancing your revenue.
Features:
- Highly-customizable filters
- Predictive search with Autocomplete, relevant Suggestions, and Matching products.
- Compatible with almost all BigCommerce Free, Premium & External themes
- <100ms for 1M SKUs
Pricing:
- Free Trial: 14 days
- Upfront Fee: $0
- Recurring Fee: $29.99/mo.
Rating: 4/5
Once you’ve chosen an app, follow the app developer’s instructions for installation and configuration.
Tips For Better BigCommerce Product Filtering Setup
Here are some tips for setting up better product filtering on your BigCommerce site:
- Know Your Customers: Tailor your filters based on your typical customer’s priorities and shopping behavior. If your audience prioritizes brand, price, or specific features, make these filters easily accessible.
- Simplicity is Key: Use straightforward and clear filter names to avoid confusion. Ensure your customers understand what each filter means without guessing.
- Structure Your Filters: Organize filters hierarchically from broad to specific to guide shoppers through a seamless narrowing-down process. For instance, start with categories like “Men/Women > Clothing Type > Size > Color.
- Variety and Flexibility: Allow users to apply multiple filters simultaneously to refine their search more precisely. This approach caters to specific needs and improves the shopping experience.
- Mobile-First Approach: Ensure your filters are easily navigable on mobile devices. A collapsible filtering menu can save space and keep the user interface clean.
Final Thought
We hope this comprehensive guide equips you to optimize your Bigcomemrce product filtering setup. Try it now and continue to improve customer satisfaction and boost conversion rates.
FAQs:
How do I add a product filter in Bigcommerce?
BigCommerce offers built-in product filtering functionalities. To access them, follow these steps:
- Log in to your BigCommerce admin panel.
- Navigate to Products > Product Filtering.
- You can enable/disable filters for your entire store or specific categories.
- Each filter has various settings you can adjust, like display name, sort order, and number of options displayed.
How are product filters applied to different industries or product categories?
The specific filters you choose will depend on your industry and product category. Here are some examples:
- Clothing: Filters by size, color, brand, and material (e.g., cotton, wool).
- Electronics: Filters by price range, brand, features (e.g., screen size, RAM capacity).
- Furniture: Filters by style (e.g., modern, traditional), color, and material (e.g., wood, leather).
Can I customize the look of my product filters?
While BigCommerce doesn’t offer extensive design customization for filters themselves, you can adjust some settings:
- Display Name: Change the label displayed on your storefront for each filter.
- Number of Options Shown: Control how many filter options are initially displayed before requiring a “See More” button.
For more advanced customization, consider exploring BigCommerce apps that offer additional design and functionality options for product filters.
Do BigCommerce product filters affect site speed?
Many filters or complex filtering logic can impact site speed. However, BigCommerce is optimized for performance. Here are some tips to minimize impact:
- Enable only relevant filters: Avoid enabling filters that aren’t crucial for your customers.
- Limit filter options: Consider initially displaying only the most common options, with a “See More” option for the rest.
Can I use product filtering on mobile devices?
Yes, BigCommerce product filtering is responsive and adapts to mobile devices. The layout might adjust for smaller screens, but the functionality remains unchanged.


